Last Lament Lich POE 2 Build
One of the smoothest setups for any Crossbow Skill that completely ignores Reloading Bolts thanks to the unique Lich powers!Last Lament
Lich Build
Updated for Path of Exile 2 Early Access
The Best Crafty Guides by Odealo
| Guide notes |
| September 27 2025 - Created for Early Access Patch 0.3.0 |
| Build Overview | |||
| Tags: [ATTACK] [ELEMENTAL] [ES] [CROSSBOW] | |||
|
Budget: Defenses: |
|
Boss DPS: AoE: |
|
The Last Lament is a very powerful Unique Crossbow that not only grants its own special Skill that is much stronger than all other Crossbow Skills, but also can ignore the Bolt Reload Time completely with the correct Setup. Unlike most other Unique Weapons with interesting gimmicks, it also has very high base DPS, so building your Character around it is very convenient.
With this Weapon, you can Sacrifice 300 Life to not consume your final Bolt. As a Lich with Eternal Life Notable, your Life cannot change. It prevents you from using Skills that Cost Life, but not from Sacrificing it, which means you completely ignore this downside and get all the benefits.
The Requiem Skill attacks very fast and deals a lot of Damage, but is limited by a 30-second Cooldown, so you will need to use some other Skills in the meantime. There are no special requirements to match the Requiem; you can use any Crossbow Skill you like. We opted for the Permafrost Bolts for the Freeze and decent Clear Speed and Stormblast Bolts for the powerful Single-target Damage. Other popular combos are Galvanic Shards with Shockburst Rounds, Explosive Shot, or Siege Cascade. Your Damage against Bosses is fully covered by Requiem, so you can freely experiment with different options.
Since your Life cannot change, you can also take advantage of the Low Life status. Most importantly, it enables the Execute III Support Gem for yourself to always grant you 30% More Damage, on top of the usual bonus against Enemies on Low Life. Another perk of your Life are the Death Articulated Gloves that generate maximum Rage, further improved by the Berserk Buff. It is very expensive, for starters, we recommend Painter's Servant Gloves that grant up to 30% Extra Damage and equalise your Elemental Damage, easily unlocking the full potential of the Trinity Buff.
To stay alive, you will need Energy Shield and Evasion Rating. Since your Life cannot change, you will be immune to Bleed and Poison, and will have pernament 10% Damage Reduction. For Recovery, you will use Ghost Dance Buff and invest heavily into Recharge. You can also trade some of the defense for Movement Speed.
You can also check our other Path of Exile 2 builds right over here Odealo's Crafty Guides - Full List
1. Gameplay
Use Permafrost Bolts to slay Enemies. Use Elemental Weakness and Emergency Reload before you unleash the Requiem against Bosses. The Stormblast Bolts can be prepared before the fight begins for a quick burst and to generate Trinity stacks.
|
|
|
|

2. Build's PROS & CONS
| PROS |
|
| CONS |
|
3. Leveling tips
The Last Lament requires a high level to use; you will have to level up with a regular Rare Crossbow. Skip the Energy Shield Notables and focus on generic Elemental Attack Damage improvements, which are quite abundant in the Monk starting area. Remember to upgrade your Weapons and Rings every few levels to keep up acceptable Damage output.
4. Final Skill Tree, Ascendancy Points, and Pantheon
Final Skill Tree:
 |
|
Click on the image to open the Passive Tree preview in a new window, or use the Path of Building (PoB) tool. |
Ascendancy points:
Preferably in this order:
- Soulless Form
- Eternal Life
- Necromantic Conduit
- Crystaline Phylactery
5. Final Gems links
| [DPS] Requiem setup Weapon Set 2 |
|
 |
Requiem - granted by your Weapon, its level affects the number of Sockets. It bombards the targeted area with very fast and powerful Bolts that explode on contact with the ground. It has 30 seconds of unscalable Cooldown. |
 |
Execute III |
 |
Rigwald's Ferocity |
 |
Concentrated Area |
 |
Rapid Attacks II / Elemental Armament II / Rakiata's Flow |
| [DPS] Permafrost Bolts setup | |
 |
Permafrost Bolts - fires multiple Bolts in a cone in front of you. All Bolts can hit the same target and are extremely efficient at Freezing Enemies. |
|
Rapid Attacks II |
|
Execute III |
 |
Elemental Armament II |
 |
Fork / Ricochet III |
 |
Mobility |
| [DPS] Stormblast Bolts setup | |
 |
Stormblast Bolts - fires 3 Bolts that land on the ground, awaiting detonation. You can prepare up to 30 Bolts. |
|
Concentrated Area |
|
Execute III |
|
Elemental Armament II |
 |
Rising Tempest |
 |
Deliberation |
| [UTILITY] Explosive Grenade setup | |
 |
Explosive Grenade - a detonator Skill that doesn't require swapping Bolts. It can also be used to inflict Exposure. |
 |
Short Fuse II |
 |
Adhesive Grenades II |
 |
Fire Exposure |
 |
Potent Exposure |
 |
Ignite III |
| [UTILITY] Elemental Weakness setup Weapon Set 1 |
|
 |
Elemental Weakness - lowers the Elemental Resistance of affected Enemies. Stronger foes require higher Gem levels to take effect. |
 |
Heightened Curse |
 |
Focused Curse |
 |
Prolonged Duration II |
 |
Efficiency II |
 |
Doedre's Undoing |
| [UTILITY] Emergency Reload setup | |
 |
Emergency Reload - reloads your Ammunition, but also Empowers all Ammunition to deal More Damage for a Duration. |
|
Prolonged Duration II |
 |
Cooldown Recovery II |
| [UTILITY] Ghost Dance setup | |
 |
Ghost Dance - recovers your Energy Shield when you are Hit. The recovered amount depends on your Evasion Rating. |
 |
Compressed Duration II |
| [UTILITY] Wind Dancer setup | |
 |
Wind Dancer - improves your Evasion Rating and releases a damaging shockwave when you are Hit. |
 |
Close Combat II |
|
Execute III |
 |
Rage III |
 |
Magnified Area I |
 |
Heavy Swing |
| [UTILITY] Trinity setup | |
 |
Trinity - grants a massive amount of Elemental Damage bonus once you accumulate high Resonance. It requires a lot of Spirit, activate it against Bosses. |
 |
Uhtred's Exodus |
| [UTILITY] Herald of Ice setup | |
 |
Herald of Ice - creates an icy explosion that deals Damage to all nearby Enemies when you shatter an Enemy. Deactivate it against Bosses to save Spirit. |
 |
Overreach |
|
Elemental Armament II |
 |
Elemental Focus |
 |
Longshot II |
|
Execute III |
| [UTILITY] Herald of Thunder setup | |
 |
Herald of Thunder - adds a few Lightning Bolts to your next Attack once you kill a Shocked Enemy. |
 |
Direstrike II |
|
Elemental Armament II |
|
Overreach |
|
Longshot II |
|
Execute III |
|
|
6. Gear Setup
The Last Lament is the core Unique. The Unique Gloves should be chosen depending on preferences and budget. For better offense, you will need additional Gem Levels and Added Elemental Damage to Attacks. For defense, focus mainly on Energy Shield with a slight addition of Evasion Rating. You will need 60 additional Spirit to include the Trinity Buff. Other than that, focus on capping Elemental and Chaos Resistances, fulfilling Gem Requirements, Item Rarity, and Movement Speed.
|
Stat priorities on items:
|
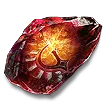
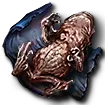
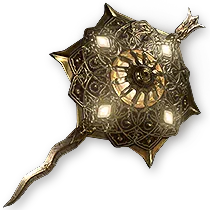
 (Weapon) The Last Lament - Sacrifices Life to save ammunition and grants the Requiem Skill. Each Level grants roughly 5% More Damage and unlocks additional Gem Sockets. (Weapon) The Last Lament - Sacrifices Life to save ammunition and grants the Requiem Skill. Each Level grants roughly 5% More Damage and unlocks additional Gem Sockets. |
|
| Grants Skill: Level 19 Requiem (250–300)% increased Physical Damage (10–20)% increased Attack Speed Leeches (5–10)% of Physical Damage as Life (10–20)% chance to load a bolt into all Crossbow skills on Kill Sacrifice 300 Life to not consume the last Bolt when firing (40–60)% reduced Reload Speed |
|
 (Weapon) Rare Wand - Curses require high Gem levels to work against Bosses now. Get a Wand with extra Intelligence, Gem Levels, and Cast Speed for your other Weapon Set. (Weapon) Rare Wand - Curses require high Gem levels to work against Bosses now. Get a Wand with extra Intelligence, Gem Levels, and Cast Speed for your other Weapon Set. |
|
| Min. requirements: +4 to Level of all Fire/Cold/Lightning Spell Skills 30% increased Cast Speed +30 to Intelligence |
|
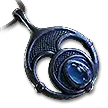
 (Offhand) Sunsplinter - this Shield grants a lot of extra Gem Levels for your Curse, as it has all 3 Elemental Tags to benefit from. (Offhand) Sunsplinter - this Shield grants a lot of extra Gem Levels for your Curse, as it has all 3 Elemental Tags to benefit from. |
|
| (100–300)% increased Evasion Rating +1% to Maximum Fire Resistance +2% to Maximum Cold Resistance +3% to Maximum Lightning Resistance +(1-3) to Level of all Cold Skills +(1-3) to Level of all Fire Skills +(1-3) to Level of all Lightning Skills |
|
 (Amulet) Rare Amulet - you will need a total of 60 Spirit split across your Amulet and Body Armour. You will also want additional Gem levels here. It can also greatly improve your Energy Shield. (Amulet) Rare Amulet - you will need a total of 60 Spirit split across your Amulet and Body Armour. You will also want additional Gem levels here. It can also greatly improve your Energy Shield. |
|
| Min. requirements: +10 to Spirit +3 to Level of all Projectile Skills Optional affixes: % increased maximum Energy Shield % total Elemental and Chaos Resistance % increased Rarity of Items found +# to Attributes Anointment: Allocates Spray and Pray |
|
 (Ring) Rare Ring - on your Rings, you should seek a high amount of Added Elemental or Physical Damage to Attacks, and tons of Resistances, Attributes, or Item Rarity. (Ring) Rare Ring - on your Rings, you should seek a high amount of Added Elemental or Physical Damage to Attacks, and tons of Resistances, Attributes, or Item Rarity. |
|
| Min. requirements: Adds 30 Elemental Damage to Attacks Optional affixes: % total Elemental and Chaos Resistance % increased Attack Damage while on Low Life % increased Rarity of Items found +# to Attributes |
|
 (Belt) Rare Belt - you probably need a Rare Belt to meet the Resistance and Attribute Requirements. It can also be Corrupted to improve your Energy Shield. (Belt) Rare Belt - you probably need a Rare Belt to meet the Resistance and Attribute Requirements. It can also be Corrupted to improve your Energy Shield. |
|
| Min. requirements: +80% total Elemental Resistance +30 to Strength Optional affixes: +# Charm slots +# to maximum Life |
|
 (Helmet) Rare Helmet - a Helm that grants only Energy Shield will still improve your Evasion Rating thanks to the Subterfuge Mask Notable. Make sure to get lots of it here. (Helmet) Rare Helmet - a Helm that grants only Energy Shield will still improve your Evasion Rating thanks to the Subterfuge Mask Notable. Make sure to get lots of it here. |
|
| Min. requirements: +400 to Energy Shield +40% total Elemental and Chaos Resistance Optional affixes: % increased Rarity of Items found +# to Attributes |
|
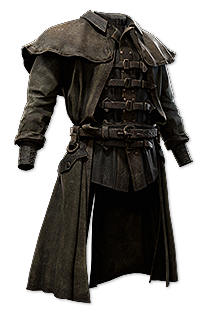 (Body Armour) Rare Armour - it is your main source of Energy Shield and Evasion Rating. You can use Evasion Bases that lower the Movement Speed penalty, and still get plenty of ES via Spectral Ward Notable. You will need lots of Spirit here. (Body Armour) Rare Armour - it is your main source of Energy Shield and Evasion Rating. You can use Evasion Bases that lower the Movement Speed penalty, and still get plenty of ES via Spectral Ward Notable. You will need lots of Spirit here. |
|
| Min. requirements: +800 to Evasion Rating +400 to Energy Shield +50 to Spirit +40% total Elemental and Chaos Resistance Optional affixes: % increased Rarity of Items found +# to Attributes |
|
 (Gloves) Death Articulated - with those Gloves you will have a permanent maximum Rage uptime, which you can boost with the Berserk Skill for a massive Damage bonus. The only downside here is the insane price tag. (Gloves) Death Articulated - with those Gloves you will have a permanent maximum Rage uptime, which you can boost with the Berserk Skill for a massive Damage bonus. The only downside here is the insane price tag. |
|
| (100–150)% increased Armour and Evasion (5–10)% increased Attack Speed +(17–23)% to Chaos Resistance Lose 5% of maximum Life per second Regenerate 5 Rage per second No Inherent loss of Rage |
|
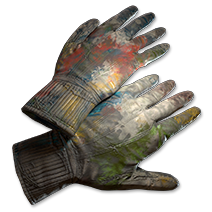 (Gloves) Painter's Servant - this very cheap pair of Gloves grants you up to 30% Extra Damage, and balances the Trinity Resonance gains for a big boost to your Damage. Getting enough Spirit for it can be pricey, but not as much as the previous Gloves. (Gloves) Painter's Servant - this very cheap pair of Gloves grants you up to 30% Extra Damage, and balances the Trinity Resonance gains for a big boost to your Damage. Getting enough Spirit for it can be pricey, but not as much as the previous Gloves. |
|
| Gain (5–10)% of Elemental Damage as Extra Cold Damage Gain (5–10)% of Elemental Damage as Extra Fire Damage Gain (5–10)% of Elemental Damage as Extra Lightning Damage 33% of Elemental Damage Converted to Cold Damage 33% of Elemental Damage Converted to Fire Damage 33% of Elemental Damage Converted to Lightning Damage |
|
 (Boots) Rare Boots - on the Boots, you will want Movement Speed, Energy Shield, and Resistances or Attributes. You can also use Runes to slightly lower the Speed Penalty while using Skills. (Boots) Rare Boots - on the Boots, you will want Movement Speed, Energy Shield, and Resistances or Attributes. You can also use Runes to slightly lower the Speed Penalty while using Skills. |
|
| Min. requirements: +100 to Energy Shield +30% increased Movement Speed +40% total Elemental and Chaos Resistance Optional affixes: % increased Rarity of Items found +# to Attributes % reduced Freeze Duration on you |
|
 (Jewel) Rare Jewel - you can use Sapphire Jewels to greatly boost your Energy Shield and its Recharge, or Emerald Jewels to improve your Attack Speed. Your best Jewel should be boosted by your Ascendency to double its effects. (Jewel) Rare Jewel - you can use Sapphire Jewels to greatly boost your Energy Shield and its Recharge, or Emerald Jewels to improve your Attack Speed. Your best Jewel should be boosted by your Ascendency to double its effects. |
|
| Min. requirements: #% increased maximum Energy Shield #% increased Energy Shield Recharge Rate #% increased Freeze Buildup Gain additional Stun Threshold equal to #% of maximum Energy Shield #% increased Attack Speed #% increased Attack Damage #% increased Damage with Hits against Rare and Unique Enemies #% increased Attack Speed with Crossbows |
|
 (Jewel) From Nothing - use this Jewel to pick up distant Notables beneficial for the Build. The default recommendation is the Vaal Pact Keystone for the Movement Speed Notables. (Jewel) From Nothing - use this Jewel to pick up distant Notables beneficial for the Build. The default recommendation is the Vaal Pact Keystone for the Movement Speed Notables. |
|
| Passives in Radius of <random Keystone> can be Allocated without being connected to your tree |
|
 (Flask) Blood of the Warrior - you can use this very cheap Flask to sustain maximum Rage as well. Aim for the maximum Duration roll, and add Quality. It is annoying to use, but it is a 30% More Damage bonus almost for free. (Flask) Blood of the Warrior - you can use this very cheap Flask to sustain maximum Rage as well. Aim for the maximum Duration roll, and add Quality. It is annoying to use, but it is a 30% More Damage bonus almost for free. |
|
| 90% less Life Recovered Effect is not removed when Unreserved Life is Filled (15–30)% of Damage taken during effect Recouped as Life Gain (3–5) Rage when Hit by an Enemy during effect No Inherent loss of Rage during effect (25–50)% increased Duration |
|
|
If you have any other build requests please leave that in the comments below. We are always open to suggestions and constructive feedback.
Pictures used in this article are the intellectual property of Grinding Gear Games.