Ethereal Knives
Elementalist Build
Updated for Patch 3.26
The Best Crafty Guides by Odealo
| Guide notes |
August 08, 2025
- Adjusted Passive Tree and Gem Setups to achieve higher DPS and better survivability |
| Build overview |
| Tags: [LIFE] [CASTER] [ELEMENTAL] [DOT] |
|
Budget:
Defenses:
|


|
Boss DPS:
AoE:
|

|
The Ethereal Knives is a simple Physical Spell that fires magical daggers in front of you. The Transfigured version of the Massacre fires them all around you, but the Cast Time is a bit slower. It is very simple to use, as you don't have to worry about aiming or positioning, making it one of the most popular Clear Speed-focused Builds out there. It is further enhanced by an additional Chain, Ignite Proliferation, and explosions caused by Oriath's End.
The extra Chain comes from the Gloomfang Amulet, which is actually implemented to boost your Single-target Damage. It grants you Non-Chaos Damage as extra Chaos Damage. By converting your Damage multiple times, starting from Physical to Cold, and then from Cold to Fire, you will gain the Extra Chaos Damage on each step. It is possible to fit in an extra Lightning conversion here, but it is simply not efficient, as it takes out valuable resources and Ring slots. Thanks to Shaper of Flames, all Damage types can inflict Ignite, so you only need to worry about lowering enemy Fire Resistance.
The Extra Chaos Damage is granted only for Projectiles that have Chained at least once. When facing just one, but powerful, opponent, you will have to use the Hydrosphere. Ideally, it will be included in an Arcanist Brand Setup that also inflicts Flammability Curse and creates Burning Ground via Flame Surge.
The best Mercenary to hire is the Toxicologist. This way, you will gain a free Malevolence and Grace Auras, and you can equip them with multiple Abyssal Jewels that increase all Damage over Time Taken by Maimed Enemies, including your own Ignite. The Maim will be guaranteed by the Tomfist Gloves, which can also be easily corrupted to apply additional Curse on Hit.
The Elementalist Ascendency is mandatory here. You will need the Shaper of Flames Notable to utilise multiple Elements for one, powerful Ignite, but it also grants tons of Damage thanks to an army of Golems, a greatly empowered Exposure effect. Thanks to cheap Forbidden Jewel Sets, you can also inflict powerful Shocks or greatly improve your Herald Skills.
You can also check our other Path of Exile builds right over here Odealo's Crafty Guides - Full List
1. Gameplay
Shield Charge between packs and use Ethereal Knives to set them ablaze. Against Bosses, you will need to use the Arcanist Brand, which casts the Hydrosphere, Flammability, and Flame Surge. Use Frostblink for better mobility and inflicting Combustion and Chill Enemies.
|
 
Odealo is a secure trading platform for MMO gamers. Here you can buy, sell, and trade PoE Currency for real cash.
|
2. Build's PROS & CONS
| PROS |
- Amazing Clear Speed
- Easy to play
- Decent Damage against Bosses
- Good Damage Avoidance
|
| CONS |
- Upgrades are expensive
- Lacks Damage Reduction
|
3. Leveling tips
The Ethereal Knives' low initial Damage is not suitable for a comfortable Campaign; you will need the Gloomfang Amulet first, which requires level 77. We recommend using the Fire Trap instead, which offers the best DoT Damage for the Campaign. It inflicts a special Burning Debuff and can inflict Ignite on top of that.
Bandits:
Kill all three bandits to get one additional Passive Skill Point or kill Alira to help with Gearing.
Leveling Skill Trees:
36 Points Passive Tree
Pick up all the nearby Fire Spell Damage to make your Traps as deadly as possible. Fill in Life, Mana, and Attributes if you need them.
74 Points Passive Tree
Pick up the Elemental Overload Keystone and other Damage Notables. The small Passives granting Ignite Chance are optional.
4. Final Skill Tree, Ascendancy Points, and Pantheon
Final Skill Tree:
94 Points Final Passive Tree (doesn't include Cluster or Unique Jewels)
120 Points Path of Building (PoB) link
Mercenary Setup Path of Building (PoB) link
Ascendancy points:
Preferably in that order:
- Liege of the Primordial
- Mastermind of Discord
- Heart of Destruction
- Shaper of Flames
Pantheon:
Major God: Soul of the Brine King: You cannot be Stunned if you've been Stunned or Blocked a Stunning Hit in the past 2 seconds; 100% chance to Avoid being Frozen
Minor God: Soul of Ralakesh: 25% reduced Physical Damage over Time taken while moving, Moving while Bleeding doesn't cause you to take extra Damage
5. Final Gems links
| [DPS] Ethereal Knives Setup |
 |
Ethereal Knives of the Massacre - fires Physical Projectiles in Nova around you. The Damage will be Converted, but it all contributes to the Ignite. The regular version will be cheaper to get to level 21, but the Clear Speed might be worse. |
 |
Burning Damage Support |
 |
Unbound Ailments Support |
 |
Swift Affliction Support |
 |
Cold to Fire Support |
 |
Deadly Ailments Support |
| [UTILITY] Golems Setup |
 |
Summon Flame Golem - this Golem massively increases your Damage and Area of Effect. |
 |
Summon Stone Golem - grants massive Life Regeneration, but also boosts your Evasion and Energy Shield. |
 |
Summon Lightning Golem - the extra Cast and Attack Speed is useful for mobility, but you primarily need it for the Mana sustain. |
 |
Summon Chaos Golem - grants an insane amount of Damage over Time Multiplier, and provides plenty of Chaos Resistance. |
| [UTILITY] Aura Setup |
 |
Hatred - an offensive Aura that grants tons of Extra Cold Damage and enables important Watcher's Eye modifier. |
 |
Tempest Shield - improves your Spell Block Chance and grants immunity to Shock. |
 |
Herald of Purity - improves your Physical Damage, which is your base source of Damage. |
 |
Herald of Ash - grants extra Fire Damage based on the Physical Damage. |
| [UTILITY] Guard Setup |
 |
Immortal Call - reduces the Damage you take during its Duration. Keep it on a low level. |
 |
Cast when Damage Taken Support - triggers linked Spells, but only if they match the Gem Levels. Keep it on a low level to trigger it more often. |
| [UTILITY] Arcanist Brand Setup |
 |
Flammability - an offensive Curse that greatly lowers the Fire Resistance of affected foes. |
 |
Hydrosphere - creates an Orb that can be Hit by your Spells, causing them to Chain towards Bosses. |
 |
Flame Surge - creates a Burning Ground that deals Damage proportional to the target's Ignite. |
 |
Arcanist Brand Support - creates a Brand that automatically Casts linked Spells in quick succession. |
| [UTILITY] Movement Setup |
 |
Shield Charge - your main form of travel, it performs a quick Charge to the targeted location. |
 |
Faster Attacks Support |
| [UTILITY] Movement Setup |
 |
Frostblink - a secondary Movement Skill, as it is limited by a Cooldown. It can be used to inflict Combustion and Chill Debuffs. |
 |
Combustion Support |
|
On Odealo dozens of sellers compete for your attention. Buying PoE Currency here guarantees the best prices, prompt delivery, and the best quality of service.
|
6. Gear Setup
The Build utilises several Unique Items. The Gloomfang Amulet and Servant of Decay provide tons of extra Chaos Damage, greatly boosting your performance. You will also use typical Ignite-related Uniques, such as Polaric Devastation or Replica Emberwake. On the Rare Items you should seek increases to Fire Damage, Gem Levels, and DoT Multiplier. Your Defence relies primarily on maximum Life, further supplemented by Energy Shield, Evasion, and Block. This Setup requires a lot of Strength and Dexterity; you will have to get lots of them on your Gear.
|
Stat priorities on items:
- Cap Elemental Resistances and Attributes
- Maximum Life
- Gem Levels
- Damage over Time Multiplier
- Fire Damage
- Chaos Resistance
|
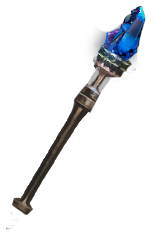 (Weapon) Rare Weapon - you will need additional Gem Levels, DoT Multiplier, and increases to Fire, Burning, or Over Time Damage. (Weapon) Rare Weapon - you will need additional Gem Levels, DoT Multiplier, and increases to Fire, Burning, or Over Time Damage. |
Min. requirements:
80% increased Elemental/Fire Damage
+1 to Level of all Physical Spell Skill Gems
+20% to Fire Damage over Time Multiplier
Optional affixes:
+#% to Damage over Time Multiplier
+1 to Level of all Spell Skill Gems |
 (Off-hand) Rare Shield - the Shield should provide a high chance to Block, and Recover Life on Block for better sustain. It can also increase your Gem Levels. (Off-hand) Rare Shield - the Shield should provide a high chance to Block, and Recover Life on Block for better sustain. It can also increase your Gem Levels. |
Min. requirements:
+1 to Level of all Physical Spell Skill Gems
40% Chance to Block
Optional affixes:
Recover #% of Life when you Block
+# to maximum Life
#% increased Fire Damage
% total Elemental Resistance |
 (Helmet) Rare Helmet - look for a high amount of maximum Life, Resistance, and Dexterity. It can also improve your Reservation Efficiency, or shift incoming Physical Damage to Elemental. (Helmet) Rare Helmet - look for a high amount of maximum Life, Resistance, and Dexterity. It can also improve your Reservation Efficiency, or shift incoming Physical Damage to Elemental. |
Min. requirements:
+100 to maximum Life
+45 to Dexterity
40% total Elemental Resistance
Optional affixes:
#% of Physical Damage from Hits taken as Elemental Damage (Eater Influence)
#% increased Cast Speed (Exarch Influence)
Chaos Resistance |
 (Body Armour) Servant of Decay - this Armour provides tons of Extra Chaos Damage just as the Gloomfang Amulet. The Void Spawns will also absorb incoming Damage, which makes your Damage fluctuate. (Body Armour) Servant of Decay - this Armour provides tons of Extra Chaos Damage just as the Gloomfang Amulet. The Void Spawns will also absorb incoming Damage, which makes your Damage fluctuate. |
Trigger Level 20 Summon Void Spawn every 4 seconds
(150-200)% increased Energy Shield
+(23-37)% to Chaos Resistance
(4-6)% of Damage from Hits is taken from Void Spawns' Life before you per Void Spawn
Gain (4-6)% of Non-Chaos Damage as Extra Chaos Damage per Summoned Void Spawn |
 (Belt) Rare Belt - your Belt should provide tons of maximum Life, even more if you include the Hunter Influence here. It should also grant you Strength and Resistances. (Belt) Rare Belt - your Belt should provide tons of maximum Life, even more if you include the Hunter Influence here. It should also grant you Strength and Resistances. |
Min. requirements:
+100 to maximum Life
+45 to Strength
40% total Elemental Resistance
Optional affixes:
#% increased maximum Life (Hunter)
Flask Charges
Chaos Resistance |
 (Gloves) Rare Gloves - the baseline Gloves are quite simple; you will need Life and Resistances. The Eldritch Implicits are very important here: they grant you Fire Exposure and Damage over Time Multiplier. (Gloves) Rare Gloves - the baseline Gloves are quite simple; you will need Life and Resistances. The Eldritch Implicits are very important here: they grant you Fire Exposure and Damage over Time Multiplier. |
Min. requirements:
+100 to maximum Life
+45 to Dexterity
40% total Elemental Resistance
Inflict Fire Exposure on Hit, applying -#% to Fire Resistance (Eater)
Optional affixes:
Chaos Resistance
+#% to Fire Damage over Time Multiplier (Exarch)
Ignites you inflict spread to other Enemies within 1.2 metres (Exarch) |
 (Boots) Rare Boots - here you will need Movement Speed, Life, and Resistances. They can also help you Avoid or reduce the Effects of various Ailments. (Boots) Rare Boots - here you will need Movement Speed, Life, and Resistances. They can also help you Avoid or reduce the Effects of various Ailments. |
Min. requirements:
+100 to maximum Life
+45 to Dexterity
40% total Elemental Resistance
+30% increased Movement Speed
Optional affixes:
Chaos Resistance
#% increased Action Speed (Exarch Influence)
#% chance to gain Onslaught for 4 seconds on Kill
#% reduced Effect of Chill and Shock on you |
 (Amulet) Gloomfang - each step of the Conversion will grant you extra Chaos Damage, which goes up to 42% after using Catalysts. The Projectile Speed and Chain greatly boost your Clear Speed as well. (Amulet) Gloomfang - each step of the Conversion will grant you extra Chaos Damage, which goes up to 42% after using Catalysts. The Projectile Speed and Chain greatly boost your Clear Speed as well. |
(48-56)% increased Mana Regeneration Rate
0.5% of Chaos Damage Leeched as Life
Lose (15-10) Life per Enemy Hit with Spells
Lose (25-20) Life per Enemy Hit with Attacks
Skills Chain +1 times
(30-40)% increased Projectile Speed
Projectiles that have Chained gain (20-35)% of Non-Chaos Damage as extra Chaos Damage |
 (Ring) Replica Emberwake - this Ring massively improves your Damage, but also makes your Ignite last barely 2 seconds, making your gameplay more active. It may be uncomfortable at times, but the amount of Damage it grants is hard to pass. (Ring) Replica Emberwake - this Ring massively improves your Damage, but also makes your Ignite last barely 2 seconds, making your gameplay more active. It may be uncomfortable at times, but the amount of Damage it grants is hard to pass. |
+(20-30)% to Fire Resistance
(30-40)% increased Fire Damage
(5-10)% increased Cast Speed
90% reduced Ignite Duration on Enemies
10% chance to Ignite
Ignites you inflict deal Damage (35-45)% faster |
 (Ring) Polaric Devastation - another typical Ring for any Ignite Build, it is used to Cover Enemies in Ash and increase the Duration of your Ignite, countering the downside of the previous Ring a bit. (Ring) Polaric Devastation - another typical Ring for any Ignite Build, it is used to Cover Enemies in Ash and increase the Duration of your Ignite, countering the downside of the previous Ring a bit. |
(15-25)% increased Elemental Damage
(15-25)% increased Global Critical Strike Chance
+(20-40)% to Fire Resistance
+(20-40)% to Cold Resistance
(10-20)% increased Duration of Ailments on Enemies
Left Ring slot: Cover Enemies in Ash for 5 seconds when you Ignite them
Right Ring slot: Cover Enemies in Frost for 5 seconds when you Freeze them |
 (Jewel) Rare Jewels - the options are rather limited here. You will need increases to maximum Life, and at least one modifier with DoT Multiplier. Remaining modifiers can be used to cover Resistances, Attributes, or increase your Damage a bit more. (Jewel) Rare Jewels - the options are rather limited here. You will need increases to maximum Life, and at least one modifier with DoT Multiplier. Remaining modifiers can be used to cover Resistances, Attributes, or increase your Damage a bit more. |
Min. requirements:
7% increased maximum Life
+7% to Fire Damage over Time Multiplier
Optional affixes:
#% increased Burning Damage
Resistance
Attribute
Corrupted Blood cannot be inflicted on you |
 (Jewel) Large Cluster Jewels - the Prismatic Heart and Sadist are the best Notables to pick; they should be accompanied by Disorienting Display or Doryani's Lesson to save Passive Points. (Jewel) Large Cluster Jewels - the Prismatic Heart and Sadist are the best Notables to pick; they should be accompanied by Disorienting Display or Doryani's Lesson to save Passive Points. |
Min. requirements:
1 Added Passive Skill is Disorienting Display
1 Added Passive Skill is Prismatic Heart
1 Added Passive Skill is Sadist
1 Added Passive Skill is Doryani's Lesson |
 (Jewel) Medium Cluster Jewels - you will use 4 Medium Jewels. You should get one Fan the Flames and Brush with Death Notable, rest should be filled with Flow of Life and Wasting Affliction. You may use Circling Oblivion to prolong the Ignite if it's too short. (Jewel) Medium Cluster Jewels - you will use 4 Medium Jewels. You should get one Fan the Flames and Brush with Death Notable, rest should be filled with Flow of Life and Wasting Affliction. You may use Circling Oblivion to prolong the Ignite if it's too short. |
1 Added Passive Skill is Flow of Life
1 Added Passive Skill is Wasting Affliction
1 Added Passive Skill is Circling Oblivion
1 Added Passive Skill is Brush with Death
1 Added Passive Skill is Fan the Flames |
 (Jewel) Lethal Pride - this Jewel grants you tons of Strength and adds useful bonuses to nearby Notables. It can boost your Physical or Ignite Damage, as well as boost your maximum Life. (Jewel) Lethal Pride - this Jewel grants you tons of Strength and adds useful bonuses to nearby Notables. It can boost your Physical or Ignite Damage, as well as boost your maximum Life. |
Commanded leadership over (10000-18000) warriors under (Akoya-Kaom-Rakiata)
Passives in radius are Conquered by the Karui
Historic |
 (Jewel) The Red Nightmare - this Jewel can grant up to 21% Chance to Block incoming Attacks if you convert nearby Strength Notables with Tattoo of the Firewalker, which grants Fire Resistance instead. (Jewel) The Red Nightmare - this Jewel can grant up to 21% Chance to Block incoming Attacks if you convert nearby Strength Notables with Tattoo of the Firewalker, which grants Fire Resistance instead. |
Gain (6-10)% of Fire Damage as Extra Chaos Damage
Passives granting Fire Resistance or all Elemental Resistances in Radius
also grant Chance to Block Attack Damage at 50% of its value |
 (Jewel) Watcher's Eye - use this Jewel to get the remaining Cold Conversion while affected by Hatred. It can also boost your Damage thanks to Malevolence Aura. (Jewel) Watcher's Eye - use this Jewel to get the remaining Cold Conversion while affected by Hatred. It can also boost your Damage thanks to Malevolence Aura. |
Recommended modifiers:
(25-40)% of Physical Damage Converted to Cold Damage while affected by Hatred
+(18-22)% to Damage over Time Multiplier while affected by Malevolence
+(5-8)% chance to Evade Attack Hits while affected by Grace |
  (Jewel) Forbidden Flame&Flesh - thanks to this cheap Set of Jewels, you can borrow the Bringer of Ruin Notable, empowering your Heralds. The Shaper of Storms is a better choice later on, but also costs more. (Jewel) Forbidden Flame&Flesh - thanks to this cheap Set of Jewels, you can borrow the Bringer of Ruin Notable, empowering your Heralds. The Shaper of Storms is a better choice later on, but also costs more. |
| Allocates <Random Ascendancy Notable> if you have the matching modifier on Forbidden Flesh |
 (Flask) Oriath's End - the explosions from this Flask will also inflict Ignite, quickly obliterating all Enemies in a large radius. (Flask) Oriath's End - the explosions from this Flask will also inflict Ignite, quickly obliterating all Enemies in a large radius. |
(20-40)% increased Charge Recovery
Enemies you Kill during Effect have a (20-30)% chance to Explode, dealing a tenth of their maximum Life as Damage of a Random Element |
 (Flask) Rumi's Concoction - this Flask grants you a bit of Block Chance for both Spells and Attacks. It also provides a bit of Armour. (Flask) Rumi's Concoction - this Flask grants you a bit of Block Chance for both Spells and Attacks. It also provides a bit of Armour. |
+(8-12)% Chance to Block Attack Damage during Effect
+(4-6)% Chance to Block Spell Damage during Effect |
|
Suggested Flasks:
- Life Flask with Bleeding Removal modifier
- Quicksilver Flask with Movement Speed modifier
- Jade Flask with increased Armour Rating modifier
|
   |
6. Mercenary Setup
You can use either the Toxicologist or Blade Bitter Mercenaries for their 2 useful Auras: Malevolence and Grace. You should then stack as many Abyssal Jewels with one specific Modifier as possible.
|
Odealo is one of the biggest Path of Exile marketplaces. It allows regular players to buy, sell, and trade PoE Currency with the use of real cash
|
If you have any other build requests please leave that in the comments below. We are always open to suggestions and constructive feedback.
Pictures used in this article are the intellectual property of Grinding Gear Games.

 (Jewel) Abyss Jewel - Enemies Maimed by Mercenary will take increased Damage from all sources. Those can also be used to apply Taunt or Blind for extra defense.
 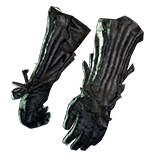 (Gloves) Tombfist - the Jewels require Maim, which can be easily applied by those Gloves, which also can hold additional Jewels. Try to get the Cure on Hit Corruption, too.
  (Body Armour) Replica Shroud of the Lightless - all other Abyssal Unique Items serve one purpose - to hold as many Abyssal Jewels as possible.
 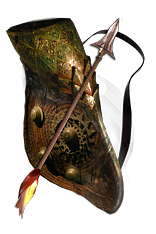 (Quiver) Rearguard - this Quiver grants a lot of Defense for your Mercenary. Pair it with the Widowhail Bow to make it even more effective.
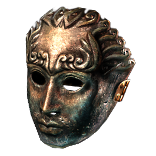
  (Helmet) Eye of Malice - this Helmet increases the Fire Resistance of nearby Enemies. Once lowered to negative values, it brings them down even more.
  (Ring) Doedre's Damning - to make proper use of the Curse on Hit modifier, you will need to raise the Curse Limit of your Mercenary. Try to get a Corrupted Ring that boosts the effect of their Aura.
  (Amulet) The Eternal Struggle - with this Amulet, your Mercenary will automatically kill any Enemy under 15% of their maximum Life.