CoC Spark/Arc
Blood Mage Build
Updated for Path of Exile 2 Early Access
The Best Crafty Guides by Odealo
| Guide notes |
May 30, 2025
- Created for Early Access. |
| Build Overview |
| Tags: [LIGHTNING] [COC] [ENERGY SHIELD] |
|
Budget:
Defenses:
|


|
Boss DPS:
AoE:
|

|
The build uses Cast on Critical Gem to Trigger powerful Spells, Arcs in our case; four of them, maybe even more. Arc has a very high damage that can easily be scaled up alongside Gem Level. We'll also increase the overall damage by specializing in Critical Damage Bonus since we already need a very high Crit Chance anyway. Because of that, we won't even need many Support Gems for Arcs to make them good. To reach high Crit Chance and damage select Blood Mage with Gore Spike and Sunder the Flesh. Blood Mage also forces you to allocate Sanguimancy; we will make good use of this superb source of Life Recovery by shifting all the Mana Cost of Spells to Life with Blood Magic Keystone. That would normally be one of the biggest hurdles in builds of that type. The last passive from the Ascendancy is Vitality Siphon for Life Leech from Spells. Combined with Atziri Acuity Gloves, which makes Life Leech from Critical Hits instantaneous, you should hardly ever run out of Life.
Maximum Life, however, is not your defensive layer - just a resource to cast a lot of Spells very fast. By hitting Critically you gain Energy, so you need a high Hit Rate. The Spark with a high Cast Speed combined with Orb of Storms will be fundamental in this endeavor, but to accelerate Energy gain equip the Choir of Storms Amulet which Triggers Lightning Bolts on Critical Strike. It creates sort of a feedback loop. It also causes your Critical Hits to ignore Elemental Resistances. It's important to note here, that your Crit Chance should reach 100%. With Crit Bonus Damage at around 700%, the build's damage is one of the highest in the game. The durability is bearable. It relies mostly on high Energy Shield recovered with a Life Flask after allocating Eternal Youth Keystone.
You can also check our other Path of Exile 2 builds right over here Odealo's Crafty Guides - Full List
1. Gameplay
Run around and cast Spark. This will trigger other damaging skills. To increase your damage, deploy Orb of Storms and stand near it. Soul Offering and Sigil of Power will too increase your damage - use them against particularly tough enemies. Remember to pick up Remnants. That's about it. The gameplay is very simple.
|
 
Odealo is a secure trading platform for MMO gamers. Here you can buy, sell, and trade PoE 2 Currency for real cash.
|
2. Build's PROS & CONS
| PROS |
- single-button build (or maybe two-button build)
- extremely high damage with an ability to electrocute
- good clear speed
|
| CONS |
- some of the high-end upgrades are expensive
- not really that durable when caught off-guard
|
3. Leveling tips
This is a late-game build that works poorly until you reach a very high Crit Chance, which requires you to allocate Sunder the Flesh, your third or fourth ascendancy passive. Blood Mage is also the worst ascendancy to level up as. What we recommend doing instead, is starting as the current most starter-friendly Witch build, and changing the ascendancy later. As of 0.2, it will probably be the Essence Drain Lich, but you can start with whatever you're already familiar with.
4. Final Skill Tree, Ascendancy Points, and Pantheon
Final Skill Tree:

|
|
Click on the image to open the Passive Tree preview in a new window
Or import the build into PoB:
Path of Building 2 code
|
Ascendancy points:
Preferably in this order:
- Sanguimancy
- Vitality Siphon
- Gore Spike
- Sunder the Flesh
5. Final Gems links
| [DPS] Spark setup |
 |
Spark - The Spell used to Trigger Lightning Bolt and Hit Critically. |
 |
Arcane Tempo - 20% More Cast Speed. |
 |
Inspiration - 30% less Life Cost for Spark. |
 |
Mobility - Reduces the Movement Speed penalty while Sparkling. |
 |
Acceleration - More Projectile Speed, which is important for Spark. |
 |
Fork - Projectiles Fork on impact, which creates more Sparks. Useful when clearing maps, but against Pinnacles, replace it with Persistence. |
| [DPS] Lightning Bolt setup |
 |
Lightning Bolt - Triggered on Critical Hit, it deals high Lightning Damage to enemies and grants Energy. |
 |
Concentrated Effect - Less Area of Effect, but more Area Damage. |
 |
Considered Casting - Much more damage, but less Cast Speed, which is irrelevant. |
 |
Spell Echo - Lightning Bolt echoes once, having increased AoE on the second cast. |
 |
Ingenuity - 30% increased Cooldown Recovery Rate. |
| [UTILITY] Orb of Storms setup |
 |
Orb of Storms - Place it down and cast Spark in its vicinity to Electrocute tough enemies. |
 |
Electrocute - Instead of Shocking, Orb of Storm builds up Electrocution. |
 |
Neural Overload - Electrocute Primed enemies on Hit. |
 |
Magnified Effect - More Area of Effect for the Orb. |
 |
Overabundance - Halves the Duration of Orbs but lets you place two of them instead of one. |
 |
Font of Blood - Font of Blood grants Life Regeneration. |
| [UTILITY] Life Remnants setup |
 |
Life Remnants - A Skill you get from Sanguimancy. It creates Remnants to be picked up to regain Life. |
 |
Dissipate - 35% increased effect of Remnants, but they now last only 3 seconds. |
 |
Interlude - Remnants are activated with a 3-second delay but their effect is increased by 25%. It's optional, since these 3 seconds may be too much. |
 |
Magnetism - Remnants can be picked from a greater distance. |
| [UTILITY] Arc setup |
 |
Cast on Critical - Linked Spells are Cast on Critical Hit once enough Energy is accumulated. |
 |
Arc - Two Arcs will deal a lot of damage due to the frequency in which they're Triggered and their high Gem Level. We've used 4 Arcs in total, but you may replace one or two of them with more utility-oriented Spells like Spark or Orb of Storms. |
|
Arc |
 |
Impetus - Skills gain 40% increased Energy. |
 |
Energy Retention - Skills have a 35% chance to refund half of the Energy spent. |
 |
Fluke - Triggered Spells deal more maximum and less minimum damage and recover up to 20% of their cost on use. |
| [UTILITY] Arc setup |
|
Cast on Critical - With enough Spirit you can afford a second CoC setup. |
|
Arc |
|
Arc |
 |
Elemental Focus - More Elemental Damage with inability to Shock. |
 |
Deliberation - 20% more damage with no drawback. |
 |
Lightning Mastery - Extra Gem Level for Arcs. |
| [UTILITY] Skeletal Cleric setup |
 |
Skeletal Cleric - Skeletons' only role is to be offered in Soul Offering. |
 |
Last Gasp - Minions will stay alive for another 4 seconds after their life is reduced to 0. |
 |
Meat Shield - Skeletons have increased Maximum Life, but deal less damage. |
| [UTILITY] Soul Offering setup |
 |
Soul Offering - Sacrifice one of your Minions for 80% increased Spell Damage. |
 |
Danse Macabre - If you can offer two Minions, the effect of Offering is increased by 30%. |
 |
Persistence - 40% increased Duration of Soul Offering. |
 |
Ablation - 30% increased Buff effect at the cost of 15% of your Maximum Life. |
 |
Minion Mastery - An extra Gem Level for Soul Offering. |
| [UTILITY] Sigil of Power setup |
|
Sigil of Power - Place the Sigil on the ground and stand on it to get 15% more Spell Damage. It comes from Chiming Staff which you can swap to. |
 |
Unbreakable - More Stun Threshold while using Sigil of Power. |
|
On Odealo dozens of sellers compete for your attention. Buying PoE 2 Currency here guarantees the best prices, prompt delivery, and the best quality of service.
|
6. Gear Setup
The build uses Life as fuel and Energy Shield as the actual defensive layer. Life is easy to replenish and spend so you will see it constantly fluctuate, but ES should stay high at all times. It can be found on most items. Combined with Resistances and maybe some Life Flask enhancements it will serve as your main defensive layer. Damage is found on a Weapon, Focus, and Jewels. The most important are Critical Hit Chance (until it's 100%), Critical Bonus Damage, Gem Level for Lightning Spells, Lightning Spell Damage, and, of course, Cast Speed. Spirit - you need it to host CoCs and Minions. If you have a Sceptre, it will provide you with bonus Spirit and Minions. Sceptre and Alpha's Howl will allow you to host even 3 CoC setups. Atziri's Acuity Gloves are great, make room for them. Choir of the Storm is mandatory - it generates a lot of Energy and grants damage. Seed of Cataclysm should be included too, as it is the best Ring in terms of damage. Be sure you have enough Resistances and Attributes, these Uniques don't really have them.
|
Stat priorities on items:
- Elemental Resistances
- Maximum Energy Shield
- Gem Level for Lightning Spells
- Critical Hit Chance for Spells
- Critical Damage Bonus
- increased Lightning and Spell Damage
- Attributes
- Cast Speed
- Chaos Resistance
- any Life Recovery
|
 (Weapon) Rare Wand - There are tons of modifiers you may find useful on a Wand, but the most important will be Gem Level to Lightning Spells, Extra Damage, increased Damage, and Critical Hit Chance or Critical Bonus Damage. (Weapon) Rare Wand - There are tons of modifiers you may find useful on a Wand, but the most important will be Gem Level to Lightning Spells, Extra Damage, increased Damage, and Critical Hit Chance or Critical Bonus Damage. |
Min. requirements:
+4 to Level of all Lightning Spell Skills
increased Spell or Lightning Damage
Gain #% of Damage as Extra Cold, Lightning or Fire Damage
Optional affixes:
increased Critical Strike Chance for Spells
increased Cast Speed
increased Critical Spell Damage Bonus
Gain # Life per Enemy Killed |
 (Off-hand) Rare Focus - Focus is another source of damage, Level to Spell Skills, and Critical Hit mods. If you want something sturdier, look for high Maximum Energy Shield and Resistances. (Off-hand) Rare Focus - Focus is another source of damage, Level to Spell Skills, and Critical Hit mods. If you want something sturdier, look for high Maximum Energy Shield and Resistances. |
Min. requirements:
increased Spell or Lightning Damage
increased Critical Strike Chance for Spells
+# to Level of all Spell Skills
Optional affixes:
increased Cast Speed
increased Critical Spell Damage Bonus
Resistances |
 (Off-hand) Sacred Flame - Extra Fire Damage is what will make this a good off-hand, at least until you find a better Focus. (Off-hand) Sacred Flame - Extra Fire Damage is what will make this a good off-hand, at least until you find a better Focus. |
Grants Skill: Level (18-19) Purity of Fire
Gain (40-60)% of Damage as Extra Fire Damage
Allies in your Presence Gain (20-30)% of Damage as Extra Fire Damage
Allies in your Presence Regenerate (2-3)% of their Maximum Life per second
Enemies in your Presence Resist Elemental Damage based on their Lowest Resistance |
 (Helmet) Alpha's Howl - It has a lot of additional Spirit which will allow you to host another CoC setup, increasing your damage. A lot of Cold Resistance too. (Helmet) Alpha's Howl - It has a lot of additional Spirit which will allow you to host another CoC setup, increasing your damage. A lot of Cold Resistance too. |
(80–100)% increased Evasion Rating
+100 to Spirit
+(50–75)% to Cold Resistance
Presence Radius is doubled |
 (Helmet) Mask of the Sanguimancer - Blood Magic Keystone is in a very bad spot on a Skill Tree, it's a huge waste of Skill Points to go there. This Helmet, among other useful stats, grants you Blood Magic just like that. (Helmet) Mask of the Sanguimancer - Blood Magic Keystone is in a very bad spot on a Skill Tree, it's a huge waste of Skill Points to go there. This Helmet, among other useful stats, grants you Blood Magic just like that. |
+(20–25) to Evasion Rating
+(10–15) to maximum Energy Shield
(20–40)% increased Critical Hit Chance for Spells
+(10–20) to Strength
+(10–20) to Intelligence
Blood Magic |
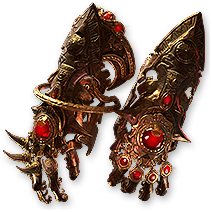 (Gloves) Atziri's Acuity - An obligatory item - instant Leech with Intelligence and a bit of Crit Chance are great. Replenishes your Life very fast as long as your Spells are Hitting. (Gloves) Atziri's Acuity - An obligatory item - instant Leech with Intelligence and a bit of Crit Chance are great. Replenishes your Life very fast as long as your Spells are Hitting. |
(80–100)% increased Armour
(30–50)% increased Critical Hit Chance
+(20–30) to Intelligence
Leech from Critical Hits is instant |
 (Boots) Rare Boots - Here you shall focus on Movement Speed and Resistances, other mods are much less valuable. (Boots) Rare Boots - Here you shall focus on Movement Speed and Resistances, other mods are much less valuable. |
Min. requirements:
Resistance
increased Movement Speed
Optional affixes:
Attributes
high Maximum Energy Shield |
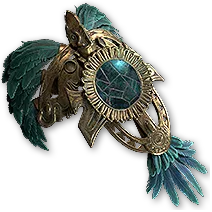
 (Amulet) Choir of the Storm - A core Unique Item. It releases Lightning Bolts on Critical Hit, which is every Hit, and causes these to ignore Lightning Resistance. (Amulet) Choir of the Storm - A core Unique Item. It releases Lightning Bolts on Critical Hit, which is every Hit, and causes these to ignore Lightning Resistance. |
Grants Skill: Level # Lightning Bolt
+(10–15) to Dexterity
+(20–30)% to Lightning Resistance
Critical Hits Ignore Enemy Monster Lightning Resistance
Trigger Lightning Bolt Skill on Critical Hit |
 (Ring) Rare Ring - You will probably need a Rare Ring to patch up the missing Resistances and Attributes. If that's not necessary, go for a second Seed of Cataclysm. (Ring) Rare Ring - You will probably need a Rare Ring to patch up the missing Resistances and Attributes. If that's not necessary, go for a second Seed of Cataclysm. |
Min. requirements:
Resistances
Attributes
Optional affixes:
Life per Enemy Killed
increased Lightning Damage
increased Cast Speed |
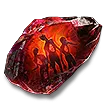
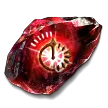
 (Ring) Seed of Cataclysm - Crit Chance and Crit Damage are both extremely valuable here, making these Rings an obvious choice. (Ring) Seed of Cataclysm - Crit Chance and Crit Damage are both extremely valuable here, making these Rings an obvious choice. |
+(20–30) to maximum Mana
(30–50)% increased Critical Hit Chance for Spells
(30–50)% increased Critical Spell Damage Bonus
+(13–17)% to Chaos Resistance
10% increased Mana Cost of Skills |
 (Belt) Rare Belt - Not many exotic mods to look for on a Belt, but it may be a very potent source of Resistances, Maximum Life, and Strength. (Belt) Rare Belt - Not many exotic mods to look for on a Belt, but it may be a very potent source of Resistances, Maximum Life, and Strength. |
Min. requirements:
Resistances
Maximum Life
Optional affixes:
increased Flask Life Recovery Rate
Strength
Armour |
 (Body Armour) Rare Body Armour - The Body Armour must have a high Maximum Energy Shield and some Resistances. Spirit or Life Regeneration are good, but may be not needed at all. (Body Armour) Rare Body Armour - The Body Armour must have a high Maximum Energy Shield and some Resistances. Spirit or Life Regeneration are good, but may be not needed at all. |
Min. requirements:
600 Energy Shield
Resistances
Optional affixes:
Spirit
Life Regeneration per second |
 (Jewel) Rare Sapphire Jewels - Sapphires may roll Critical-Hit-related modifiers and increase your Energy Shield. (Jewel) Rare Sapphire Jewels - Sapphires may roll Critical-Hit-related modifiers and increase your Energy Shield. |
Optional affixes:
increased maximum Energy Shield
increased Critical Hit Chance for Spells
increased Critical Hit Chance
increased Critical Damage Bonus
increased Critical Spell Damage Bonus
increased Energy Shield from Equipped Focus
Meta Skills gain increased Energy |
|
Odealo is one of the biggest Path of Exile 2 marketplaces. It allows regular players to buy, sell, and trade PoE 2 Currency with the use of real cash
|
If you have any other build requests please leave that in the comments below. We are always open to suggestions and constructive feedback.
Pictures used in this article are the intellectual property of Grinding Gear Games.