Wave of Conviction of Trarthus Miner Trickster Build
A conventional well-rounded Wave of Conviction of Trarthus mine build for a Trickster.Wave of Conviction of Trarthus Miner
Trickster Build
Updated for Patch 3.28
The Best Crafty Guides by Odealo
| Guide notes | |||
| March 19, 2026 -Build created |
|||
| Build overview | |||
| Tags: [MINES] [ELEMENTAL] [HYBRID] | |||
|
Budget: Defenses: |
|
Boss DPS: AoE: |
|
Wave of Conviction of Trarthus is a Nova Spell that deals inherent Physical Damage, half of which is Converted to Fire. Its damage may seem lackluster (it's quite similar to Exsanguinate), but it deals damage twice: once it expands, and again when it retracts. Of course, it would require you to stand very close to the target when doing so, so it's a good idea to cast it with a Mine and to wear Astral Projector. The Gem description claims that only one Wave of Conviction can be active at a time, but since Mines don't trigger all at the same time, the Waves will have a chance to deal damage before terminating. You have to Convert the remaining Damage to some type of Element, and the best type seems to be Cold. It can be done with Rare Gloves, Cold Mastery, or Watcher's Eye. You can then gain a lot of additional Elemental and Chaos Damage sourced from the original Physical type with Skills like Hatred, items like The Balance of Terror, and Flasks like Atziri's Promise.
The build uses a deliberately crafted Archdemon Crown Helmet to host the main damaging Skill. It increases the socketed Gem Level by two, and has two built-in Support Gems that benefit it. With good Weapons and an Amulet, you can reach level 30 with Wave of Conviction, whose base damage is absurdly high at that point. The next step is to scale Crit Chance and Crit Multiplier via Power Charges, regular passives, or Jewels. The enemy is also heavily debuffed thanks to Skitterbots that Chill, Shock, and Scorch, courtesy of Arkhon's Tools. To stay alive, the build relies on the mechanics most Trickcsters employ, which are high Evasion and Energy Shield from the Escape Artist. ES is Recovered with Ghost Dance. Damage over Time is usually not a problem after allocating Lethe Shade and Heartstopper. Spell Suppression and Chaos Resistance must be fixed at some point.
1. Gameplay
Throw Mines on top of enemies to slay them. To increase your damage, cast Elemental Weakness to gain The Balance of Terror's bonus. Assassin's Mark and Frost Bomb can be applied with one Arcanist Brand. Bear Trap has to be thrown at bosses you want killed faster. Your movement Skills are Frostblink and Whirling Blades or Shield Charge, depending on your weapon setup. Steelskin and Detonate Mines are automated with Automation. Your passive skills are Hatred, Skitterbots, an maybe Zealotry or Grace if you can afford it. Clarity plays only a minor role.
|
|

2. Build's PROS & CONS
| PROS |
|
| CONS |
|
3. Leveling tips
Start as a Pyroclaster. We've prepared a separate starter guide for it. These Mines are known for their excellence during the early stages of the game and for their affordability. You may swap to this version after getting the required rare and unique items, which can be quite expensive, so do it around level 80 to 90.
Bandits:
An additional Passive Skill Point seems like the best option, but you may need to help Alira to get the additional Elemental Resistances.
4. Final Skill Tree, Ascendancy Points, and Pantheon
Final Skill Tree:
96 Points Final Skill Tree (doesn't include Cluster or Unique Jewels)
119 Points Path of Building (PoB) link
Ascendancy points:
Preferably in that order:
- Polymath
- Swift Killer
- Escape Artist
- Heartstopper
Pantheon:
Major God: Soul of Solaris: 6% additional Physical Damage Reduction while there is only one nearby Enemy; 20% chance to take 50% less Area Damage from Hits
Minor God: Soul of Abberath: 60% less Duration of Ignite on You
5. Final Gems links
| [DPS] Wave of Conviction of Trarthus setup socketed in a Rare Helmet |
|
 |
Wave of Conviction of Trarthus - A partially-converted-to-Fire Physical Damage Nova Spell. It should also be supported by Archdemon's Crown's Hypothermia and Concentrated Effect. |
 |
High-Impact Mine Support - Transforms Spell into a throwable Mine with an Aura for a Chance to deal double damage. |
 |
Charged Mines Support - Mines grant Power and Frenzy Charges. They also provide Crit Chance and Throwing Speed; these Charges scale alongside them. |
 |
Minefield Support - More mines per throw with an extended limit for the Mines that can be set up, but less Throwing Speed. |
| [UTILITY] Reservation setup | |
 |
Hatred - Grants 40% of Physical Damage as Cold Damage, resulting in mixed Elemental Damage. |
 |
Zealotry - More Spell Damage and increased Critical Strike Chance for Spells. You probably won't be able to afford it even with superb Reservation Efficiency, so skip it if that's the case. |
 |
Grace - Added and increased Evasion Rating - one of two very important defence stats. |
 |
Summon Skitterbots - Skitterbots can Chill, Shock, detonate, and re-arm Mines, making them a core element of every Mine build. Here, they're especially important due to the Arkhon's Tools Belt and Unbound Ailments. |
 |
Unbound Ailments Support - Skitterbots' Chill, Shock, and Schorch is more powerful. You can also link Skitterbots with Bonechill Support if you have Mana for it. |
 |
Enlighten Support - Linked Spells Reserve less Mana. |
| [UTILITY] Automation setup | |
 |
Detonate Mines - A Spell to Detonate Mines with. Used in all builds that want them to Trigger some kind of Spell. |
 |
Automation - Automatically casts linked cast-time-less Spells for you. |
 |
Cooldown Recovery Support - Linked Spells with Cooldown have greatly increased Cooldown Recovery Rate. |
 |
Steelskin - A Guard Spell to reduce incoming damage and stop Bleeding. |
| [MOBILITY] Shield Charge setup | |
 |
Shield Charge - A movement Skill you can use while wielding a Shield. It can be replaced with Whirling Blades if you wield a Dagger, or a Frostblink if you dual-wield Wands. If you use Frosblink, link it with Void Manipulation Support to be able to run woeful Reflect maps. |
 |
Faster Attacks Support - Increased Attack Speed for the Shield Charge. |
 |
Momentum Support - Slightly more Attack Speed. |
| [UTILITY] Bear Trap | |
 |
Bear Trap - Ensnared enemies will receive increased Damage from Mines. |
| [UTILITY] Clarity setup | |
 |
Clarity - Use Level-1 Clarity if you have a Watcher's Eye with a mod that reduces the Mana Cost of Skills with it. You may also find Precision's mod for Crit Multiplier good enough to use alongside Clarity. |
 |
Arrogance Support - We can't afford to Reserve any more Mana. Use Arrogance to Reserve for the level-1 Clarity. |
| [UTILITY] Elemental Weakness | |
 |
Elemental Weakness - You're dealing mixed Elemental Damage, so Elemental Weakness is a good Hex Curse, but you may replace it with Assassin's Mark, which is often better. You want to cast it manually to trigger The Balance of Terror's bonus. |
| [UTILITY] Frost Bomb setup | |
 |
Frost Bomb - Reduces Life Regeneration and applies Cold Exposure, so it's good against the toughest bosses. |
 |
More Duration Support - More Duration for the Bomb and the debuffs it inflicts. |
 |
Void Manipulation Support - Optional Support Gem for when you want to be extra safe on Reflect maps. You can replace this Gem with Assassin's Mark and link both Spells to Arcanist Brand to cast them more swiftly. |
|
|
5. Gear Setup
The only notable Uniques are Arkhon's Tools Belt and Astral Projector Ring. None of them is mandatory, but they're good to have. Damage scaling is very similar to most Spell builds - go for Critical Strike mods, high Physical and Elemental Damage, and Gem Level of the Spell you're interested in. Wave of Conviction is a type of Spell that's very easy to improve due to the abundance of Gem Tags - it's easier to find good Weapons or Amulets for it as it's Physical, Fire, Duration, and AoE. Its base damage is Physical, so it's also scalable with mods that grant x% of Physical Damage as some other type of damage. Cast Speed does nothing; you're not Casting the Spells - your Mines are. One of the most important things to check is if your Gloves Convert 50% of Physical Damage to Cold. You don't want to deal Physical Damage. Defensively, the build relies on Maximum Life, Energy Shield, Spell Suppression, and Evasion. All are equally important. With Ghost Dance, your ES Recovery is covered. Mana Reservation Efficiency is crucial, but hard to get. Arkhon's Tools Belt also forces you to reach 100% chance to Avoid Elemental Ailments, which we achieve via Stormshroud and "Chance to Avoid Elemental Ailments" modifiers.
|
Stat priorities on items:
|
 (Helmet) Rare Helmet - Aim for a Shaper/Elder Archdemon Crown with two built-in Support Gems: Hypothermia and Concentrated Effect. It also needs an open Prefix for +1 to Level of Socketed AoE Gems. (Helmet) Rare Helmet - Aim for a Shaper/Elder Archdemon Crown with two built-in Support Gems: Hypothermia and Concentrated Effect. It also needs an open Prefix for +1 to Level of Socketed AoE Gems. |
|
| Min. requirements: Socketed Gems are Supported by Hypothermia (Shaper Suffix) +1 to Level of Socketed AoE Gems (crafted Prefix) Socketed Gems deal 30% more Elemental Damage (Essence of Horror Suffix) Optional affixes: Nearby Enemies take 9% increased Elemental Damage (Shaper Suffix) Socketed Gems are Supported by Hypothermia (Elder Prefix) Maximum Life Resistances |
|
 (Body Armour) The Restless Ward - A Unique Body Armour is almost always a bad idea, unless it's twice Corrupted with +4 (Duration and AoE) to socketed Gems. It can then compete with the Helmet for Wave of Conviction. (Body Armour) The Restless Ward - A Unique Body Armour is almost always a bad idea, unless it's twice Corrupted with +4 (Duration and AoE) to socketed Gems. It can then compete with the Helmet for Wave of Conviction. |
|
| +(20-25) to maximum Mana (220-250)% increased Evasion and Energy Shield +(60-80) to maximum Life 4% increased Movement Speed per Frenzy Charge Regenerate 75 Life per second per Endurance Charge (100-200)% increased Endurance, Frenzy and Power Charge Duration |
|
 (Body Armour) Rare Body Armour - Escape Artist encourages accumulating lots of Evasion and ES on a Body Armour. Other stats that one usually wants here are of lower priority. (Body Armour) Rare Body Armour - Escape Artist encourages accumulating lots of Evasion and ES on a Body Armour. Other stats that one usually wants here are of lower priority. |
|
| Min. requirements: 3000 Evasion rating 500 Energy Shield Optional affixes: Resistance Maximum Life Spell Suppression Chance |
|
 (Weapon) Rare Wand or Dagger - You must get a "+2" Wand or Dagger, preferably with some increases to Spell Damage and Crit Multiplier on. We don't recommend dual-wielding them, unless you prioritize damage over Block Chance. (Weapon) Rare Wand or Dagger - You must get a "+2" Wand or Dagger, preferably with some increases to Spell Damage and Crit Multiplier on. We don't recommend dual-wielding them, unless you prioritize damage over Block Chance. |
|
| Min. requirements: 80% Increased Spell Damage +1 to Level of all Physical/Fire/Spell Skill Gems Optional affixes: +1 to Level of all Physical/Fire/Spell Skill Gems Global Critical Strike Multiplier increased Critical Strike Chance for Spells increased Mine Throwing Speed (crafted) |
|
 (Off-hand) Rare Shield - On a Shield, get +1 Gem Level, some Maximum Life, and Chance to Avoid Elemental Ailments or some more damage-oriented mod. Resistances are of lesser priority here. (Off-hand) Rare Shield - On a Shield, get +1 Gem Level, some Maximum Life, and Chance to Avoid Elemental Ailments or some more damage-oriented mod. Resistances are of lesser priority here. |
|
| Min. requirements: +80 to maximum Life +1 to Level of all Physical/Fire Skill Gems +40% to Elemental Resistances Optional affixes: increased Spell Damage increased Cold Damage increased Spell Critical Strike Chance Chance to Avoid Elemental Ailments Resistances |
|
 (Gloves) Rare Gloves - Gloves must Convert 50% of Physical Damage to Cold using a Veiled Suffix and Greater Eater Implicit. You can also craft the Suffix on a Bench and aim for Exceptional Eater Implicit. Then, get basic Life and Resistances. (Gloves) Rare Gloves - Gloves must Convert 50% of Physical Damage to Cold using a Veiled Suffix and Greater Eater Implicit. You can also craft the Suffix on a Bench and aim for Exceptional Eater Implicit. Then, get basic Life and Resistances. |
|
| Min. requirements: +90 to Maximum Life 40% total Elemental Resistance 35% of Physical Damage Converted to Cold Damage (Veiled Prefix) 15% of Physical Damage Converted to Cold Damage (Eater Implicit) Optional affixes: increased Damage with Hits against Chilled Enemies (Incursion Suffix) Life Regeneration Chaos Resistance |
|
 (Boots) Rare Boots - On Boots, you can craft and add additional Chance to Avoid Elemental Ailments. With Stormshroud Jewel, you can also go for Chance to Avoid being Shocked to easily become unaffected by all Elemental Ailments and your own Skitterbots. Then, Maximum Life, Resistances, and Movement Speed. (Boots) Rare Boots - On Boots, you can craft and add additional Chance to Avoid Elemental Ailments. With Stormshroud Jewel, you can also go for Chance to Avoid being Shocked to easily become unaffected by all Elemental Ailments and your own Skitterbots. Then, Maximum Life, Resistances, and Movement Speed. |
|
| Min. requirements: +90 to Maximum Life 40% total Elemental Resistance +30% increased Movement Speed Optional affixes: Chance to Avoid Elemental Ailments (Crafted Suffix and Eater Implicit) chance to Avoid being Shocked (Essence of Torment Suffix and Exarch Implicit) Chaos Resistance |
|
 (Belt) The Arkhon's Tools - Skitterbots' Shock, Chill, and now Scorch, too, are much more powerful with this Belt on. They Reserve less Mana, and you have increased Mine Throwing Speed. (Belt) The Arkhon's Tools - Skitterbots' Shock, Chill, and now Scorch, too, are much more powerful with this Belt on. They Reserve less Mana, and you have increased Mine Throwing Speed. |
|
| (15-25)% increased Stun and Block Recovery +(20-30) to Dexterity and Intelligence (10-20)% increased Mana Reservation Efficiency of Skills (15-25)% increased Trap and Mine Throwing Speed Summon Skitterbots also summons a Scorching Skitterbot Summoned Skitterbots' Auras affect you as well as Enemies (50-75)% increased Effect of Non-Damaging Ailments inflicted by Summoned Skitterbots |
|
 (Amulet) Rare Amulet - An Amulet can get you additional Gem Levels, Crit Multiplier, Reduced Mana Cost of Skills, Maximum Life, Resistances, and Attributes. (Amulet) Rare Amulet - An Amulet can get you additional Gem Levels, Crit Multiplier, Reduced Mana Cost of Skills, Maximum Life, Resistances, and Attributes. |
|
| Min. requirements: +90 to Maximum Life +1 to Level of all Fire/Physical Skill Gems Global Critical Strike Multiplier Optional affixes: +1 to Level of all Skill Gems Non-Channelling Skills have -7 to Total Mana Cost Resistances Attributes |
|
 (Amulet) Replica Dragonfang's Flight - This Amulet should be good until you can afford a Rare one that outclasses it, which won't be easy. It will provide 3 Levels to the Wave of Conviction on top of other beneficial bonuses. (Amulet) Replica Dragonfang's Flight - This Amulet should be good until you can afford a Rare one that outclasses it, which won't be easy. It will provide 3 Levels to the Wave of Conviction on top of other beneficial bonuses. |
|
| +(10-16) to all Attributes +3 to Level of all <Random Skill> Gems +(5-10)% to all Elemental Resistances (5-10)% increased Reservation Efficiency of Skills Items and Gems have (10-5)% reduced Attribute Requirements |
|
| Recommended Anointments: Charisma Sovereignty |
|
 (Ring) Rare Rings - Rare Rings are rarely good, but they may be necessary if you're short on Resistances or Attributes. They should also provide a significant bonus to Maximum Life. (Ring) Rare Rings - Rare Rings are rarely good, but they may be necessary if you're short on Resistances or Attributes. They should also provide a significant bonus to Maximum Life. |
|
| Min. requirements: +90 to Maximum Life Resistances Attributes Optional affixes: Non-Channelling Skills have -7 to Total Mana Cost increased Mana Regeneration Rate |
|
 (Ring) The Taming - The Taming works great in this setup, where an enemy is afflicted with multiple Elemental Ailments, and you deal only Elemental Damage. It's a big damage boost and lots of Resistances. (Ring) The Taming - The Taming works great in this setup, where an enemy is afflicted with multiple Elemental Ailments, and you deal only Elemental Damage. It's a big damage boost and lots of Resistances. |
|
| +(8-10)% to all Elemental Resistances (30-40)% increased Elemental Damage with Hits and Ailments for each type of Elemental Ailment on Enemy +(20-30)% to all Elemental Resistances 10% chance to Freeze, Shock and Ignite |
|
 (Ring) Astral Projector - Astral Projector causes your Wave of Conviction of Trarthus to originate on top of enemies, so you don't have to look where you throw your Mines. It also grants Chance to Avoid Elemental Ailments. (Ring) Astral Projector - Astral Projector causes your Wave of Conviction of Trarthus to originate on top of enemies, so you don't have to look where you throw your Mines. It also grants Chance to Avoid Elemental Ailments. |
|
| +(20-30)% to Lightning Resistance +(30-50) to Intelligence (20-25)% increased Spell Damage 30% chance to Avoid Elemental Ailments Nova Spells have 20% less Area of Effect Nova Spells Cast at the targeted location instead of around you |
|
 (Jewel) Stormshroud - Chance to Avoid being Shocked will apply to other Elemental Ailments, rendering you immune to your own Skitterbots, and, more importantly, enemies. (Jewel) Stormshroud - Chance to Avoid being Shocked will apply to other Elemental Ailments, rendering you immune to your own Skitterbots, and, more importantly, enemies. |
|
| +(10-15)% to Lightning Resistance Modifiers to Chance to Avoid being Shocked apply to all Elemental Ailments |
|
 (Jewel) The Balance of Terror - You only want the "Gain #% of Physical Damage as a Random Element if you've cast Elemental Weakness in the past 10 seconds" to get a damage boost. (Jewel) The Balance of Terror - You only want the "Gain #% of Physical Damage as a Random Element if you've cast Elemental Weakness in the past 10 seconds" to get a damage boost. |
|
| +(10-15)% to all Elemental Resistances <2 random curse modifiers> |
|
 (Jewel) Lethal Pride - Lethal Pride grants lots of Strength. The notable upgrades to look for are Maximum Life, increased Physical Damage, or Fire Resistance. (Jewel) Lethal Pride - Lethal Pride grants lots of Strength. The notable upgrades to look for are Maximum Life, increased Physical Damage, or Fire Resistance. |
|
| Commanded leadership over (10000-18000) warriors under <Akoya • Kaom • Rakiata> Passives in radius are Conquered by the Karui Historic |
|
  (Jewel) Forbidden Flesh & Flame - As a Shadow, you have access to very fitting passives, like Bomb Specialist, Calculated Risk, For the Jugular, Opportunistic, or even Harness the Void. (Jewel) Forbidden Flesh & Flame - As a Shadow, you have access to very fitting passives, like Bomb Specialist, Calculated Risk, For the Jugular, Opportunistic, or even Harness the Void. |
|
| Allocates <random Ascendancy Notable> if you have the matching modifier on Forbidden Flame Allocates <random Ascendancy Notable> if you have the matching modifier on Forbidden Flesh |
|
 (Jewel) Ancestral Vision - This Jewel will grant you a lot of Spell Suppression Chance, which you want ideally capped at 100%. (Jewel) Ancestral Vision - This Jewel will grant you a lot of Spell Suppression Chance, which you want ideally capped at 100%. |
|
| +(5-10) to Dexterity Modifiers to Chance to Suppress Spell Damage also apply to Chance to Avoid Elemental Ailments at 50% of their Value |
|
 (Jewel) Rare Jewels - Besides Maximum Life, look for Critical Strike Multiplier for Physical, Fire, or Spell Skills in general. Jewels with multiple mods for Crit Multiplier are usually expensive, but for this build, you should be able to get them a bit cheaper. (Jewel) Rare Jewels - Besides Maximum Life, look for Critical Strike Multiplier for Physical, Fire, or Spell Skills in general. Jewels with multiple mods for Crit Multiplier are usually expensive, but for this build, you should be able to get them a bit cheaper. |
|
| Recommended affixes: increased Maximum Life Critical Strike Multiplier (various applicable types) Attributes Resistances |
|
 (Jewel) Watcher's Eye - Your Auras are Hatred, Clarity, and maybe Grace with Zealotry. On a Watcher's Eye, you want the Clarity mod that reduces Mana Cost. Most Hatred mods are great. (Jewel) Watcher's Eye - Your Auras are Hatred, Clarity, and maybe Grace with Zealotry. On a Watcher's Eye, you want the Clarity mod that reduces Mana Cost. Most Hatred mods are great. |
|
| (4-6)% increased maximum Energy Shield (4-6)% increased maximum Life (4-6)% increased maximum Mana <Two or Three random aura modifiers> |
|
 (Jewel) Large Cluster Jewel - 8-passive Physical Damage Cluster Jewels with Battle-Hardened, Force Multiplier, and Iron Breaker are the best. One will be enough; the second one requires a high character level. (Jewel) Large Cluster Jewel - 8-passive Physical Damage Cluster Jewels with Battle-Hardened, Force Multiplier, and Iron Breaker are the best. One will be enough; the second one requires a high character level. |
|
| Recommended affixes: 1 Added Passive Skill is Battle-Hardened 1 Added Passive Skill is Force Multiplier 1 Added Passive Skill is Iron Breaker |
|
 (Jewel) Medium Cluster Jewel - Medium Cluster Jewels with Expert Sabotage and Guerrilla Tactics are the best investments for your Skill Points damage-wise. (Jewel) Medium Cluster Jewel - Medium Cluster Jewels with Expert Sabotage and Guerrilla Tactics are the best investments for your Skill Points damage-wise. |
|
| Recommended affixes: 1 Added Passive Skill is Expert Sabotage 1 Added Passive Skill is Guerrilla Tactics |
|
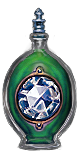
 (Flask) Atziri's Promise - Grants extra Chaos damage twice, so look for good rolls on both modifiers here. (Flask) Atziri's Promise - Grants extra Chaos damage twice, so look for good rolls on both modifiers here. |
|
| Gain (5-8)% of Elemental Damage as Extra Chaos Damage during effect 2% of Chaos Damage Leeched as Life during Effect Gain (5-8)% of Physical Damage as Extra Chaos Damage during effect |
|
 (Flask) Taste of Hate - This Flask granst 15% of Physical Damage as Extra Cold, and its other mods are mostly irrelevant. (Flask) Taste of Hate - This Flask granst 15% of Physical Damage as Extra Cold, and its other mods are mostly irrelevant. |
|
| +40% to Cold Resistance +5% to maximum Cold Resistance (20-30)% of Fire and Lightning Damage from Hits taken as Cold Damage during Effect Gain (10-15)% of Physical Damage as Extra Cold Damage during effect 30% chance to Avoid being Chilled during Effect 30% chance to Avoid being Frozen during Effect |
|
|
Other suggested Flasks and Tinctures:
|
|
   |
|
|
If you have any other build requests, please leave that in the comments below.
Pictures used in this article are the intellectual property of Grinding Gear Games.
