Shield Wall Warbringer POE2 Build
A build that sources its damage from a shield with lots of Armour and offers insane burst damage from instantly exploding Shield WallsShield Wall
Warbringer Build
Updated for Path of Exile 2 Early Access
The Best Crafty Guides by Odealo
| Guide notes |
| October 19, 2025 - Created for Early Access. |
| Build Overview | |||
| Tags: [MELEE] [PHYSICAL] [LIFE] | |||
|
Budget: Defenses: |
|
Boss DPS: AoE: |
|
The Armour on the character's Shield has a dormant destructive potential. There are several Attack Skills whose damage is based not on the Weapon's Damage, but the Shield's Armour instead. This build uses Shield Wall, Resonating Shield, Fortifying Cry, Shield Charge, and Even Magma Barrier to some extent. Shield Wall is the main source of DPS against bosses. This skill has the highest damage, but it has to be detonated by one of your other skills. If enemies destroy it, it won't do much. The best ability to do so is Fortifying Cry because its damage is sourced from Shield as well. We've allocated Warbringer's Warcaller's Bellow to bypass the Cooldown on it; it would bottleneck the Wall's potential heavily. A single Wall detonated this way will do between one and two million damage per hit. Resonating Shield has no restrictions and requires no preparations, so it's the most convenient skill to kill enemies that don't need all that special care. One bash is usually enough to slay normal monsters.
Warbringer has other good passives. Renly's Training, combined with Magma Barrier, caps Block Chance at 50%. Jade Heritage is another defensive pick that reduces Physical Damage taken by 10%. It should be mixed with Armour to make the character more durable. Armour can also be employed to affect Elemental Damage with item modifiers and skill tree passives. The last Ascendancy passive is Anvil's Weight to break Armour. It improves damage, but has other functions too. With Scavenged Plating, it grants more Armour for the character, and with Armour Explosion Support on Resonating Shield, it improves clear speed. All this results in a well-rounded character with a tool for every situation. Its only shortcoming is its short range. That cannot be fixed. The Life Pool is also not that good if you decide to go for Giant's Blood, so getting slayed with a single well-telegraphed blow from a high-tier pinnacle boss is to be expected.
You can also check our other Path of Exile 2 builds right over here Odealo's Crafty Guides - Full List
1. Gameplay
Most mapping consists of Shield Bashing and Shield Dashing. If the enemies are particularly tough, place a Shield Wall and break it with Fortifying Cry and repeat that "combo" until the foe dies. A single Wall should deal between one and two million damage. The passive skills are Scavenged Plating, Encase in Jade, Herald of Ash, Berserk, and Magma Barrier.
|
|
|
|

2. Build's PROS & CONS
| PROS |
|
| CONS |
|
3. Leveling tips
Level it up as any other Warrior build - with Rolling Slam, Earthquake, and Boneshatter. Prime your enemies for Boneshatter linked to Impact Shockwave, and execute them with it. You can start using Shield Wall combined with a Slam Skill to detonate it if you can keep up with upgrading your shield act after act alongside the weapon, which is already troublesome enough. It's a late-game build, but you can start assembling it as this guide describes it as soon as you're able to equip a Shield with at least 900 Armour. Leave Gian't Blood for finishing touches.
4. Final Skill Tree, Ascendancy Points, and Pantheon
Final Skill Tree:
 |
|
Click on the image to open the Passive Tree preview in a new window Or import the build into PoB: |
Ascendancy points:
Preferably in this order:
- Anvil's Weight
- Renly's Training
- Jade Heritage
- Warcaller's Bellow
5. Final Gems links
| [DPS] Shield Wall setup | |
 |
Shield Wall - It's the damaging Skill. Creates a detonatable object with a huge Area of Effect. Only two at a time can be active. Its damage scales up with Gem Level and Shield's Armour, not the Weapon. |
 |
Heft |
 |
Brutality |
 |
Heavy Swing |
 |
Rapid Attacks |
 |
Atalui's Bloodletting |
| [DPS] Resonating Shield setup | |
 |
Resonating Shield - Bash that damages enemies around you. It should be enough to kill minor enemies. Its damage also scales up with Gem Level and Shield's Armour. |
|
Rapid Attacks |
 |
Uruk's Smelting |
 |
Armour Explosion |
 |
Efficiency |
|
Brutality |
| [DPS] Fortifying Cry setup | |
 |
Fortifying Cry - A Warcry that enhances your next Shield Attack (so any Attack in this build) by releasing Shield Wave on Hit, and absorbs some of the incoming damage. |
|
Heft |
|
Brutality |
|
Heavy Swing |
 |
Raging Cry |
 |
Physical Mastery |
| [MOBILITY] Shield Charge setup | |
 |
Shield Charge - The movement ability that's strong enough to kill most foes you crash into. |
 |
Stomping Ground |
|
Heft |
 |
Rage |
|
Rapid Attacks |
 |
Close Combat |
| [UTILITY] Herald of Ash setup | |
 |
Herald of Ash - Herald of Ash can be of use in certain situations with increased mob density, such as during a breach. The overkill damage of Shield Wall translated into AoE burn will undoubtedly improve your clear speed. |
 |
Magnified Area |
 |
Deadly Herald |
 |
Swift Affliction |
 |
Fire Mastery |
| [UTILITY] Magma Barrier setup | |
 |
Magma Barrier - Grants 30% increased Block chance. It also deals some Fire Damage based on your Shield's Armour now and then, but it does so every 8 seconds on Block, thus it's not a crucial component of the build. |
 |
Fire Penetration |
 |
Elemental Armament |
 |
Fire Attunement |
|
Fire Mastery |
|
Close Combat |
| [UTILITY] Scavenged Plating setup | |
 |
Scavenged Plating - Scavenged Plating grants you more Armour when you break opponents' Armour. With Anvil's Weight, you break Armour all the time. |
 |
Prolonged Duration |
 |
Precision |
| [UTILITY] Encased in Jade setup | |
 |
Encase in Jade - An Ascendancy Skill. Grants permanent 10% additional Physical Damage Reduction if you don't activate it, which you really shouldn't. |
| [UTILITY] Berserk | |
 |
Berserk - Vastly increased effect of Rage at the cost of life drain. |
|
|
6. Gear Setup
Gearing up is simple. There are no Unique gear pieces that would beat rares in any slot, not in terms of DPS at least. We won't recommend any; Defiance of Destiny is one exception, as it improves survivability quite a lot, but it's a big tradeoff. Maximum Life and Armour, with Armour applying to Resistances, are the defensive mods to seek. Block Chance is not needed since that's fixed at maximum already. Life Recovery can be a hurdle, so get some sort of Life on Kill or Life Leech; maybe Life Regeneration. With Blood Mage, you have no Mana, so you are not managing this resource. The damage comes from the Weapon and Shield both. If you want higher DPS, you may allocate Giant's Blood, and that's what we did, but that's an end-game damage-over-life keystone that won't fit all sizes. The Gem setup will need 50 extra Spirit. Dex and Int requirements are so low that you won't need to worry about them at all.
|
Stat priorities on items:
|
 (Helmet) Rare Helmet - It must be plentiful in Armour, Life, and Resistances. It's also easy to find Intelligence and Accuracy here, even on pure Strength ones. (Helmet) Rare Helmet - It must be plentiful in Armour, Life, and Resistances. It's also easy to find Intelligence and Accuracy here, even on pure Strength ones. |
|
| Min. requirements: +130 to Maximum Life +40% total Elemental and Chaos Resistance Optional affixes: Strength Armour Accuracy Rating #% of Armour also applies to Elemental Damage |
|
 (Weapon) Rare Mace - Mace is not your main damage source; the Shield is. You don't need a high-DPS mace. Still, weapons are abundant in influential mods, such as Gem Level for Melee Skills and global damage improvements. Two-hand Maces, available with Giant's Blood, are better. (Weapon) Rare Mace - Mace is not your main damage source; the Shield is. You don't need a high-DPS mace. Still, weapons are abundant in influential mods, such as Gem Level for Melee Skills and global damage improvements. Two-hand Maces, available with Giant's Blood, are better. |
|
| Min. requirements: +# to Level of all Melee Skills increased Damage against Enemies with Fully Broken Armour Gain #% of Damage as Extra Physical Damage Optional affixes: Accuracy Rating Strength Reduced Attribute Requirements Life on Kill or on Hit |
|
 (Off-hand) Rare Shield - On prefixes, go for Armour and Maximum Life - these are the most important, especially Armour, which is directly tied to your damage. Chance to Block is fixed with Ascendancy; you won't need that. (Off-hand) Rare Shield - On prefixes, go for Armour and Maximum Life - these are the most important, especially Armour, which is directly tied to your damage. Chance to Block is fixed with Ascendancy; you won't need that. |
|
| Min. requirements: 1200 Armour +130 to Maximum Life Optional affixes: Elemental and Chaos Resistance Strength Armour additional Physical Damage Reduction #% of Armour also applies to Elemental Damage |
|
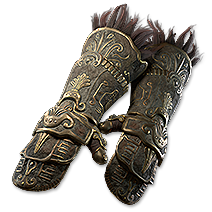 (Gloves) Rare Gloves - Gloves can roll great damage modifiers, the most important of which are Gem Level for Melee Skills and increased Attack Speed. Then, focus on basic defences or invest in added damage and Accuracy. (Gloves) Rare Gloves - Gloves can roll great damage modifiers, the most important of which are Gem Level for Melee Skills and increased Attack Speed. Then, focus on basic defences or invest in added damage and Accuracy. |
|
| Min. requirements: +130 to Maximum Life increased Attack Speed +2 to Level of all Melee Skills Optional affixes: Strength Armour Accuracy Rating Elemental and Chaos Resistance Adds Physical Damage to Attacks #% of Armour also applies to Elemental Damage |
|
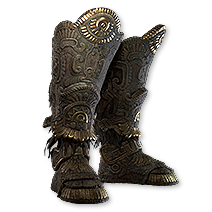 (Boots) Rare Boots - Boots must have Movement Speed on top of Maximum Life, Resistances, Armour, and maybe even Strength. Farrul's Rune of Grace could be good here; it reduces Movement Speed Penalty from using Skills. (Boots) Rare Boots - Boots must have Movement Speed on top of Maximum Life, Resistances, Armour, and maybe even Strength. Farrul's Rune of Grace could be good here; it reduces Movement Speed Penalty from using Skills. |
|
| Min. requirements: +100 to Maximum Life +40% total Elemental and Chaos Resistance 30% increased Movement Speed Optional affixes: Strength Armour #% of Armour also applies to Elemental Damage |
|
 (Amulet) Defiance of Destiny - DoD is the most effective fix to the problem of low Life Recovery during mapping. It renders you nearly-immortal against barrages of attacks, but does not prevent getting one-shotted. (Amulet) Defiance of Destiny - DoD is the most effective fix to the problem of low Life Recovery during mapping. It renders you nearly-immortal against barrages of attacks, but does not prevent getting one-shotted. |
|
| +(10–15) to Dexterity (6–10)% increased maximum Life +(10–20) to Strength (25–40)% increased Mana Regeneration Rate Recover (10–20)% of Missing Life before being Hit by an Enemy |
|
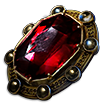
 (Amulet) Rare Amulet - On the Amulet, first thing get Spirit and Level of Melee Skills. Then, try to acquire as much Maximum Life and Resistances as possible. (Amulet) Rare Amulet - On the Amulet, first thing get Spirit and Level of Melee Skills. Then, try to acquire as much Maximum Life and Resistances as possible. |
|
| Min. requirements: Spirit +100 to Maximum Life +3 to Level of all Melee Skills Optional affixes: increased maximum Life Elemental and Chaos Resistance Accuracy Rating Attributes increased Armour Anointment: Breakage Spray and Pray Unhindered |
|
 (Ring) Rare Ring - On Rings aim for Maximum Life, Resistances, added Physical Damage to Attacks, and Accuracy or some Life Recovery mod. (Ring) Rare Ring - On Rings aim for Maximum Life, Resistances, added Physical Damage to Attacks, and Accuracy or some Life Recovery mod. |
|
| Min. requirements: +80% total Elemental and Chaos Resistance +100 to Maximum Life Optional affixes: Adds # Physical Damage to Attacks Gain # Life per Enemy Killed Attributes Life Leech Accuracy Rating Life Regeneration per second |
|
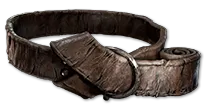 (Belt) Rare Belt - Belt should provide lots of Maximum Life, Armour, Resistances, Charm slots, and Strength. There is no need for anything else. (Belt) Rare Belt - Belt should provide lots of Maximum Life, Armour, Resistances, Charm slots, and Strength. There is no need for anything else. |
|
| Min. requirements: +80% total Elemental Resistance +140 to Maximum Life Strength Optional affixes: Charm slots Armour Life Regeneration per second |
|
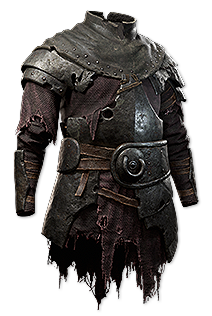 (Body Armour) Rare Body Armour - Body Armour should have high Maximum Life, Resistances, and Armour. If you have an Amulet with over 50 Spirit, it won't be needed here. (Body Armour) Rare Body Armour - Body Armour should have high Maximum Life, Resistances, and Armour. If you have an Amulet with over 50 Spirit, it won't be needed here. |
|
| Min. requirements: +150 to Maximum Life +40% total Elemental and Chaos Resistance Optional affixes: Armour #% of Armour also applies to Elemental Damage Strength Spirit |
|
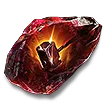
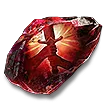
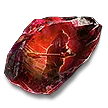
 (Jewel) Rare Jewels - Ruby Jewels are the most suitable. On them, prioritise "increased Defences from equipped Shield" with "increased Damage against Enemies with Fully Broken Armour". (Jewel) Rare Jewels - Ruby Jewels are the most suitable. On them, prioritise "increased Defences from equipped Shield" with "increased Damage against Enemies with Fully Broken Armour". |
|
| Optional affixes: increased Defences from equipped Shield increased Global Physical Damage increased Damage against Enemies with Fully Broken Armour increased Armour Gain # Rage when hit by an Enemy Gain 1 Rage on Melee Hit |
|
|
If you have any other build requests please leave that in the comments below. We are always open to suggestions and constructive feedback.
Pictures used in this article are the intellectual property of Grinding Gear Games.