
Blade Vortex Chieftain Marauder Build
Easily the strongest Build of the Mirage League that deals a tremendous amount of damage, scaled through your own Defense and Minion's Life.Minion Pact Blade Vortex
Chieftain Build
Updated for Patch 3.28
The Best Crafty Guides by Odealo
| Guide notes | |||
| March 29, 2026 -Build created |
|||
| Build overview | |||
| Tags: [MELEE] [ELEMENTAL] [LIFE] | |||
|
Budget: Defenses: |
|
Boss DPS: AoE: |
|
The Minion Pact is a new Exceptional Support Gem that is completely out of tune compared to other methods of scaling Damage if used in a specific combination. It Sacrifices your Minion to add a small portion of their maximum Life as Added Physical Damage for your Spells. It is just 3% of their Life, but if you pick the correct monster to raise as a Spectre and scale its Life, it leads to over 30,000 added Physical Damage to your Spell, which is completely absurd. Moreover, the Blade Vortex can snapshot this bonus Damage for its entire duration, meaning as long as you never let your stacks completely disappear, you will hold this bonus Damage for the entire Map. If you lose your streak for any reason, you can simply leave the Map and enter again, as your Spectres will respawn upon moving location automatically.
The recommended Spectre to Raise is Unholy Aberration, which has the best Life scaling among all Spectres. It is a spider monster that appears in the interphase during the fight with the Depraved Trinity Boss in Act 9 of the Campaign, Carcass Map, or Nightmare Abomination Map. Other notable mentions are Perfect Meatsacks that have lower maximum Life, but can be easily bought as Itemised Corpses from Rituals, or Perfect Dark Marionettess, which have even less Life, but automatically resurrect after death and apply Scorch.
You barely need any investments into Damage to reach absurd amounts of DPS. You should focus on Defense and Clear Speed instead. The Chieftain is the best pick for that, as it provides an easy way to obtain 90% all Elemental Resistances, and creates explosions that greatly supplement your AoE Clear. The Warcry route is optional, as they have to be used manually, but they grant you tons of Life Regeneration, Endurance Charges, and plenty of extra Fire Damage on top of that. Since you only need to use your Blade Vortex every few seconds, adding extra Utility Skills to use in the meantime is not disruptive for smooth gameplay.
That said, you can't completely ignore scaling Damage. Our recommendation is to use the Rathpith Globe Shield, which increases your Spell Damage and Critical Strike Chance based on your maximum Life. You will also want to use the Nebulis Sceptre to increase your Elemental Damage based on your maximum Resistance. Lastly, use the Enmity Embrace to Penetrate tons of Fire Resistance based on your own Fire Resistance. With this Setup, you will gain tons of Damage by stacking defensive modifiers. In the end, you can expect to reach over 10,000 maximum Life and be almost immune to Elemental Damage.
You can also check our other Path of Exile builds right over here Odealo's Crafty Guides - Full List
1. Gameplay
The first use of Blade Vortex will consume your Spectre and preserve the bonuses of Minion Pact until it falls off. Try to keep it active at all times; otherwise, you would have to re-enter the Map to resurrect the Spectre. Use Shield Charge and Frostblink for mobility. Using Life Flask has almost no effect - you have to use percentage-based Recovery, such as Leech or Enduring Cry. To boost your Damage against Bosses, use Assassin's Mark and Infernal Cry.
|
|
|
|

2. Build's PROS & CONS
| PROS |
|
| CONS |
|
3. Leveling tips
The Exceptional Gem requires at least level 72 to use. Use our Righteous Fire Chieftain Build Guide to smoothly progress through the Campaign.
4. Final Skill Tree, Ascendancy Points, and Pantheon
Final Skill Tree:
113 Points Final Skill Tree (doesn't include Cluster Jewels)
119 Points Path of Building (PoB) link
Ascendancy points:
Preferably in that order:
- Tasalio
- Hinekora
- Valako
- Sione
Pantheon:
Major God: Soul of Arakaali: 10% reduced Damage taken from Damage Over Time, +40% Chaos Resistance against Damage Over Time
Minor God: Soul of Ralakesh: 25% reduced Physical Damage over Time taken while moving, Moving while Bleeding doesn't cause you to take extra Damage
5. Final Gems links
| [DPS] Blade Vortex setup | |
 |
Blade Vortex - deals Damage over the duration and holds the initial bonuses of the Minion Pact until all stacks fall off. |
 |
Minion Pact Support - try to raise its level to 4, but it provides an absurd amount of Damage even at the first level too. |
 |
Greater Unleash Support |
 |
Elemental Focus Support |
 |
Increased Critical Damage Support |
 |
Inspiration Support |
 |
Added Fire Damage/More Duration/Lifetap/Cruelty Support - Imbue option |
| [Utility] Spectre setup | |
 |
Raise Spectre - the maximum Life of your Spectre depends on the Gem Level and the monster you Raise. The Unholy Aberration has 1400% Life Multiplier, the highest amount among Spectres. |
 |
Companionship Support - make sure it is your only Minion to get bonus Life. |
 |
Empower Support |
 |
Minion Life Support |
| [UTILITY] Mark setup | |
 |
Assassin's Mark - A Mark Skill that increases your Critical Strike Chance and Multiplier against a specific target, and generates Power Charges when you Hit Them. |
| [UTILITY] Mana Reservation setup | |
 |
Purity of Fire - improves your maximum Fire Resistance, which affects all Elemental Resistance thanks to the Chieftain Ascendency. |
 |
Zealotry - improves your Damage with Spells. You can also use Purity of Elements for Ailment Immunity. |
 |
Herald of Ash - adds Extra Fire Damage to your Physical Spells and applies Burning Debuff on nearby Enemies when you kill their allies. |
 |
Enlighten Support |
| [UTILITY] Life Reservation setup | |
 |
Vitality - improves your Life Regeneration and enables useful modifiers on the Watcher's Eye Jewel. |
 |
Arrogance Support |
| [UTILITY] Mobility setup | |
 |
Frostblink - an instantaneous teleport that leaves Chilling Ground in both locations. It is limited by a short Cooldown. |
 |
Shield Charge - a swift charge towards the targeted location. It is your main form of travel. |
 |
Faster Attacks Support |
| [UTILITY] Warcry setup | |
 |
Enduring Cry - regenerates a large amount of maximum Life and generates Endurance Charges. |
 |
Infernal Cry - grants Extra Fire Damage based on your Physical Damage and causes slain Enemies to explode. |
 |
Urgent Orders Support |
| [UTILITY] Righteous Fire setup | |
 |
Righteous Fire - inflicts heavy Fire DoT on yourself but grants a massive bonus to Spell Damage. You can also use the Vaal version for a larger burst. |
|
|
5. Gear Setup
Your Damage scaling comes from certain Unique Items and specific modifiers on your Gear, but none of them are truly mandatory for the core Minion Pact interactions. Your main goal on the remaining Rare Items is to get as much maximum Life, Energy Shield, and Fire or Chaos Resistance as possible. The Life of your Minions should be scaled by Gem Levels and special Jewels.
|
Stat priorities on items:
|
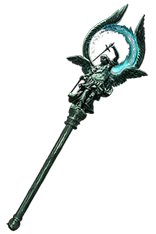 (Weapon) Nebulis - increases your Elemental Damage by 450% and might provide useful Synthesis Implicits. (Weapon) Nebulis - increases your Elemental Damage by 450% and might provide useful Synthesis Implicits. |
|
| <Three random synthesis implicit modifiers> (60-120)% increased Implicit Modifier magnitudes (15-20)% increased Cast Speed (5-10)% increased Elemental Damage per 1% Fire, Cold, or Lightning Resistance above 75% |
|
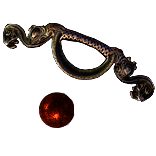
 (Weapon) Divinarius - a better option for your Clear Speed, as it provides a similar amount of Damage through Critical Strikes but also improves your Area of Effect. (Weapon) Divinarius - a better option for your Clear Speed, as it provides a similar amount of Damage through Critical Strikes but also improves your Area of Effect. |
|
| 30% increased Global Critical Strike Chance (150-200)% increased Spell Damage Gain (100-200) Life per Enemy Killed Gain (50-100) Mana per Enemy Killed 30% increased Area of Effect (200-250)% increased Critical Strike Chance for Spells if you've Killed Recently +(60-100)% to Critical Strike Multiplier for Spells if you haven't Killed Recently |
|
 (Shield) Rathpith Globe - grants a massive amount of Critical Strike Chance and Spell Damage based on your maximum Life. You will lose 10% of your Life when you use a Spell, so a potent Regeneration and Leech are mandatory. (Shield) Rathpith Globe - grants a massive amount of Critical Strike Chance and Spell Damage based on your maximum Life. You will lose 10% of your Life when you use a Spell, so a potent Regeneration and Leech are mandatory. |
|
| (10-15)% Chance to Block Spell Damage (120-160)% increased Energy Shield 10% increased maximum Life Sacrifice 10% of your Life when you Use or Trigger a Spell Skill 5% increased Spell Critical Strike Chance per 100 Player Maximum Life 5% increased Spell Damage per 100 Player Maximum Life |
|
 (Body Armour) The Apostate - provides a large amount of maximum Life based on the Energy Shield from your other Armour pieces. Try to get a useful Corrupted Implicit here. (Body Armour) The Apostate - provides a large amount of maximum Life based on the Energy Shield from your other Armour pieces. Try to get a useful Corrupted Implicit here. |
|
| Has no Attribute Requirements or Energy Shield (Hidden) +(30-50) to Strength +(20-30)% to all Elemental Resistances Gain Maximum Life instead of Maximum Energy Shield from Equipped Armour Items |
|
 (Helmet) Rare Helmet - here you can get additional Gem Levels for your Spectres, ideally paired with the usual defensive modifiers. The Eldritch Implicits can improve your Minion's Life a bit further. (Helmet) Rare Helmet - here you can get additional Gem Levels for your Spectres, ideally paired with the usual defensive modifiers. The Eldritch Implicits can improve your Minion's Life a bit further. |
|
| Min. requirements: +300 to Maximum Life and Energy Shield combined +2 to Level of all Minion Skill Gems 70% Total Fire and Chaos Resistances Optional affixes: % increased Area of Effect Minions have #% increased maximum Life % of Physical Damage from Hits taken as Fire Damage |
|
 (Boots) Rare Boots - your Boots are responsible for your Movement Speed, ideally they should grant you the Onslaught Buff on top of that. The bonus Action Speed from the Eldritch Implicit is very useful, too. (Boots) Rare Boots - your Boots are responsible for your Movement Speed, ideally they should grant you the Onslaught Buff on top of that. The bonus Action Speed from the Eldritch Implicit is very useful, too. |
|
| Min. requirements: +200 to Maximum Life and Energy Shield combined 30% increased Movement Speed 70% Total Fire and Chaos Resistances Optional affixes: % chance to gain Onslaught for 4 seconds on Kill #% increased Action Speed Gain #% of Physical Damage as Extra Fire Damage % chance to Avoid Bleeding |
|
 (Gloves) Rare Gloves - your Gloves are very simple too, but make sure to get the remaining Damage Conversion here. To make your Clear Speed better, you can spec a bit into Ignite. (Gloves) Rare Gloves - your Gloves are very simple too, but make sure to get the remaining Damage Conversion here. To make your Clear Speed better, you can spec a bit into Ignite. |
|
| Min. requirements: +300 to Maximum Life and Energy Shield combined 10% of Physical Damage Converted to Fire Damage 70% Total Fire and Chaos Resistances Optional affixes: Inflict Fire Exposure on Hit, applying -#% to Fire Resistance #% chance to Unnerve Enemies for 4 seconds on Hit Ignites you inflict spread to other Enemies within 1.2 metres |
|
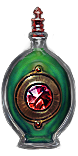
 (Belt) The Tides of Time - a budget way to make your Flask always active. It makes them 25% better, and you can use Unique Flasks too. (Belt) The Tides of Time - a budget way to make your Flask always active. It makes them 25% better, and you can use Unique Flasks too. |
|
| 100% increased Life Recovery from Flasks 100% increased Mana Recovery from Flasks Flasks applied to you have 25% increased Effect Life Flasks gain (0-3) Charges every 3 seconds Mana Flasks gain (0-3) Charges every 3 seconds Utility Flasks gain (0-3) Charges every 3 seconds |
|
 (Belt) Mageblood - extra Effect of your Flasks makes stacking Resistance much easier and more reliable. It is an aspirational upgrade, but it is not mandatory. (Belt) Mageblood - extra Effect of your Flasks makes stacking Resistance much easier and more reliable. It is an aspirational upgrade, but it is not mandatory. |
|
| +(25-35) to Strength +(30-50) to Dexterity +(15-25)% to Fire Resistance +(15-25)% to Cold Resistance Magic Utility Flasks cannot be Used Leftmost (2-4) Magic Utility Flasks constantly apply their Flask Effects to you Magic Utility Flask Effects cannot be removed |
|
 (Amulet) Defiance of Destiny - the best Amulet to boost your survivability, it grants a massive amount of extra recovery during combat. (Amulet) Defiance of Destiny - the best Amulet to boost your survivability, it grants a massive amount of extra recovery during combat. |
|
| +(60-80) to maximum Life +(10-40)% to Fire Resistance +(10-40)% to Cold Resistance +(10-40)% to Lightning Resistance Gain (10-20)% of Missing Unreserved Life before being Hit by an Enemy |
|
 (Amulet) Foulborn Xoph's Blood - grants a bit of extra Damage by Covering Enemies in Ash, which increases the Fire Damage they take from you. The Foulborn version also shifts a portion of the Physical Damage to be taken as Fire, for which you will have massive Resistance. (Amulet) Foulborn Xoph's Blood - grants a bit of extra Damage by Covering Enemies in Ash, which increases the Fire Damage they take from you. The Foulborn version also shifts a portion of the Physical Damage to be taken as Fire, for which you will have massive Resistance. |
|
| +(20-30) to Strength 10% increased maximum Life +(20-40)% to Fire Resistance 10% increased Strength Damage Penetrates 10% Fire Resistance Cover Enemies in Ash when they Hit you Avatar of Fire Foulborn modifier: (5-15)% of Physical Damage from Hits taken as Fire Damage |
|
 (Ring) Enmity's Embrace - is an easy way to deal with Enemy Fire Resistance, but requires extra effort put into stacking your own Fire Resistance. (Ring) Enmity's Embrace - is an easy way to deal with Enemy Fire Resistance, but requires extra effort put into stacking your own Fire Resistance. |
|
| (5-7)% increased maximum Life +(30-50) to Strength (10-20)% increased Fire Damage (75-65)% reduced Fire Resistance Take (300-500) Fire Damage when you Use a Skill Damage Penetrates Fire Resistance equal to your Overcapped Fire Resistance, up to a maximum of 200% |
|
 (Ring) Rare Ring - use a Rare Ring to get the basic Life and Resistances. You can also use Bone Ring to get a bit of extra Life for your Minions, and Reflect it to amplify it even more. (Ring) Rare Ring - use a Rare Ring to get the basic Life and Resistances. You can also use Bone Ring to get a bit of extra Life for your Minions, and Reflect it to amplify it even more. |
|
| Min. requirements: +100 to Maximum Life 70% Total Elemental and Chaos Resistances Optional affixes: +1 to minimum Frenzy charge Minions have #% increased maximum Life |
|
 (Jewel) Rare Jewels - use Jewels to raise your maximum Fire Resistance. Use the Harvest Resistance Craft to swap them from other types if possible. Other than that, focus on maximum Life and Critical Strike Multiplier. You can also improve your Minions or Flasks. (Jewel) Rare Jewels - use Jewels to raise your maximum Fire Resistance. Use the Harvest Resistance Craft to swap them from other types if possible. Other than that, focus on maximum Life and Critical Strike Multiplier. You can also improve your Minions or Flasks. |
|
|
Recommended affixes: |
|
 (Jewel) Large Cluster Jewel - you will need the Doryani's Lesson Notable to get Life Leech, ideally paired with Burning Bright to get extra AoE. Master of Fire can be picked to get automatic Fire Exposure. (Jewel) Large Cluster Jewel - you will need the Doryani's Lesson Notable to get Life Leech, ideally paired with Burning Bright to get extra AoE. Master of Fire can be picked to get automatic Fire Exposure. |
|
| Recommended Notables: 1 Added Passive Skill is Burning Bright 1 Added Passive Skill is Doryani's Lesson 1 Added Passive Skill is Prismatic Heart 1 Added Passive Skill is Master of Fire |
|
 (Jewel) Medium Cluster Jewel - if your main goal is to farm Bosses, pick a Jewel that increases the maximum Life of your Minions. For better Clear Speed focus on improving your AoE or Ignites of the Hinekora's explosions. (Jewel) Medium Cluster Jewel - if your main goal is to farm Bosses, pick a Jewel that increases the maximum Life of your Minions. For better Clear Speed focus on improving your AoE or Ignites of the Hinekora's explosions. |
|
| Recommended Notables: 1 Added Passive Skill is Assert Dominance 1 Added Passive Skill is Towering Threat 1 Added Passive Skill is Blessed Rebirth 1 Added Passive Skill is Hulking Corpses 1 Added Passive Skill is Cooked Alive 1 Added Passive Skill is Fan the Flames |
|
 (Jewel) Watcher's Eye - you will use Zealotry, Precision, and Vitality; all of them have some useful modifiers you can include in this Build. (Jewel) Watcher's Eye - you will use Zealotry, Precision, and Vitality; all of them have some useful modifiers you can include in this Build. |
|
| (4-6)% increased maximum Energy Shield (4-6)% increased maximum Life (4-6)% increased maximum Mana <Two or Three random aura modifiers> Recommended Aura modifiers: +(20-30)% to Critical Strike Multiplier while affected by Precision Gain a Flask Charge when you deal a Critical Strike while affected by Precision (100-120)% increased Critical Strike Chance against Enemies on Consecrated Ground while affected by Zealotry Critical Strikes Penetrate (8-10)% of Enemy Elemental Resistances while affected by Zealotry Gain Arcane Surge for 4 seconds when you create Consecrated Ground while affected by Zealotry |
|
 (Jewel) Elegant Hubris - use the Caspiro Keystone to remove Attribute Requirements. Aim for at least 2 Axiom Warden Notables to boost the maximum Life of your Minions. Other useful Notables grant Critical Strikes, Resistance, or Frenzy Charge generation. (Jewel) Elegant Hubris - use the Caspiro Keystone to remove Attribute Requirements. Aim for at least 2 Axiom Warden Notables to boost the maximum Life of your Minions. Other useful Notables grant Critical Strikes, Resistance, or Frenzy Charge generation. |
|
| Commissioned (2000-160000) coins to commemorate Caspiro Passives in radius are Conquered by the Eternal Empire Historic |
|
 (Jewel) The Light of Meaning - use this Jewel to gain an enormous amount of Fire Damage or Chaos Resistance, depending on what you lack the most. (Jewel) The Light of Meaning - use this Jewel to gain an enormous amount of Fire Damage or Chaos Resistance, depending on what you lack the most. |
|
| Passive Skills in Radius also grant +4% to Chaos Resistance Passive Skills in Radius also grant 6% increased Fire Damage |
|
 (Jewel) Unnatural Instinct - a very synergetic Jewel when placed near Light of Meaning. It also grants extra AoE and Skill Duration when placed near the Scion's starting area. (Jewel) Unnatural Instinct - a very synergetic Jewel when placed near Light of Meaning. It also grants extra AoE and Skill Duration when placed near the Scion's starting area. |
|
| Allocated Small Passive Skills in Radius grant nothing Grants all bonuses of Unallocated Small Passive Skills in Radius |
|
 (Jewel) Rational Doctrine - grants a permanent Consecrated Ground effect around you, which means extra Life Regeneration and Curse Effect Reduction. (Jewel) Rational Doctrine - grants a permanent Consecrated Ground effect around you, which means extra Life Regeneration and Curse Effect Reduction. |
|
| You have Consecrated Ground around you while stationary if Strength is your highest Attribute 25% chance to create Profane Ground on Critical Strike if Intelligence is your highest Attribute Effects of Consecrated Ground you create Linger for 4 seconds Effects of Profane Ground you create Linger for 4 seconds |
|
 (Jewel) Foulborn Red Dream - an expensive Jewel that grants up to 24% increased maximum Life and 20% Chaos Resistance. (Jewel) Foulborn Red Dream - an expensive Jewel that grants up to 24% increased maximum Life and 20% Chaos Resistance. |
|
|
Foulborn modifiers: |
|
  (Jewel) Forbidden Flesh&Flame - if you want to push your survivability to the limits, get the special Ascendency point available only through this Jewel combo that grants 25% Damage taken reduction. (Jewel) Forbidden Flesh&Flame - if you want to push your survivability to the limits, get the special Ascendency point available only through this Jewel combo that grants 25% Damage taken reduction. |
|
| Allocates <random Ascendancy Notable> if you have the matching modifier on Forbidden Flame/Flesh Recommended Notable: Indomitable Resolve |
|
 (Flask) Overflowing Chalice - this Flask, combined with the Tides of Time Belt, makes sustaining your Flasks very easy even during Boss encounters. It combines very well with other Unique Flasks if you don't have Mageblood yet. (Flask) Overflowing Chalice - this Flask, combined with the Tides of Time Belt, makes sustaining your Flasks very easy even during Boss encounters. It combines very well with other Unique Flasks if you don't have Mageblood yet. |
|
| (40-60)% increased Charge Recovery Gains no Charges during Effect of any Overflowing Chalice Flask (50-100)% increased Charges gained by Other Flasks during Effect |
|
| 40% increased Damage Creates Consecrated Ground on Use (20-40)% increased Duration Consecrated Ground created by this Flask has Tripled Radius Consecrated Ground created during Effect applies (7-10)% increased Damage taken to Enemies (100-150)% increased Critical Strike Chance against Enemies on Consecrated Ground during Flask effect |
|
 (Flask) Progenesis - another great source of extra survivability, but it is also very expensive. (Flask) Progenesis - another great source of extra survivability, but it is also very expensive. |
|
| (20-10)% reduced Charges per use (-35-35)% increased Duration When Hit during effect, 25% of Life loss from Damage taken occurs over 4 seconds instead |
|
 (Flask) Oriath's End - if you want yet another source of explosions, make sure to use this Flask. They are far weaker than Hinekora's, but also more reliable. (Flask) Oriath's End - if you want yet another source of explosions, make sure to use this Flask. They are far weaker than Hinekora's, but also more reliable. |
|
| (20-40)% increased Charge Recovery Enemies you Kill during Effect have a (20-30)% chance to Explode, dealing a tenth of their maximum Life as Damage of a Random Element |
|
 (Flask) Cinderswallow Urn - it is a good source of Osnlaugh Buff, and it can also roll a special modifier to apply Malediction on your Enemies, which lowers the Damage they deal. (Flask) Cinderswallow Urn - it is a good source of Osnlaugh Buff, and it can also roll a special modifier to apply Malediction on your Enemies, which lowers the Damage they deal. |
|
| +(10-20) to Maximum Charges Recharges 5 Charges when you Consume an Ignited corpse Enemies Ignited by you during Effect take (7-10)% increased Damage Recover (1-3)% of Life when you Kill an Enemy during Effect Catarina's Veiled (prefix): Enemies Ignited by you during Effect have Malediction |
|
|
Other suggested Flasks:
|
|
   |
|
|
If you have any other build requests please leave that in the comments below. We are always open to suggestions and constructive feedback.
Pictures used in this article are the intellectual property of Grinding Gear Games.
