 Buy/Sell
 Log in

Death Trap Rogue Build for Diablo 4
Build around Death Trap, cut its Cooldown and bring the next explosion faster with Beastfall Boots and Aspect of Aftermath.Death Trap Rogue Build
Last Update: November 11, 2026
Introduction
The Death Trap Rogue fills an area with explosive Shadow damage and Stun Grenades, then moves on before the next pack has time to react. Death Trap: Explosive Trigger adds the Grenade tag and scatters additional explosives whenever the trap activates. With Scoundrel's Leathers, the trap can be thrown into the middle of a group while the Rogue stays at a safer distance. The finished build can cast its Ultimate repeatedly, turning what is normally a long-Cooldown attack into its primary source of damage.
That repeated casting comes from a precise interaction between Preparation, Beastfall Boots and Aspect of Aftermath. Beastfall Boots spends all available Energy when Death Trap is cast, adding damage according to the amount consumed. Preparation reduces the Ultimate's Cooldown whenever enough Energy is spent, and Aftermath restores Energy for each rank invested in Death Trap. The character needs all three effects working together: a large enough resource pool, sufficient Energy returned after the cast and a short enough Cooldown for Preparation to finish the reset.
Sea Lord's Fine Gloves increases Maximum Energy through Momentum stacks built with Shadow Step, while Eyes in the Dark adds a second activation against tougher enemies. The Applied Alchemy Talisman set improves Trap and Grenade damage, making Explosive Trigger particularly valuable. Smoke Grenade and Cold Imbuement provide additional control; the latter works through Imbueable Shadow Step attacks to apply Chill and help generate Barriers. Dark Shroud and Concealment protect the Rogue during close engagements.
The main obstacle is the equipment, not the skill rotation. Before the Energy and Cooldown thresholds are met, Death Trap may leave a considerable gap between explosions, especially against a lone Boss. Trap Arm Time Reduction is also important: traps need to activate quickly enough that new casts do not overwrite traps still waiting to spring. Once these requirements are covered, Shadow Step supplies the mobility to cross dungeons quickly, but staying alive still requires careful use of Dark Shroud and Concealment.
Pros
- Fast Pack Clearing
- Excellent Mobility
- High Ultimate Damage
- Strong Crowd Control
Cons
- Strict Energy Requirements
- Expensive Endgame Gear
You can also visit this page to check our other Best Diablo 4 Builds.
Equipment
Boots - Beastfall Boots drives the entire resource cycle. Casting the non-Channeled Death Trap Ultimate consumes the Rogue's Energy and increases damage according to the amount spent. The Boots also restore Energy when a Cooldown Skill is used, contributing to the refill after each cast. Prioritize a high roll on the Unique effect and a Greater Affix on Maximum Resource. A large Energy pool strengthens Death Trap and gives Preparation more Cooldown reduction in the same activation.
Amulet - Aspect of Aftermath supplies most of the Energy returned after Death Trap. Its restoration scales with Death Trap Skill Ranks, and the Amulet improves the Aspect's potency. Aim for at least 225 Maximum Energy, enough recovery to refill the resource spent, and a Death Trap Cooldown of 15 seconds or less. Spending 225 Energy activates Preparation's Cooldown reduction three times, which is why the 15-second target matters. A strong Aftermath roll and additional Ultimate or Trap Skill Ranks can save several other equipment slots from needing resource affixes. The three requirements must be met together.
Chest Armor - Scoundrel's Leathers lets you throw Trap Skills and directly increases their damage. Ranged placement is useful against ranged enemies, Elites with dangerous ground effects and Bosses that punish close contact. Pants - Eyes in the Dark strengthens Death Trap and allows it to rearm after activation on its own timer. The second explosion adds damage during longer encounters, although it does not replace the separate Cooldown reset needed to cast Death Trap again. Look for useful Trap Skill Ranks on the Chest and Cooldown Reduction on the Pants.
Gloves - Sea Lord's Fine Gloves increases Maximum Energy, Energy Regeneration and damage for each Momentum stack. Shadow Step is a Cutthroat Skill, so moving between enemies helps generate and maintain those stacks. Check your Maximum Energy while Momentum is active: the Gloves' multiplier may be enough to reach the 225 target with fewer resource affixes elsewhere. Add Trap Arm Time Reduction wherever available, since a fast reset loses value if the previous Trap has not yet activated.
Helm - Leoric's Crown increases the effect of the gem socketed into it. Choose the gem according to the damage or survivability your character needs; its Attack Speed affix is also useful when moving rapidly through packs. Off-Hand - Misericorde gives Lucky Hits against trapped enemies a chance to shorten Trap Cooldowns and build additional Trap damage. A Legendary Dagger with good Cooldown Reduction and offensive affixes can fill this slot until a suitable Misericorde drops. The Unique becomes more attractive when your normal Death Trap reset is already close to working consistently.
Main Hand - Legendary Sword with Aspect of Surprise supports Shadow Step and Evade by releasing Stun Grenades that briefly control enemies. These grenades benefit from the build's Grenade bonuses, making movement Skills contribute damage as well as safety. Place Trickster's Aspect on a Legendary Bow to increase Trap and Grenade damage. The two-handed weapon slot boosts the offensive Aspect's effect while leaving both melee weapon slots available for the Sword and Misericorde.
Ring 1 - Aspect of Apogeic Furor reduces the Cooldowns of your other Skills when you cast Death Trap. This helps bring back Shadow Step, Concealment and the defensive tools needed between attacks. Ring 2 - Vehement Brawler's Aspect improves damage after an Ultimate cast and adds two Ultimate Skill Ranks. Those ranks also increase Aftermath's Energy restoration. Use Cooldown Reduction and Maximum Resource affixes on compatible Jewelry when needed; the exact mix depends on your Death Trap ranks and the Amulet's Aspect roll.
Prioritize Ranks to Death Trap, Cooldown Reduction, Maximum Energy, Trap Arm Time Reduction, Dexterity, Critical Strike Chance, Critical Strike Damage Multiplier and Vulnerable Damage Multiplier. Once the reset is working, Shadow Damage Multiplier and Trap damage improve the explosions, while Attack Speed makes Shadow Step and repeated casting smoother. Greater Affixes on Cooldown Reduction, Death Trap Ranks and Maximum Resource are especially useful. Keep Armor, Elemental Resistances and Maximum Life at safe values before replacing defensive rolls with damage.
Applied Alchemy
- Berú of Applied Alchemy
- Fer of Applied Alchemy
- Linta of Applied Alchemy
- Mlor of Applied Alchemy
- Phoba of Applied Alchemy
- (2) Set: Grenade and Trap Skills deal 60%[x] increased damage. Casting one reduces active Grenade and Trap Cooldowns by 1 second.
- (3) Set: Gain 5% Damage Reduction per Grenade or Trap Skill used in the last 12 seconds, up to 30%.
- (5) Set: Casting a Grenade or Trap Skill releases Stun Grenades. Enemies hit by them take 250%[x] increased damage from Grenade and Trap Skills for 6 seconds.
Beastfall Boots
- Maximum Resource
When you Cast a non-Channeled Ultimate Skill, it consumes all of your Energy and deals [0.60 - 0.75]%[x] increased damage per Energy consumed. Using a Cooldown restores 25 Energy.
Scoundrel's Leathers
- Ranks to Trap Skills
Your Trap Skills can be thrown and deal [45 - 60]%[x] increased damage.
Sea Lord's Fine Gloves
- Attack Speed
Casting or Channeling a Cutthroat Skill grants Momentum, up to 10 stacks. Casting a Marksman Skill removes one stack. Each stack increases Maximum Energy by [2.50 - 3.00]%, Energy Regeneration by [2.50 - 3.00]%[x] and damage by [5.00 - 6.00]%[x].
Eyes in the Dark
- Cooldown Reduction
Death Trap deals [75 - 90]%[x] increased damage and will rearm itself after activating, once every 10 seconds.
Leoric's Crown
- Attack Speed
This item counts as Jewelry. The effect of a gem socketed in this Helm is increased by [35 - 50]%[x].
Misericorde
- Cooldown Reduction
Lucky Hit: Dealing damage to an enemy affected by a Trap Skill has up to a 40% chance to reduce the active Cooldowns of Trap Skills by 30% and increase Trap Skill damage by [9.0 - 12.0]%[x] for 10 seconds, up to [45 - 60]%[x].
Protection of the Prime
While moving, gain [25 - 30]% Dodge Chance and Damage Reduction. These benefits linger for 2 seconds after you stop. After standing still for 2 seconds, become Unstoppable until you move.
The main equipment layout reserves Helm, Chest Armor, Gloves, Pants, Boots and the Off-Hand for the listed Uniques. Aftermath occupies the Amulet, Apogeic Furor and Vehement Brawler take the Rings, Surprise goes on the one-handed Sword, and Trickster uses the Bow. Each Legendary Aspect has a compatible slot and can be upgraded without disrupting the fixed Unique pieces.
Aspect of Aftermath
Casting an Ultimate Skill generates 8.0 Energy per Skill Rank it has.
Aspect of Apogeic Furor
Casting an Ultimate Skill reduces the Cooldowns of your other Skills by [6.5 - 10.0] seconds.
Vehement Brawler's Aspect
Casting an Ultimate Skill increases your damage by [35 - 55]%[x] for 8 seconds. Gain 2 additional Ultimate Skill Ranks.
Aspect of Surprise
When you Evade or Shadow Step, you drop a cluster of exploding Stun Grenades that deal Physical damage and Stun enemies for 1 second. Your Stun Grenades deal 120%[x] increased damage.
Trickster's Aspect
Trap and Grenade Skills deal [40 - 60]%[x] increased damage.
Energy and Cooldown check: cast Death Trap against a single durable target with Momentum already active. If Energy is not restored close to maximum, improve Aftermath, Death Trap Skill Ranks or the available resource recovery. If the Energy returns but Death Trap remains on Cooldown, add Cooldown Reduction and develop the relevant Paragon nodes. If subsequent casts fail to explode promptly, increase Trap Arm Time Reduction. These are three separate gearing problems, and identifying the failing step prevents unnecessary upgrades.
Skills
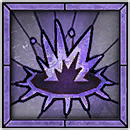 15/15
Primary DPS: Death Trap is a Shadow-damage Ultimate that arms on the ground and explodes when an enemy enters its area. Explosive Trigger makes it a Grenade Skill and releases a spread of Stun Grenades with every activation. This allows Death Trap to benefit from the Trap and Grenade bonuses on Applied Alchemy and Trickster's Aspect. Scoundrel's Leathers lets you throw it toward a group or place it safely on the path of a moving Boss. This variant does not pull enemies together, so aim for the area they are about to occupy.
Maximize Death Trap and take Explosive Trigger, the Cooldown upgrade and the appropriate defensive or control upgrade for your remaining points. Additional ranks improve direct damage and the Energy returned by Aspect of Aftermath. Keep Trap Arm Time Reduction high enough for each explosion to trigger before the next cast can overwrite it. Against bosses, activating a well-placed Trap matters more than casting into empty ground.
 1/15
Mobility/Utility: Shadow Step moves the Rogue rapidly between targets and helps build Momentum through Sea Lord's Fine Gloves. Aspect of Surprise causes each use to scatter Stun Grenades, improving control as you enter a group. Shadow Step can also carry Cold Imbuement, allowing its hit to apply Chill and Weaken while supporting the Barrier from Buffered Battery. Keep it available when a Boss prepares a dangerous attack.
Choose Artifice and the Cooldown upgrade. Artifice allows the skill to be used freely for movement, while further Cooldown Reduction keeps the next cast close at hand. With enough investment, Shadow Step can move the Rogue between packs almost continuously. It is also your main way to keep Momentum stacks active without relying on Marksman attacks.
 1/15
Defense/Utility: Concealment provides Stealth and a reliable escape when an Elite pack crowds the Rogue or a Death Trap reset falls short. It also gives you a moment to refresh Dark Shroud and prepare the next burst. Breaking Stealth at the right time helps avoid control effects and resume attacks safely, particularly when the Boss arena leaves little room to move.
Take the Ferocity and Resolve upgrades for additional offensive and defensive value. Use Concealment before a dangerous pull or during a forced pause in a Boss fight. Keep a charge available when possible; losing control of your character while Energy is empty is much more dangerous than briefly delaying the next explosion.
 15/15
Defense: Dark Shroud surrounds the Rogue with protective shadows. At maximum shadows, it reduces direct damage and improves Elemental Resistances, which is valuable when moving through several groups in quick succession. Each direct hit can consume a shadow, so entering the next room with a depleted Shroud leaves you much more exposed even when the Death Trap loop works perfectly.
Invest heavily in Dark Shroud. Shadow Dancer improves Dodge Chance, and the Consume Chance upgrade can help preserve the active shadows. Refresh the Skill regularly, particularly before Elites and Bosses. Its defensive benefits complement the Protection of the Prime Charm and Raheir's assistance.
 1/15
Crowd Control: Smoke Grenade deals Physical damage and Dazes enemies in its area, giving the Rogue a moment to place Death Trap and move to the next target. It is also a Grenade Skill, so it contributes to the bonuses provided by Applied Alchemy. Use it on dangerous Elites before the main explosion; against a Boss, its supporting damage and control interactions remain useful while the enemy approaches Stagger.
Keep Smoke Grenade at a low base rank and choose upgrades that apply Vulnerable or improve its Size, depending on the enemies you are facing. The shorter Cooldown allows frequent use between Death Trap casts, and Aspect of Apogeic Furor helps bring it back after each Ultimate. Do not spend points on a Core Skill conversion that would turn this into a different attack.
 1/15
Control/Barrier: Cold Imbuement adds Cold damage, Chill and Weaken to Imbueable Skills. This build uses it through Shadow Step, giving the mobility Skill a defensive purpose when it hits an enemy. The extra control helps keep Elites away from you while Death Trap arms, and Cold Imbuement does not need to contribute a large share of damage to earn its place on the Skill Bar.
Choose Buffered Battery for a chance to gain a Barrier from Cold-Imbued hits. The Resolve or Cooldown upgrades are useful supporting choices. Activate Cold Imbuement before stepping into a pack or crossing a Boss through Shadow Step. Death Trap itself cannot be imbued, so the purpose of this Skill is protection and control during movement.
Core Rotation
Keep Dark Shroud active while approaching a pack, then use Shadow Step to reach a safe firing angle and maintain Momentum. Apply Cold Imbuement before Shadow Step when a Barrier or Chill will help. Smoke Grenade Dazes the most dangerous targets, and Death Trap follows where its explosion and Stun Grenades can hit the group. Beastfall Boots spends your Energy, Aftermath restores it, and Preparation shortens Death Trap's remaining Cooldown. Continue casting as long as the full cycle completes; use Shadow Step to move toward the next pack while the previous grenades finish exploding.
For a Boss, build Momentum before the damage window and place Death Trap where the Boss will remain long enough for the trap to arm. Follow the explosions with Smoke Grenade whenever available, and refresh Dark Shroud before a heavy incoming attack. Eyes in the Dark can produce an extra detonation on a tougher target. If the resource bar does not refill or the Ultimate stays on Cooldown, use Concealment and Shadow Step to survive the gap. Avoid spamming overlapping unarmed Traps: the activation speed still matters even when your Cooldown is fully reset.
Miscellaneous
Paragon Board
Begin on the Starting Board with Canny, taking efficient Dexterity, Maximum Life and nearby damage nodes on the way to the Glyph socket. Add No Witnesses with Versatility to support the Ultimate Skill rotation. Deadly Ambush is one of the most important boards for the finished build: it has Trap-related bonuses, including Cooldown and arm-time support through Spring-Loaded. Use Ambush in its Glyph socket to strengthen damage against enemies affected by your Traps.
Continue through Cheap Shot with Grenadier and Danse Macabre with Explosive. The first reinforces damage against controlled enemies and strengthens the grenades created by Explosive Trigger, while the second develops the Shadow and Trap damage package. Prioritize the Glyph sockets and useful Rare Nodes, then spend remaining Paragon points on Dexterity, Maximum Life and defenses needed for your chosen difficulty.
Your final route should support the three key requirements: enough Energy for Preparation, enough Cooldown Reduction to keep Death Trap available and sufficiently fast Trap activation. Do not travel far for minor damage bonuses while one of those conditions is still missing. The most valuable Glyph upgrades are Versatility, Ambush, Grenadier, Explosive and Canny, with extra priority given to the ones already placed on your active boards.
Specialization
Choose Preparation. Beastfall Boots spends the full Energy pool when Death Trap is cast, triggering Preparation's Ultimate Cooldown reduction for each required amount spent. At 225 Energy, this provides the reduction needed for a Death Trap with roughly 15 seconds of remaining Cooldown. Aspect of Aftermath restores Energy based on Death Trap's ranks, while the Boots contribute additional Energy when a Cooldown Skill is used. The Specialization can only produce repeated casts when the Energy refill and Cooldown reduction both cover the full cycle.
Runes
Use Cir + Que for periodic Earthen Bulwark protection. Frequent Skill casts generate Offering for Cir, while Que grants a Barrier when enough Offering is available. Pair Zan + Gar in another valid two-socket item to improve Critical Strike Chance through Ultimate Skill use. These Runewords strengthen an already functioning Death Trap setup; they do not replace the necessary Energy restoration or Cooldown Reduction on gear.
Talisman
The five-piece Applied Alchemy set is recommended because both Death Trap: Explosive Trigger and Smoke Grenade activate its Trap and Grenade bonuses. Two pieces increase damage and reduce active Trap and Grenade Cooldowns when one of those Skills is cast. Three pieces add Damage Reduction during repeated attacks. With five pieces, casts release additional Stun Grenades that make affected enemies take substantially more damage from your next Trap and Grenade hits.
Equip Berú, Fer, Linta, Mlor and Phoba of Applied Alchemy, then place Protection of the Prime in the sixth Charm slot. The extra Dodge Chance and Damage Reduction while moving are valuable for a Rogue that frequently uses Shadow Step. Favor Maximum Energy, Trap Skill Ranks, Dexterity, Critical Strike Damage and key defensive affixes on the Charms. You need a Seal that unlocks the sixth Charm slot to equip all six pieces.
Mercenary
Raheir is the recommended Hired Mercenary with Bastion for protection during dangerous attacks. Use Subo as Reinforcement for his scouting utility while moving rapidly through dungeons.
Final Thoughts
Death Trap Rogue relies on repeating one powerful Ultimate, with Explosive Trigger and Applied Alchemy filling the target area with Stun Grenades. Beastfall Boots, Preparation and Aftermath keep the attack available once the Energy and Cooldown requirements are met, while Scoundrel's Leathers improves its reach and Eyes in the Dark adds damage against tougher enemies. Shadow Step carries the Rogue through dungeons, and Dark Shroud, Concealment and Cold Imbuement cover the moments when another Trap cannot be cast. The equipment takes work to assemble, but each important upgrade has a clear purpose in the rotation.
We plan to continue updating this guide alongside future Diablo 4 patches and expand our Diablo 4 content with additional builds, strategies, and seasonal updates.
If you have suggestions or would like to see other Builds covered, feel free to share your feedback - it helps us improve and create better guides for the community.
Images used in this article are the intellectual property of Blizzard Entertainment or its corresponding owners.