 Buy/Sell
 Log in

Evasion Stacking Blade Vortex of Scythe Assassin Build
An Assassin build using the Unblinking Eye Helmet to increase its damage alongside Evasion.Blade Vortex
Assassin Build
Updated for Patch 3.29
The Best Crafty Guides by Odealo
| Guide notes | |||
| August 2, 2026 -Build created |
|||
| Build overview | |||
| Tags: [TRIGGER] [CHAOS] [HYBRID] | |||
|
Budget: Defenses: |
|
Boss DPS: AoE: |
|


The build takes full advantage of The Unblinking Eye Helmet. It reads: Increases and Reductions to your Evasion Rating also apply to your Spell Damage. We can reach nearly 1000% increased Spell Damage this way, while also keeping the Evasion bonus to make the character more durable. This global increase to Evasion is sourced mainly from the Skill Tree passives, conditional Evasion from ES & Evasion Masteries, a clever combination of Jewels, Dexterity, and a Flask's Suffix. The "increase" to Evasion should be paired up with "more" Evasion (from Grace and Stibnite Flask) and flat Evasion from Items. Evasion, inherently, grants a chance to avoid Attacks and is capped at 95%, but increasing it way beyond the reasonable number, adding Blind, and reducing enemies' Accuracy by other means will improve your survivability nonetheless. It guarantees reaching the cap even against bosses and enemies with increased Accuracy. Because of the Entropy, Evasion is more reliable and seems fairer. It is supplemented by Wind Dancer and Ghost Dance to better protect the character. Against Spells, you rely on Spell Suppression. Assassin's Mistwalker with Phase Run will provide you with additional defensive layers, mainly mobility.
The second piece of the damage puzzle is Critical Strike Damage. As an Assassin using a Spell with a high base Crit Chance, we can effortlessly reach 100% Crit Chance to then focus on scaling Crit Damage to multiply the damage tenfold. The Bifurcation of Critical Strikes from Mystical Infusion will double that Multiplier if the Crit Chance is high enough. The last element to be taken care of is the actual flat damage that we plan to increase and multiply, and in the case of Spells, it will be sourced predominantly from Gem Level. The setup we went for consists of Vaal Blade Vortex and Blade Vortex of the Scythe with Void Sphere of Rending, Triggered by Channelling Cyclone. Physical Spells like these have the highest Crit Chance. The main advantage of such a setup, where Cast Speed is irrelevant, is its relatively high Trigger Rate. We've used two Cold Iron Points, but Poet's Pen & The Squire combo to Trigger these Spells is a good candidate if you prefer a different playstyle.
1. Gameplay
Cyclone, or other such Attack, will Trigger your Spells for you: Blade Vortex and Void Sphere. Vaal Blade Vortex cannot be Triggered, so you'll cast this one yourself, preferably empowered by Pact of K'Tash. There's also the Despair Curse to be cast if you've extended your Curse Limit to at least two, and a movement Skill such as Whirling Blades or Frostblink. Your passive skills are Auras such as Grace, Zealotry, Precision, and Automated Skills like Phase Run and Steelskin.
|
|
|
|


2. Build's PROS & CONS
| PROS |
|
| CONS |
|
3. Leveling tips
When levelling up, you should ignore Evasion; the helmet has a level requirement of 57. Focus rather on Spell Damage and Critical Strike nodes. As an assassin, you can allocate unstable infusion first and level up with power siphon very comfortably, and then put the helmet on for a nice damage boost. If you have it ready, start picking up increases to evasion upon entering the second part of the campaign. If you don't have the Helmet, start with Mistwalker to move faster. You may switch to Ethereal Knives, Blade Blast with bladefall spellslinger combo, or Soulrend of Reaping if you need more damage at any time, but Power Siphon and Kinetic Blast are very good Wand Attacks that benefit from increases to Spell Damage; thus, The Unblinking Eye will improve their damage. You can venture up the skill tree for the Wand passives and masteries. The items worth examining are Doedre's Tenure, Karui Ward, Poet's Pen, Foxshade, and Storm Prison.
| [DPS] Power Siphon setup | |
 |
Power Siphon - A Wand Attack that benefits from increases to Spell Damage, grants Power Charges, and has Power Charges scaling. |
 |
Added Lightning Damage Support |
 |
Faster Attacks Support |
 |
Power Charge On Critical Support |
 |
Inspiration Support |
| [UTILITY] other skills | |
 |
Herald of Ice - Adds Cold Damage to Attacks. |
 |
Herald of Thunder - Adds Lightning Damage to Attacks. |
 |
Precision - Adds Accuracy and increases Critical Strike Chance. |
Bandits:
An additional Passive Skill Point seems like the best option.
4. Final Skill Tree, Ascendancy Points, and Pantheon
Final Skill Tree:
108 Points Final Skill Tree (doesn't include Cluster or Unique Jewels)
123 Points Path of Building (PoB) link
Ascendancy points:
Preferably in that order:
- Mistwalker
- Unstable Infusion
- Deathmarked
- Mystical Infusion
Pantheon:
Major God: Soul of the Brine King: You cannot be Stunned if you've been Stunned or Blocked a Stunning Hit in the past 2 seconds; 100% chance to Avoid being Frozen; 50% reduced Effect of Chill on you
Minor God: Soul of Garukhan: 60% reduced Effect of Shock on you
5. Final Gems links
| [DPS] Cyclone setup | |
 |
Cyclone - A Channelling Attack whose only purpose is to Trigger Blade Vortex of the Scythe and Void Sphere of Rending. |
 |
Cast while Channelling Support - It lets you Trigger linked Spells by Channelling Cyclone. |
 |
Blade Vortex of the Scythe - A simplified version of Blade Vortex with only one active Blade limit, albeit a strong one. |
 |
Void Sphere of Rending - A smaller version of Void Sphere that deals actual damage and has no Cooldown. |
 |
Increased Critical Strikes Support - Increases Crit Chance. |
 |
Increased Critical Damage Support - Adds Critical Strike Multiplier, |
| [DPS] Vaal Blade Vortex setup | |
 |
Vaal Blade Vortex - These are independently spinning Blades to be used against tough enemies. |
 |
Void Manipulation Support - More Chaos Damage; inability to deal Elemental Damage. |
|
Increased Critical Strikes Support |
|
Increased Critical Damage Support |
| [UTILITY] Reservation setup | |
 |
Flesh and Stone - Stay in the Sand Stance to take up to 20% less damage from nearby enemies. |
 |
Grace - Since you stack "increases" to Evasion, the Flat Evasion and "more" Evasion of Grace will be especially impactful. |
 |
Herald of Purity - More Physical Damage for more damage. Minions are irrelevant. |
 |
Enlighten Support - Linked Spells Reserve less Mana. |
| [MOBILITY] Shield Charge setup | |
 |
Shield Charge - A movement Skill to traverse maps with haste. You can replace it with Whirling Blades if you don't have a Shield or Frostblink if you don't have sockets. |
|
Faster Attacks Support - Increases the Attack Speed of Shield Charge to move even faster. |
|
Inspiration Support - Used to reduce the Mana Cost of the Shield Charge. |
| [UTILITY] Automation setup | |
 |
Phase Run - Phasing increases Movement Speed and pairs up nicely with the Freedom of Movement notable. Use it only if you have a good source of Frenzy Charges. |
 |
Blood Rage - A source of Frenzy Charges on Kill and Attack Speed that drains your Life over time. It prevents ES Recharge, so you may want to skip it altogether and replace it with Steelskin instead. |
 |
Arcane Surge Support - Keep it at a level low enough so that a single Trigger of Phase Run will grant you the buff for Mana Regeneration and Cast Speed. It is very optional. |
 |
Automation - Automatically Triggers Blood Rage and Phase Run for you. |
| [UTILITY] Other skills | |
 |
Frost Shield - A defensive spell that reduces damage taken, but also grants some Crit Chance if needed. |
 |
Assassin's Mark - It's sourced from the Deathmarked passive, but you may as well use a Skill Gem linked to Mark on Hit. It grants mainly Crit Chance and Crit Multiplier. |
|
Precision - An optional Aura for Accuracy and Crit Chance, the two things that this build can benefit from. |
 |
Clarity - To fix Mana sustain, try a low-level Clarity combined with Watcher's Eye mods. |
 |
Zealotry - If you can afford to Reserve all your Mana, try to fit Zealotry in. It grants more Spell Damage, increases Spell Crit Chance, and creates Consecrated Ground. |
 |
Pact of K'Tash - Empowers your next Vaal Spell, which is Vaal Blade Vortex. |
|
|
5. Gear Setup
The build scales up its damage like any other Spellcaster, but in addition to that, with increases to Evasion thanks to The Unblinking Eye Helmet. They are sourced mostly from a Skill Tree because items usually grant local Evasion (unless stated otherwise), but that doesn't mean you don't want it. Evasion is a primary defensive layer that, with all the increases gathered, we can use to avoid almost every Attack. Reaching 100k of Evasion is easy, but a build focused on that can reach double or even triple the amount. Check the Wiki page for Evasion to see how it works exactly, but in short, you will get hit occasionally. Spell Suppression is important to not get one-shotted. The build uses both Life and ES since we cannot afford enough ES passives for Chaos Inoculation. Seek increases to the Gem Level of Blade Vortex and such, Crit Multiplier, Attack Speed up to 4 a second, enough Accuracy for the Attack, and a bit of Crit Chance if needed. Mana management can be tricky, so try lowering the cost of your Spells and get yourself a source of Mana Leech. Life Leech and ES Leech are also of the essence. You can Corrupt the Helmet and Rings for additional Maximum Power Charges, which are especially good here.
|
Stat priorities on items:
|
 (Helmet) The Unblinking Eye - A core element of the build. It increases Spell Damage alongside global increases to Evasion, but renders you unable to reduce Physical Damage with tools like Armour or Endurance Charges. (Helmet) The Unblinking Eye - A core element of the build. It increases Spell Damage alongside global increases to Evasion, but renders you unable to reduce Physical Damage with tools like Armour or Endurance Charges. |
|
| +(15-20)% chance to Suppress Spell Damage +(50-100) to Dexterity (120-160)% increased Evasion and Energy Shield Increases and Reductions to your Evasion Rating also apply to your Spell Damage Physical Damage Reduction is zero |
|
 (Body Armour) Rare Body Armour - We recommend a hybrid ES and Evasion Armour since ES is also very important. Add Spell Suppression and Resistances if able. For the Eldritch mods: Physical Damage taken as something else, increased Evasion Rating, or Crit Multiplier for Spell Damage. (Body Armour) Rare Body Armour - We recommend a hybrid ES and Evasion Armour since ES is also very important. Add Spell Suppression and Resistances if able. For the Eldritch mods: Physical Damage taken as something else, increased Evasion Rating, or Crit Multiplier for Spell Damage. |
|
| Min. requirements: high Maximum Energy Shield and Evasion Rating Spell Suppression Chance Optional affixes: Resistances |
|
 (Body Armour) The Perfect Form - "Evasion Rating is increased by Overcapped Cold Resistance" is a global modifier which makes this Armour good if you have exceptionally high Cold Resistance, but the Foulborn variant, a Vestigial Unique, or even a Rare Chest all may retain this valuable mod as an Implicit or Prefix. (Body Armour) The Perfect Form - "Evasion Rating is increased by Overcapped Cold Resistance" is a global modifier which makes this Armour good if you have exceptionally high Cold Resistance, but the Foulborn variant, a Vestigial Unique, or even a Rare Chest all may retain this valuable mod as an Implicit or Prefix. |
|
| +50% chance to Suppress Spell Damage (150-200)% increased Evasion Rating -30% to Cold Resistance Evasion Rating is increased by Overcapped Cold Resistance Acrobatics |
|
 (Weapon) Cold Iron Point - By Triggering via Cast while Channelling, you can equip two Cold Iron Points for Gem Levels, which grant a lot of damage with no downside. (Weapon) Cold Iron Point - By Triggering via Cast while Channelling, you can equip two Cold Iron Points for Gem Levels, which grant a lot of damage with no downside. |
|
| (40-45)% increased Global Critical Strike Chance +3 to Level of all Physical Spell Skill Gems Deal no Elemental Damage |
|
 (Weapon) Foulborn The Poet's Pen - Socketed Spell gets Triggered when you Attack (not on Attack Hit), so you're aiming for exactly 4 Attacks per second with it for the most optimal Trigger Rate. (Weapon) Foulborn The Poet's Pen - Socketed Spell gets Triggered when you Attack (not on Attack Hit), so you're aiming for exactly 4 Attacks per second with it for the most optimal Trigger Rate. |
|
| Cannot roll Caster Modifiers +1 to Level of Socketed Skill Gems per 25 Player Levels Trigger a Socketed Spell when you Attack with this Weapon, with a 0.25 second Cooldown Adds 3 to 5 Physical Damage to Spells per 3 Player Levels (8-12)% increased Attack Speed |
|
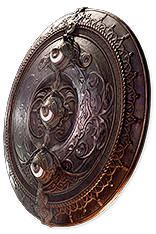 (Off-hand) The Squire - It's a piece that lets you create a six-link out of the Gem socketed in The Poet's Pen, so it's obviously what we're aiming for in such a case. (Off-hand) The Squire - It's a piece that lets you create a six-link out of the Gem socketed in The Poet's Pen, so it's obviously what we're aiming for in such a case. |
|
| 120% increased Block Recovery Has 3 Sockets +(5-8)% to Quality of Socketed Support Gems Socketed Support Gems can also Support Skills from your Main Hand (100-150)% increased Armour and Evasion +(3-5)% Chance to Block |
|
 (Gloves) Rare Gloves - On Gloves, get defensive stats like Maximum Life and ES or Evasion. Accuracy should not be needed if your Dexterity is high. For the Eldritch mods, get Life Leech from Chaos Damage and Unnerve on Hit or Attack Speed. (Gloves) Rare Gloves - On Gloves, get defensive stats like Maximum Life and ES or Evasion. Accuracy should not be needed if your Dexterity is high. For the Eldritch mods, get Life Leech from Chaos Damage and Unnerve on Hit or Attack Speed. |
|
| Min. requirements: high Maximum Energy Shield and Evasion Rating +80 to Maximum Life 40% total Resistances Optional affixes: increased Damage while Leeching (crafted) Accuracy |
|
 (Gloves) Shaper's Touch - This is not an Attribute-stacker, but Shaper's Touch Gloves provide a global increase to Evasion and Accuracy per Intelligence, which are both required. You can reasonably assume to get 200 to 300 Intelligence without making huge sacrifices. (Gloves) Shaper's Touch - This is not an Attribute-stacker, but Shaper's Touch Gloves provide a global increase to Evasion and Accuracy per Intelligence, which are both required. You can reasonably assume to get 200 to 300 Intelligence without making huge sacrifices. |
|
| (80-120)% increased Armour and Energy Shield +2 Accuracy Rating per 2 Intelligence +1 Life per 4 Dexterity +1 Mana per 4 Strength 1% increased Energy Shield per 10 Strength 2% increased Evasion Rating per 10 Intelligence 2% increased Melee Physical Damage per 10 Dexterity |
|
 (Boots) Rare Boots - On Boots you'll need Movement Speed, Maximum Life, Resistances, and Spell Suppression. For the Eldritch mods, try Action Speed, Movement Speed, Suppression, Resistances, or Physical damage as extra Chaos Damage. (Boots) Rare Boots - On Boots you'll need Movement Speed, Maximum Life, Resistances, and Spell Suppression. For the Eldritch mods, try Action Speed, Movement Speed, Suppression, Resistances, or Physical damage as extra Chaos Damage. |
|
| Min. requirements: 30% increased Movement Speed +80 to Maximum Life 40% total Resistances Spell Suppression Chance Optional affixes: high Maximum Energy Shield and Evasion Rating |
|
 (Boots) Three-step Assault - "100% increased Evasion Rating during Onslaught" is a global mod that will work with your Helmet, so these Boots are rather good. It can be made into a Vestigial Implicit. (Boots) Three-step Assault - "100% increased Evasion Rating during Onslaught" is a global mod that will work with your Helmet, so these Boots are rather good. It can be made into a Vestigial Implicit. |
|
| +(25-35) to Dexterity (20-40)% increased Evasion Rating 100% increased Evasion Rating during Onslaught +(50-70) to maximum Life 25% increased Movement Speed 30% chance to Avoid Elemental Ailments while Phasing |
|
 (Belt) Rare Belt - On a Belt, try to get Maximum Life, Resistances, and Strength. Flask modifiers could be great; they have a huge impact in this build. Micro-Distillery Belt or a Cord Belt are the best bases. (Belt) Rare Belt - On a Belt, try to get Maximum Life, Resistances, and Strength. Flask modifiers could be great; they have a huge impact in this build. Micro-Distillery Belt or a Cord Belt are the best bases. |
|
| Min. requirements: Strength +90 to Maximum Life 80% total Resistances Optional affixes: increased Maximum Life (Hunter's Prefix) |
|
 (Amulet) Replica Dragonfang's Flight - Replica Dragonfang's Flight with Levels for Blade Vortex introduces lots of damage, on top of other utility mods. It's the Amulet we recommend the most. (Amulet) Replica Dragonfang's Flight - Replica Dragonfang's Flight with Levels for Blade Vortex introduces lots of damage, on top of other utility mods. It's the Amulet we recommend the most. |
|
| +(10-16) to all Attributes +3 to Level of all <Random Skill> Gems +(5-10)% to all Elemental Resistances (5-10)% increased Reservation Efficiency of Skills Items and Gems have (10-5)% reduced Attribute Requirements |
|
 (Amulet) Whispers of Infinity - It completely solves your Mana issue while still letting you keep ES as the defensive layer, given you have ES Leech. (Amulet) Whispers of Infinity - It completely solves your Mana issue while still letting you keep ES as the defensive layer, given you have ES Leech. |
|
| (10-15)% faster start of Energy Shield Recharge (5-10) to (20-25) Added Attack Chaos Damage per 100 Maximum Mana +(50-100) to maximum Energy Shield (60-40)% reduced maximum Mana Skills Cost Energy Shield instead of Mana or Life |
|
| Recommended Anointments: Overcharge Force of Darkness |
|
 (Ring) Ming's Heart - The vast boost to the damage output (and a lot of Chaos Resistance) is worth paying the price of reduced Life and Energy Shield, especially in this build where you rely on Evasion, Suppression, and Recovery. (Ring) Ming's Heart - The vast boost to the damage output (and a lot of Chaos Resistance) is worth paying the price of reduced Life and Energy Shield, especially in this build where you rely on Evasion, Suppression, and Recovery. |
|
| +(17-23)% to Chaos Resistance 25% reduced maximum Energy Shield 25% reduced maximum Life +(40-50)% to Chaos Resistance Gain (40-60)% of Physical Damage as Extra Chaos Damage |
|
 (Ring) Anathema - You can introduce Despair and Enfeeble or Punishment as your additional Curses on top of Assassin's Mark, but inflicting them will require some adjustments to your Skill setups. (Ring) Anathema - You can introduce Despair and Enfeeble or Punishment as your additional Curses on top of Assassin's Mark, but inflicting them will require some adjustments to your Skill setups. |
|
| (7-10)% increased Cast Speed +(30-40) to Intelligence (10-15)% increased Cast Speed (10-20)% chance to gain a Power Charge when you Cast a Curse Spell Your Curse Limit is equal to your maximum Power Charges |
|
 (Ring) Rare Ring - The main reason to wear Rare Rings is to reduce the Mana Cost of Skills, get the required Resistances and Accuracy, and have one additional Maximum Power Charge, although that can be achieved by Corrupting any Ring. (Ring) Rare Ring - The main reason to wear Rare Rings is to reduce the Mana Cost of Skills, get the required Resistances and Accuracy, and have one additional Maximum Power Charge, although that can be achieved by Corrupting any Ring. |
|
| Min. requirements: +90 to Maximum Life 80% total Resistances Accuracy Non-Channelling Skills have -7 to Total Mana Cost (Crafted Prefix) Optional affixes: Attributes Maximum Power Charge (Corrupted Implicit) |
|
 (Jewel) Brutal Restraint - Dexterity is highly prized here, as it increases Evasion and grants Accuracy, but the Balbala version of Brutal Restraint may also get you the Traitor Keystone for a much better Flask sustain. (Jewel) Brutal Restraint - Dexterity is highly prized here, as it increases Evasion and grants Accuracy, but the Balbala version of Brutal Restraint may also get you the Traitor Keystone for a much better Flask sustain. |
|
| Denoted service of (500-8000) dekhara in the akhara of <Asenath • Balbala • Nasima> Passives in radius are Conquered by the Maraketh Historic |
|
 (Jewel) Split Personality - Two Split Personality Jewels are used here to get increased Evasion, and either Dexterity, ES, or Accuracy. It will grant flat ES, so it won't increase your damage via The Unblinking Eye, but the amount of it is worth a detour. (Jewel) Split Personality - Two Split Personality Jewels are used here to get increased Evasion, and either Dexterity, ES, or Accuracy. It will grant flat ES, so it won't increase your damage via The Unblinking Eye, but the amount of it is worth a detour. |
|
| This Jewel's Socket has 25% increased effect per Allocated Passive Skill between it and your Class' starting location <Two random modifiers> |
|
 (Jewel) The Light of Meaning - Causes nearby passives to increase your Evasion, thus Spell Damage. Socket it near the Infused, or Harrier if you have Unnatural Instinct to pair it up with. (Jewel) The Light of Meaning - Causes nearby passives to increase your Evasion, thus Spell Damage. Socket it near the Infused, or Harrier if you have Unnatural Instinct to pair it up with. |
|
| Passive Skills in Radius also grant 7% increased Evasion Rating | |
 (Jewel) Unnatural Instinct - You may socket it near Sentinel with The Light of Meaning near Harrier to get the most out of it. There, it will also grant plenty of Resistances, Block Chance, Movement Speed, some Strength, and Physical Damage. (Jewel) Unnatural Instinct - You may socket it near Sentinel with The Light of Meaning near Harrier to get the most out of it. There, it will also grant plenty of Resistances, Block Chance, Movement Speed, some Strength, and Physical Damage. |
|
| Allocated Small Passive Skills in Radius grant nothing Grants all bonuses of Unallocated Small Passive Skills in Radius |
|
 (Jewel) Watcher's Eye - You're using Grace, but if you struggle with Mana, Clarity can be added for the Reduced Mana Cost mod found on a Watcher's Eye. Grace has mostly good defensive stuff. (Jewel) Watcher's Eye - You're using Grace, but if you struggle with Mana, Clarity can be added for the Reduced Mana Cost mod found on a Watcher's Eye. Grace has mostly good defensive stuff. |
|
| (4-6)% increased maximum Energy Shield (4-6)% increased maximum Life (4-6)% increased maximum Mana <Two or Three random aura modifiers> |
|
  (Jewel) Forbidden Flame & Flesh - Shadow has many great passives to add. We recommend Spellbreaker, Born in the Shadows, or Escape Artist for defence, and Like Clockwork, Bomb Specialist, or Harness the Void for damage. Triggerbots are not exactly what you're looking for, as your damage is restricted by the Blade and Orb limit. (Jewel) Forbidden Flame & Flesh - Shadow has many great passives to add. We recommend Spellbreaker, Born in the Shadows, or Escape Artist for defence, and Like Clockwork, Bomb Specialist, or Harness the Void for damage. Triggerbots are not exactly what you're looking for, as your damage is restricted by the Blade and Orb limit. |
|
| Allocates <random Ascendancy Notable> if you have the matching modifier on Forbidden Flesh Allocates <random Ascendancy Notable> if you have the matching modifier on Forbidden Flame |
|
 (Jewel) Rare Jewels - On Jewels, try to get Maximum Life, Maximum ES, Evasion, Attack Speed, and Crit Multiplier for Physical Spells. (Jewel) Rare Jewels - On Jewels, try to get Maximum Life, Maximum ES, Evasion, Attack Speed, and Crit Multiplier for Physical Spells. |
|
| Recommended affixes: increased Maximum Energy Shield increased Evasion Rating increased Maximum Life increased Attack Speed Critical Strike Multiplier (various options) |
|
 (Jewel) Large Cluster Jewel - Chaos Damage Large Cluster Jewels offer Overwhelming Malice for Unholy Might that is the most important buff to have: it grants Wither on Hit and Converts all Physical Damage to Chaos. Grim Oath adds lots of damage. (Jewel) Large Cluster Jewel - Chaos Damage Large Cluster Jewels offer Overwhelming Malice for Unholy Might that is the most important buff to have: it grants Wither on Hit and Converts all Physical Damage to Chaos. Grim Oath adds lots of damage. |
|
| Recommended affixes: 1 Added Passive Skill is Overwhelming Malice 1 Added Passive Skill is Grim Oath 1 Added Passive Skill is Touch of Cruelty 1 Added Passive Skill is Master the Fundamentals |
|
 (Flask) Sin's Rebirth - If you don't have Overwhelming Malice or any other source of Wither on Hit, use Sin's Rebirth to get it. It's a Stibnite Flask, which you want to have anyway. (Flask) Sin's Rebirth - If you don't have Overwhelming Malice or any other source of Wither on Hit, use Sin's Rebirth to get it. It's a Stibnite Flask, which you want to have anyway. |
|
| 20% more Evasion Rating Creates a Smoke Cloud on Use Unholy Might during Effect Grants Immunity to Ignite for 4 seconds if used while Ignited Removes all Burning when used |
|
 (Flask) Stormblood (Lightning) - Shock, which this Flask enables on your Chaos Damage, increases damage taken by the afflicted enemy, so it works similarly to the Withered debuff. (Flask) Stormblood (Lightning) - Shock, which this Flask enables on your Chaos Damage, increases damage taken by the afflicted enemy, so it works similarly to the Withered debuff. |
|
| +40% to Lightning Resistance +5% to maximum Lightning Resistance (20-40)% chance to gain a Flask Charge when you deal a Critical Strike 50% reduced Duration All Damage from Critical Strikes can apply Lightning Ailments during effect |
|
 (Flask) Witchfire Brew - If you can apply a second Curse, but don't want to press additional buttons, use Witchfire Brew. It's a Stibnite Flask for more Evasion. (Flask) Witchfire Brew - If you can apply a second Curse, but don't want to press additional buttons, use Witchfire Brew. It's a Stibnite Flask for more Evasion. |
|
| 20% more Evasion Rating Creates a Smoke Cloud on Use (-10-10)% increased Charges per use Grants Level 21 Despair Curse Aura during Effect |
|
|
Other suggested Flasks and Tinctures:
|
|
    |
|
|
If you have any other build requests, please leave that in the comments below.
Pictures used in this article are the intellectual property of Grinding Gear Games.
