Buy/Sell
 Log in

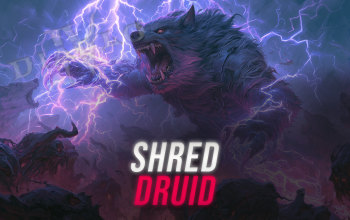
Shred Druid for Diablo 4
Easily the best Setup for the Shred Druid that imbues this Werewolf Skill with both Storm and Werebear powers for insane DPS!Shred Druid Build
Last Update: July 09, 2026
Introduction
The Shred is one of the strongest Skills in the Werewolf arsenal. It is a Core Storm Skill, so it synergises greatly with the current best Set for the Druid Class, which is the Storm Shepherd's Call. It makes your Storm Skills free to use, but consumes all your Spirit to greatly boost their Damage. It's not only great for your DPS, but also makes it very comfortable to play, as your Energy Regeneration is not a limiting factor for your gameplay. Furthermore, you have a 25% chance to cast your Skills multiple times, gaining a 500%[x] Damage bonus for each hit. To push that to the limit, you should wear the Waxing Gibbous Axe, which makes your Shred stronger, but also grants a 33% chance to land up to 4 additional strikes. When combined with the aforementioned Set, it leads to an insane burst of Damage.
The default Werewolf's Ultimate ability is not very good. Instead, you should pick the Ifeh's Dire Totem that converts the Grizzly Rage into a Werewolf Skill that transforms you into Dire Werewolf. It grants you an insane amount of Damage and survivability, and it is quite easy to reach 100% uptime of this buff in the endgame. Notably, the Archdruid's Aspect grants you bonuses for both Werewolf and Werebear forms, making it even more powerful.
Pros
- Great mobility
- Very high Damage
- Insane speed
- Easy to start
Cons
- Melee range
- Endgame variant requires certain Unique Items
You can also visit this page to check our other Best Diablo 4 Builds
Equipment
The Waxing Gibbous is tailor-made Unique for the Shred Builds. It greatly empowers its base Damage, but also allows for a crazy combo Damage if you proc it multiple times along the Triple Cast from your Storm Shepherd's Call Set.
The Ifeh's Dire Totem is mandatory to unlock the very powerful Ultimate ability, since you can't mix Werewolf and Werebear form Skills by default. It also provides a bit of Life Recovery, although not as much as the Malefic Crescent provides. By picking the specific upgrades for the Blood Howl, it also becomes an inanely powerful Spirit generator.
To generate even more Spirit, you should implement the Dirge of Airidah, which grants you 2 Spirit upon hitting a target. You will inflict most of the debuffs automatically, so they are almost always active. You also can't forget about Tibault's Will, which provides the biggest passive Resource Regeneration in the game. To enable it, you will use an Earthen Bulwark triggered by the Runeword combination.
Storm Shepherd's Call
- Phoba of the Storm Shepherd
- Fer of the Storm Shepherd
- Mlor of the Storm Shepherd
- Linta of the Storm Shepherd
- Berú of the Storm Shepherd
- Storm Shepherd's Call
- (2) Set: Storm Skills no longer cost Spirit to cast. Casting a Storm Skill consumes all available Spirit to increase Storm Skill damage by 0.5 per Spirit consumed for 2 seconds, up to 60%[x]. Additional bonuses may stack but do not refresh.
- (3) Set: Cyclone Armor grants 30%[x] Damage Reduction and triggers when Close enemies damage you. This effect can only happen once every 10 seconds, affected by Cooldown Reduction.
- (5) Set: Storm Skills have a 20% chance to Double Cast and a 5% chance to Triple Cast. Double and Triple Casts gain a 500%[x] damage bonus.
Gathlen's Birthright
- Primary Core Stat
- Skill Ranks to Cyclone Armor
Cyclone Armor is automatically triggered once every 5 seconds. Cyclone Armor's passive grants you 39% Damage Reduction.
Tibault's Will
- Primary Core Stat
- Maximum Life
You deal 26%[x] increased damage and gain 50 Primary Resource Regeneration while Unstoppable and for 5 seconds after.
Waxing Gibbous
- Weapon Damage
- Skill Ranks to Shred
Shred deals 78%[x] more damage, and Shred has a 33% chance to land an additional strike, up to 4 times.
Ifeh's Dire Totem
- Weapon Damage
- Poison Damage Multiplier
Grizzly Rage is now a Werewolf Skill and Shapeshifts you into a Dire Werewolf. Dire Werewolves gain 163%[x] Critical Strike Damage, 163%[x] bonus Poisoning damage and Spirit Cost Reduction instead of Armor. In addition, kills Heal you for 5% of your Maximum Life.
Dirge of Airidah
- Primary Core Stat
- Vulnerable Damage Multiplier
Storm Skills that you Cast grant 1 Spirit and deal 45%[x] bonus damage. These bonuses are doubled when damaging a Vulnerable, Immobilized or Slowed enemy.
Malefic Crescent
- Primary Core Stat
- Skill Ranks to Blood Howl
Blood Howl is automatically cast when you Shapeshift into a Werewolf and every 4 seconds while in Werewolf form. In addition, you gain 52%[x] bonus damage for 4 seconds whenever Blood Howl is triggered.
Rustbitten Dirk
Deal 120%[x] increased damage to isolated enemies.
Once you convert the Grizzly Rage into a Werewolf Skill, you will gain both bonuses from the Archdruid's Aspect for an insane Damage boost. To improve the uptime on your ultimate ability, you should use the Aspect of the Orange Herald. It grants you tons of Cooldown reduction for your defensive and mobility Skills too.
Since the Shred is a Storm Skill, you should take advantage of the Overcharged Aspect to automatically apply Vulnerability to all your Enemies, while also boosting your Damage while doing so. Additionally, the Great Storm Aspect grants you Ferocity stacks on Lucky Hits, and makes you more durable if you have at least one stack active.
Lastly, the Aspect of Disobedience and Aspect of Debilitating Toxins grant you tons of Damage Reduction, which is very important to push greater difficulties. To enable it, you will need the Constricting Tendrils Paragon power allocated. It is a very efficient way of optimizing your build to the fullest!
Archdruid's Aspect
Gain an additional passive bonus for each Druid form:
- Human: x[45-60%] increased damage to Distant enemies.
- Werewolf: x[45-60%] increased Critical Strike Damage to Close enemies.
- Werebear: x[45-60%] increased damage while you have Resolve.
Overcharged Aspect
Your Storm Skill damage makes enemies Vulnerable for 4 seconds. You deal x [15 - 20%] increased damage to Vulnerable enemies.
Aspect of Debilitating Toxins
You gain [20 - 30%] Damage Reduction, and Poisoned enemies deal 15% less damage to you.
Aspect of the Orange Herald
Cast Core Skill damage reduces the Cooldown of one of your Skills by [0.7 - 1] second.
Great Storm Aspect
Lucky Hit: Lightning damage has up to a 15% chance to grant a stack of Ferocity.
You gain [10 - 15%] Damage Reduction while you have Ferocity.
Aspect of Disobedience
Your Damage over Time grants you [1 - 1.5%] Damage Reduction for 2 seconds, stacking up to 30 times.
A lot of your effects are based on Critical Hits, making the Critical Strike Chance number 1 priority on your list. You will also need some Cooldown Recovery, just enough to ensure 100% uptime on the Grizzly Rage. After that, you will want the usual Damage modifiers: the Critical Strike Damage Multiplier is the most potent among them, tightly followed by the Vulnerable Damage Multiplier. After that, focus on All Damage Multiplier, Lightning Damage Multiplier, and Attack Speed or additional Ranks for your Skills. Your Willpower and improved Spirit Regeneration also offer a decent boost to your DPS.
You can't push harder content without proper defensive layers as well. Aim for high Armor and maximum Life values. Resistances should be sourced from your Charms, optionally Rings too. You should also cap your Movement Speed for better Clear Speed.
Skills
 15/15
15/15Primary DPS: Shred is your bread and butter. It is a fast combo attack that also dashes you to your target if necessary.
The Storm Shred upgrade is mandatory to turn this Skill into the Storm category. All 4 minor upgrades are very good, especially at the start of your journey. However, later on you should opt for the Healing and Cast Speed bonuses, as you will gain remaining bonuses from other sources.
 1/15
1/15Utility/Offence: The Lightning Storm is used here for its utility. You should use it once at the start of a new instance.
The Hero of the Storm is a mandatory choice that makes this skill permanent. The Movement Speed improves your mobility, while Additional Strikes causes it to strike your targets more often.
 15/15
15/15Utility/Def: Cyclone Armor is permanently active thanks to the Gathlen's Birthright Helm, which also grants additional Damage Reduction.
The Resistance boosts the defensive bonuses higher. You can pick the Reversal upgrade to group-up enemies more easily, or get the Greater Cyclone Armor boon for the amazing defensive capabilities.
 1/15
1/15Utility/Def: The Blood Howl is also triggered automatically, this time by the Malefic Crescent Amulet. It is an amazing source of Life and Spirit.
The Spirit Howl converts the Healing into Spirit generation. It is further enhanced by the Healing upgrade. Thanks to the Unstoppable upgrade, you can easily ignore most Crowd Control effects in the game.
 1/15
1/15Utility/Def: Your final defensive tool is Earthen Bulwark. To make it easier, it should also be used automatically, ideally by your Runewords.
The Travertine Bulwark also grants you Resolve stacks, while the Overpowered upgrade, as the name suggests, provides Overpower stacks. Lastly, the Fortify Fortifies your Life and restores a portion of it if the Bulwark is depleted by incoming Damage.
 1/15
1/15Utility/Offense: In this setup, your Wolves companions are not very good. However, they can provide quite useful bonuses for yourself.
The Attack Speed boon grants you 20% Attack Speed, which can be doubled by the Thrill of the Hunt. At first you can pick the Berserking upgrade, but later on it will be provided by your ultimate ability.
 1/15
1/15Utility: The Hurricane surrounds you at all times to deal a moderate amount of Damage. It is very useful to trigger other effects.
The Derecho is a mandatory choice; for this setup, additional Spirit drain is not very problematic. It should also apply Weakened to hit enemies and improve your Movement Speed.
 1/15
1/15Utility/Mobility: The Trample is your main Mobility Skill. Keep in mind your Shred also dashes you to your enemies, so it is mostly used for traveling or dodging attacks.
You will need the Werewolf patch to use this skill and the Unstoppable to make it more reliable. The Cooldown Recovery allows you to use it more often. You can pick the Exsanguination perk to Execute your Enemies, but it's not very useful.
 15/15
15/15Utility/Offence: Grizzly Rage is an ultimate ability that is packed with powerful bonuses. You can use it only after acquiring the Ifeh's Dire Totem.
The Cornered Beast quickly stacks up to 200%[x] Damage bonus thanks to your very fast Attacks and multiple proccing abilities. Cooldown Reduction helps with the upkeep. You can also pick Fortify or Unstoppable for a defensive burst, but it's usually not necessary.
Core Rotation
At first, you will have to activate the Hurricane and Lightning Storm. Then simply use Shred to deal with hordes of monsters and bosses alike. The Grizzly Rage should be ready to activate at all times thanks to the large amount of Cooldown recovered via Orange Herald. For additional mobility, use Trample. To gain benefits from Wolves, you have to bind this skill to your Skill bar, but you can ignore the Command part.
Miscellaneous
Paragon Board
At the starting Board, you will want to keep the Keeper Glyph, which provides a decent bonus for all your Non-physical Damage types.
You will want to start with the obvious Lust for Carnage Board that improves the Damage of your Critical Hits with the Werewolf Skills. It also restores your Spirit with every Hit. It is the ideal board to host the Earth and Sky Glyph for additional Nature Damage. The Nature Skills include both Storm and Earth types.
Another great Board for the Storm Skills is the Thunderstruck. It greatly boosts your Damage, but also provides a very valuable Critical Strike chance. It is a good place to socket the Fang and Claw Glyph for generic Damage bonuses for Shapeshifters.
The aforementioned Constricting Tendrils Board enables powerful scaling by Poisoning your Enemies passively with all your Nature Skills. There you should socket the Spirit Rune for tons of additional Critical Damage Bonus.
The Heightened Malice requires the previous boon to be useful, as it grants you additional Damage against Poisoned Enemies. The Fulminate Glyph is also a conditional boon, but quite easy to fulfil at most times.
Runes
The Poc Rune is insanely effective with this setup. You will want to combine it with the Que Rune to trigger your Earthen Bulwark very often.
Moni + Gar is an excellent combo to boost your Critical Strike Chance. The Moni is constantly triggered by your main ability, Shred.
Snake
Your main Spirit Boon is Snake. It allows you to pick the Calm Before the Storm Node, which is much needed for better uptime on your Ultimate ability. However, the Overlord is also very important, as it's your main source of Ferocity buff.
You can still pick one offering for each Spirit. For the Eagle, you should take the Scythe Talons for higher Critical Strike Chance and Lucky Hit efficiency. The Deer provides an excellent survivability bonus via Wariness. The Wolf also helps with your Ultimate ability once you pick the Calamity Node.
Mercenary.
Subo is the best-in-slot Mercenary due to the immense Quality of Life provided by the Map reveal, but he also offers plenty of Damage through the Opening Fire boon.
For additional support, you should pick the Raheir for his powerful Bastion ability, which can save you once you become Injured.
Final Thoughts
The Shred Druid is easily the strongest Setup of the Season. It offers an immense amount of Damage while still retaining excellent mobility and survivability, which are all necessary for comfortable gameplay.
We plan to continue updating this guide alongside future Diablo 4 patches and expand our Diablo 4 content with additional builds, strategies, and seasonal updates.
If you have suggestions or would like to see other Builds covered, feel free to share your feedback—it helps us improve and create better guides for the community.
Images used in this article are the intellectual property of Blizzard Entertainment or its corresponding owners.