 Buy/Sell
 Log in

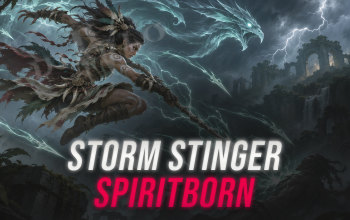
Storm Stinger Spiritborn Build for Diablo 4
Stab once, leave a storm behind, then do it again. See how Kepeleke and The Protector turn Stinger into a lightning machine.Storm Stinger Spiritborn Build
Last Update: November 4, 2026
Introduction
The Storm Stinger Spiritborn has a knack for turning a close-range sting into a miniature lightning storm. Drive Stinger into an enemy and the hit leaves a Spirit Storm crackling across the ground. A few quick attacks cover a crowded pack with overlapping effects, while The Protector pulls stragglers back into their reach. It is an active melee build with a satisfying rhythm: gather enemies, strike repeatedly and let the storms finish those who try to escape.
The important choice is Nimbostratal Strike. It changes Stinger into an Eagle Skill that deals Lightning Damage and creates Spirit Storms, opening up damage bonuses usually associated with the Eagle Spirit. Rod of Kepeleke then gives the Core attack a Basic Skill tag and removes its regular Vigor cost. Once Vigor is full, the Rod spends everything on a guaranteed Critical Strike. The difference between an ordinary attack and a full-resource hit is large enough that recovering Vigor becomes part of your attack timing.
Gorilla in the Primary Spirit Hall gives the Spiritborn Barriers while making the entire Skill Bar count as Gorilla Skills. That unlocks a strong interaction with Hesha e Kesungi: The Protector can be summoned onto a distant pack, pulls enemies inward and makes them take additional damage from your Gorilla-tagged attacks. Against a Boss, the Gloves become especially valuable because their damage bonus is doubled. Ravager, Toxic Skin and Scourge keep Vigor returning and apply the control needed for close-range fighting.
The build asks you to stand close enough for Stinger and its storms to overlap, so it has a tougher time with enemies that constantly jump away or leave dangerous ground effects behind. Counterattack gives a brief Dodge window, while The Protector and your Barriers help when an Elite group pushes back. The required Uniques are another hurdle: Kepeleke, Midnight Sun and Hesha e Kesungi make the combat loop feel much smoother than an early Legendary-only setup.
Pros
- Strong Lightning AoE
- Excellent Critical Strikes
- Reliable Barriers
- Good Boss Damage
Cons
- Vigor-Dependent Bursts
- Limited Mobility
You can also visit this page to check our other Best Diablo 4 Builds
Equipment
Rod of Kepeleke is the first Unique you should pursue. Its free Core Skill casts let Stinger continue attacking even after you have spent your Vigor, while a cast from maximum Vigor becomes a guaranteed Critical Strike. Since Nimbostratal Strike creates Spirit Storms with the same attack, the Rod strengthens both your initial engagement and your repeated pressure on packed enemies. Prioritize Maximum Vigor and Resource Generation on the equipment that still has room for those stats. Greater Affixes on Core Skill Ranks are especially useful.
Ring of the Midnight Sun handles a large part of that resource problem. Critical Strikes return a portion of the Vigor you spent recently. The guaranteed Critical Strike from a full-resource Kepeleke cast makes this pairing dependable, but the Ring alone will not always refill the bar. Ravager, Scourge and Toxic Skin add the missing generation. Watch the resource bar while fighting a Boss: the most valuable Stinger is often the one you hold for a moment until Vigor reaches maximum.
Hesha e Kesungi occupies the Gloves slot. The Protector can appear directly inside an enemy group and draw it together with repeated smashes. With Gorilla Primary Spirit Hall, Stinger also counts as a Gorilla Skill, so the Gloves increase its damage to enemies caught in that area. The bonus is doubled against Knocked Down enemies and Bosses. Use The Protector as the opening move for dangerous encounters, then attack from close enough for several Spirit Storms to stay on your primary target.
Harmony of Ebewaka goes on the Helm. Your Secondary Spirit Hall is Jaguar, which adds another Spirit tag and contributes Ferocity, while your actual Stinger still uses its Centipede, Eagle and Gorilla identities. The Helm rewards those overlapping tags with increased damage. The value of its Spirit-type bonus makes obtaining it a worthwhile upgrade after the resource loop is stable. If it takes time to obtain, use a Legendary Helm with useful defensive affixes until the Unique drops.
The Legendary pieces fill the gaps around these four Uniques. Place Aspect of Debilitating Toxins on Chest Armor to reduce incoming damage, especially against enemies Poisoned by Scourge or Toxic Skin. Aspect of Glynn's Anvil on Pants adds Maximum Resolve and damage reduction per stack. Aspect of Apprehension on Boots rewards the strong Slow from The Protector: once enemies are sufficiently slowed, they are Feared and take more damage. That control is especially helpful when several Elites arrive at once.
For the offensive slots, put Aspect of Supremacy on the Amulet and Reaper's Aspect on Ring 2. Supremacy rewards kills while The Protector is active, making its damage stacks easier to build during dense dungeon runs. Reaper's gives Eagle Skills extra damage against Poisoned enemies, and Nimbostratal Strike gives Stinger the Eagle tag needed to use it. Against single Bosses, Scourge and Toxic Skin help maintain Poison while you concentrate on full-Vigor Stinger casts.
Use five Charms of Bliss of the Multitude with Protection of the Prime in the sixth slot. The set rewards overlapping Spirit types and can call additional Ultimate Spirits as you continue casting. Protection of the Prime helps you survive while moving between dangerous targets. Look for Dexterity, Maximum Vigor, Resource Generation, Ranks to Basic or Core Skills, Lightning Damage, Critical Strike Damage and Maximum Life on the appropriate pieces. Cap Armor and Elemental Resistances before chasing more offensive Greater Affixes.
Bliss of the Multitude
- Berú of the Multitude
- Fer of the Multitude
- Linta of the Multitude
- Mlor of the Multitude
- Phoba of the Multitude
- (2) Set: While an Ultimate Skill is active, your Skills gain its Spirit type. Your Skills deal 15%[x] increased damage per Spirit type.
- (3) Set: Casting a Skill grants 35% Resistance to its Spirit's primary damage type and the Passive effect of that Spirit's Incarnate Skill for 10 seconds.
- (5) Set: Casting a Skill has a 5% chance to invoke the Ultimate Spirit of that Skill's type, increasing damage from that Spirit by 40%[x] for 10 seconds.
Rod of Kepeleke
- Ranks to Core Skills
Your Core Skills are also Basic Skills and free to cast. At Maximum Vigor, they consume all Vigor, cast at their largest Size and are guaranteed Critical Strikes, with [1.00 - 1.20]%[x] increased Critical Strike Damage per point of Vigor spent.
Ring of the Midnight Sun
- Critical Strike Chance
When you Critically Strike, regain [40 - 50]%[+] of the Vigor spent in the last 2 seconds. Gain Counterattack's Passive Effect.
Hesha e Kesungi
- Ranks to Gorilla Skills
The Protector can be invoked at range and Pulls inward with its smashes. Enemies in its area take [50 - 60]%[x] increased damage from your Gorilla Skills, doubled while they are Knocked Down or a Boss.
Harmony of Ebewaka
- Maximum Life
According to your Secondary Spirit Hall choice, your Skills are additionally Jaguar, Eagle, Gorilla, or Centipede Skills. Your Skills deal [20 - 25]%[x] increased damage per Spirit type they have.
Protection of the Prime
While moving, gain [25 - 30]% Dodge Chance and Damage Reduction. These benefits linger for 2 seconds after you stop. After standing still for 2 seconds, become Unstoppable until you move.
The five Legendary Aspects use distinct equipment slots: Debilitating Toxins on Chest Armor, Glynn's Anvil on Pants, Apprehension on Boots, Supremacy on Amulet and Reaper's on Ring 2. Hesha e Kesungi, Harmony of Ebewaka, Ring of the Midnight Sun and Rod of Kepeleke occupy the remaining slots. Keep the offensive aspects on the specified items when making equipment upgrades.
Aspect of Debilitating Toxins
Gain up to 30% Damage Reduction. Poisoned enemies deal 15% less damage to you.
Aspect of Glynn's Anvil
Gain 2 additional Maximum Resolve. Each Resolve stack grants [2.5 - 4.0]% Damage Reduction, up to [25 - 40]%.
Aspect of Apprehension
Once an enemy is Slowed by at least 80%, it is also Feared for 3 seconds. You deal [30 - 40]%[x] increased damage to Feared enemies.
Aspect of Supremacy
Killing enemies while an Ultimate Skill is active grants Supremacy, increasing damage by [6 - 9]%[x] per stack, up to [60 - 90]%[x]. When the Ultimate ends, gain 5 stacks that fall off one per second.
Reaper's Aspect
Enemies you Poison have 100% reduced Healing. Your Eagle Skills gain 50%[+] Critical Strike Chance and deal 30%[x] increased damage against them.
If Stinger stops landing full-Vigor Critical Strikes against a lone Boss, improve Resource Generation before replacing any of the defensive pieces. A very large Maximum Vigor pool raises Kepeleke's potential damage, but it also takes more resources to refill. Try a few uninterrupted Stinger chains while Ravager and Toxic Skin are active to see whether the next big hit comes at the right time.
Skills
 15/15
Main Damage: Stinger is your main attack. Nimbostratal Strike changes it to Lightning Damage, adds the Eagle tag and leaves Spirit Storms behind each hit. Rod of Kepeleke makes it free between full-resource Critical Strikes. Position close to Bosses and dense packs so the newly created storms continue damaging the targets you want to finish.
Max Stinger and choose Nimbostratal Strike, Damage Bonus and Weakened Damage Bonus. Scourge and Toxic Skin help apply the conditions for the final upgrade. Cast Stinger in runs of three to benefit from Prodigy's Tempo, checking Vigor before a difficult Elite burst.
 15/15
Offense/Resource: Ravager supports the full-Vigor attack loop with faster resource recovery and extra hits. Those attacks also help maintain Ferocity during long fights, improving the pace of consecutive Stinger casts. Refresh Ravager before you commit to a boss or a large pack.
Use Flurry of Claws, Vigor Generation and Ferocity Maximum. Flurry of Claws provides Cooldown Rate during the active effect. The Vigor Generation upgrade is a priority because the next full-resource Stinger is one of your biggest damage spikes.
 15/15
Defense/Poison: Toxic Skin gives you Unhindered movement and keeps nearby enemies Poisoned, allowing Reaper's Aspect to strengthen your Eagle-tagged Stinger. Its protective effects are most useful when you are forced to fight close to an Elite pack while several Spirit Storms are active.
Take Skuttle Bug, Vigor Generation and Duration Increase. Skuttle Bug contributes Armor and Weaken. Activate Toxic Skin before stepping into a dangerous group, and keep an eye on its remaining duration during Boss fights.
 1/15
Control/Resource: Scourge spreads Poison and Crowd Control around your position. Its Vulnerable application helps Stinger and the active Spirit Storms damage tougher targets, while its control creates safer openings for repeated melee attacks. It also helps you recover Vigor after a full-resource Kepeleke cast.
Select Hive Mind, Vigor Generation and Vulnerable. Cast Scourge before your main Stinger sequence. Save it for a fresh wave of enemies when The Protector is on Cooldown.
 1/15
Emergency Defense: Counterattack provides a Dodge window against heavy incoming attacks. It is particularly valuable when The Protector is unavailable and you need to stay close enough for your storms to keep hitting. Holding a charge for the dangerous part of a Boss encounter is often safer than using it automatically on every small pack.
Choose Asymmetrical Warfare, Damage Over Time Reduction and Duration Increase. Use Counterattack immediately before a threatening hit. Its Cooldown begins after the active effect finishes, so plan its next defensive window with that delay in mind.
 1/15
Ultimate/Control: The Protector gathers enemies in one area and gives you an opening to strike several times without chasing scattered targets. Hesha e Kesungi lets you invoke it at range and increases Gorilla Skill damage inside its area. Because the Primary Spirit Hall makes Stinger a Gorilla Skill, the damage bonus applies directly to your main attack.
Choose Canopy Shelter, Barrier and Resolve Generation. Canopy Shelter supplies a powerful Slow and a safe area during dangerous fights. Place the Ultimate on a Boss or on the middle of an Elite group, then attack from inside its area.
Core Rotation
Start by activating Ravager and Toxic Skin. Approach the next pack, apply Poison and Vulnerable with Scourge, and place The Protector where its inward smashes can hold the enemies together. When Vigor is full, land Stinger for a guaranteed Critical Strike and a fresh Spirit Storm. Continue attacking in groups of three so Prodigy's Tempo can help with Cooldowns, then let the Ring of the Midnight Sun and your generation effects fill Vigor for another big hit.
During Boss fights, keep The Protector on the Boss whenever possible. Its Hesha e Kesungi bonus is doubled against that target, and your Gorilla Barrier lets you fight close enough to maintain overlapping storms. Refresh Scourge and Toxic Skin to keep Poison, Weaken and Vulnerable active. Hold Counterattack for the most dangerous attack rather than using it on cooldown. If Vigor is still short, use another free Stinger cast and wait for the next full-resource Critical Strike before spending your strongest offensive window.
Miscellaneous
Paragon Board
On the Starting Board, take an efficient route through Dexterity and defensive nodes to the Canny Glyph socket. Follow with Swarm of Storms and Jagged Plume. Swarm of Storms directly strengthens Spirit Storms created by Nimbostratal Strike, while Jagged Plume supports the Eagle portion of the build. Jagged Plume's Legendary bonus improves Eagle damage, which Nimbostratal Strike can use.
Next take Prodigy's Tempo with Talon for Eagle damage and cooldown support from consecutive Stinger casts. Continue into Convergence with Headhunter to scale your Non-Physical damage and improve performance against Elites. Finish with Revealing and Colossal for damage against controlled targets and improved close-range Gorilla attacks. Talon's Legendary bonus improves Vulnerable Damage. Prioritize the Legendary Nodes, Glyph sockets and required attribute thresholds before pursuing distant Rare clusters.
Spirit Hall
Choose Gorilla as Primary and Jaguar as Secondary. Gorilla makes all Skills count as Gorilla Skills and generates a Barrier as you attack. That extra tag is essential for Hesha e Kesungi. Jaguar supplies Ferocity support and adds another tag through Harmony of Ebewaka. Nimbostratal Strike gives Stinger its Eagle identity, so the main attack can benefit from the offensive Eagle aspects and Glyphs even though your Spirit Hall uses Gorilla and Jaguar.
Runes
Use Cir + Tzic to invoke Concussive Stomp through repeated Skill casts. Its Knock Down helps keep enemies inside your Spirit Storms and activates the stronger Hesha e Kesungi damage bonus against affected targets. Take the Crackling Earth upgrade for the triggered skill when your allocation allows it. For the second pair, use Yul + Kry to invoke Vortex as your cooldown abilities are cast. Vortex pulls scattered enemies back into your attack area. Put each Runeword in a separate compatible two-socket item.
Talisman
Bliss of the Multitude is the preferred five-piece set. Its two-piece effect adds another Spirit type while an Ultimate Skill is active and increases Skill damage based on the number of Spirit types involved. With The Protector active, that supports the multiple tags on Stinger. The three-piece bonus offers resistance and an Incarnate passive effect, while the full set can summon additional Ultimate Spirits through ordinary casts.
Equip Berú, Fer, Linta, Mlor and Phoba of the Multitude, then add Protection of the Prime as your sixth Charm. Its movement-based damage reduction and Dodge Chance are valuable when moving between packs or repositioning for another Stinger chain. Favor Skill Ranks, Maximum Vigor, Dexterity and defensive affixes on available Charm and Seal rolls.
Mercenary
Hire Raheir with Shield Charge, Raheir's Guard, Provoke and Iron Wolf's Ward. His protection helps while you stand close enough to keep Stinger and Spirit Storms on target. Use Aldkin as Reinforcement with Field of Languish, triggered on a Skill cast, to Slow dangerous enemies and reduce their damage.
Final Thoughts
The Storm Stinger Spiritborn rewards players who can maintain their Vigor loop and keep enemies inside overlapping Spirit Storms. Rod of Kepeleke supplies the major Critical Strikes, while Hesha e Kesungi turns The Protector into both a grouping tool and a strong Boss damage window.
We plan to continue updating this guide alongside future Diablo 4 patches and expand our Diablo 4 content with additional builds, strategies, and seasonal updates.
If you have suggestions or would like to see other Builds covered, feel free to share your feedback - it helps us improve and create better guides for the community.
Images used in this article are the intellectual property of Blizzard Entertainment or its corresponding owners.