Arc Spell Totem Gemling Legionnaire POE 2 Build
A very potent Setup for the Gemling Legionnaire that utilises the extra bonuses from Quality for Arc and Spell Totem at the same timeArc Spell Totem
Gemling Legionnaire
Updated for Path of Exile 2 Early Access
The Best Crafty Guides by Odealo
| Guide notes |
| June 30 2026 - Created for Early Access Patch 0.5.0 |
| Build Overview | |||
| Tags: [CASTER] [CRITICAL] [HYBRID] | |||
|
Budget: Defenses: |
|
Boss DPS: AoE: |
|
The Gemling Legionnaire grants additional Quality bonuses to all Skills in the game, often providing Build-enabling features. In the hands of a Gemling, the Arc deals More Damage for each remaining Chain. It still retains the original Quality bonuses as well, which grant additional Chains. Mix in the Dominus' Grasp Support Gem to double the amount of Chains, and optionally Dialla's Desire for even more Quality. In the end, you will deal over 150% More Damage to the first target Hit, while also retaining the incredible Clear potential thanks to the massive amount of Chaining Projectiles.
The Spell Totem also receives potent bonuses in the form of additional Cast Speed per summoned Totem. By reaching the limit of 6 Totems, you will improve your Cast Speed by over 100%. To summon that many Totems, you will need to improve the Spell Totem Gem levels up to 23, and pick the Ancestral Bond Keystone, which doubles the total limit at the cost of Spirit Reservation. Reaching 450 Spirit for all Totems would be very hard, but you can improve your Reservation Efficiency with Efficient Description Notable and Desecrated Modifiers on your Body Armour and Helmet. If you amass even more Spirit, you should consider adding Archmage or Charge Regulation Skills to improve your Damage, but it can be very expensive.
While the Gemling Legionnaire offers great bonuses for Spells, the Mercenary Class is a terrible choice for Spell users due to lack of meaningful Notables on the Passive Tree. To solve that problem, you will need the Split Personality Jewel that allows you to start allocating Points from a different position on the Passive Tree. The only exception here is the Ricochet Notable, which grants extra Chains from Terrain for your Arc, which is a very valuable boost for your AoE Coverage. You will also want to balance the Gem Studded Ascendency Notable to gain all 3 benefits at the same time. This results in seemingly random Support Gems socketed in various Skills that serve no real purpose.
The Additional Quality for your Skills can be obtained through small Passives on the Gemling Ascendency, Fox Idol socketed in the Darkness Enthroned with Body Armor variant, Desecrated modifier on your Amulet, and the Paragon Anoint. You can also Corrupt your Gems twice to raise both Skill Levels and Quality.
You can also check our other Path of Exile 2 builds right over here Odealo's Crafty Guides - Full List
1. Gameplay
Place down Totems to deal Damage in almost every direction thanks to the massive amount of Projectiles and Chains. Against Bosses, use Elemental Weakness and Frost Bomb to lower their Resistance, and summon Mana Tempest to improve your Damage further.
|
|
|
|

2. Build's PROS & CONS
| PROS |
|
| CONS |
|
3. Leveling tips
This Setup requires high level and complete Ascendancy to perform well. Our recommendation is to level up with the Explosive Grenade Gemling Legionnaire POE 2 Build and change to the final Setup once you can equip all the necessary Items.
4. Final Skill Tree, Ascendancy Points, and Pantheon
Final Skill Tree:
 |
|
Click on the image to open the Passive Tree preview in a new window, or use the Path of Building (PoB) tool, |
Ascendancy points:
Preferably in this order:
- Essence of Virtue
- Advanced Thaumaturgy
- Implanted Gems
- Gem Studded
5. Final Gems links
| [DPS] Arc setup Weapon Set 1 |
|
 |
Arc - fires a Chaining Projectile that deals Lightning Damage and inflicts potent Shock. |
 |
Spell Totem - creates a Totem that uses linked Spells for you. Higher levels allow you to summon more Totems, with the final bonus gained at level 23. |
 |
Dominus' Grasp |
 |
Zenith II |
 |
Urgent Totems III |
 |
Pinpoint Critical - use this only if you are wearing Maligaro's Virtuosity. |
| [Utility] Entangle setup Weapon Set 2 |
|
 |
Entangle - rapidly Hits Enemies, applying Critical Weakness Debuff sourced from the Effigy of Cruelty. Use it against Bosses. |
 |
Prolonged Duration II |
|
Pinpoint Critical |
 |
Unleash |
 |
Branching Fissures II |
 |
Mobility |
| [Utility] Elemental Weakness setup Weapon Set 2 |
|
 |
Elemental Weakness - an offensive Curse that greatly lowers Elemental Resistance of affected targets. |
 |
Heightened Curse |
 |
Ritualistic Curse |
|
Mobility |
 |
Efficiency II |
|
Prolonged Duration II |
| [Utility] Frost Bomb setup Weapon Set 2 |
|
 |
Frost Bomb - a Damaging Orb that applies Elemental Exposure, lowering Elemental Resistance further. |
 |
Potent Exposure |
 |
Cooldown Recovery II |
 |
Spell Echo |
|
Efficiency II |
 |
Prolonged Duration II |
| [Utility] Mana Tempest setup | |
 |
Mana Tempest - a potent Buff that rapidly drains your Mana but Empowers your Spells. |
| [UTILITY] Purity of Fire/Cold/Lightning setup | |
 |
Purity of Fire/Cold/Lightning - your Sceptre should grant one of the Purity Skills to improve your Resistances for free. |
 |
Clarity II |
 |
Mysticism II |
 |
Warm Blooded |
 |
Cool Headed |
 |
Strong Hearted |
|
|
6. Gear Setup
As usual for Spell Builds, you will want additional Skill Levels and plenty of Cast Speed. The Maligaro's Virtuosity Gloves greatly help with scaling your Critical Strikes by allowing you to ignore certain penalties. Thanks to the Reservation Efficiency, you can summon all your possible Totems without needing extra Spirit itself. With the Effigy of Cruelty, you can drastically raise your Critical Hit Chance against Bosses. Your main defense comes from Energy Shield and its Recharge. You will also need the additional Quality from Fox Idol socketed in your Belt, Amulet Desecration, and special Anointment.
|
Stat priorities on items:
|
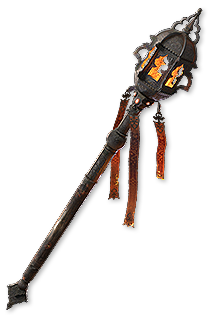
 (Weapon) Rare Wand - your Wand provides tons of Damage through additional Spell Levels, and increases to your Spell Damage, Cast Speed, and Crit Chance. You can also get plenty of Extra Damage here, ideally of Cold type to inflict Chill for extra survivability. (Weapon) Rare Wand - your Wand provides tons of Damage through additional Spell Levels, and increases to your Spell Damage, Cast Speed, and Crit Chance. You can also get plenty of Extra Damage here, ideally of Cold type to inflict Chill for extra survivability. |
|
| Min. requirements: +4 to Level of all Lightning Spell Skills 80% increased Spell Damage 20% increased Cast Speed Optional affixes: #% increased Critical Hit Chance for Spells Gain #% of Damage as Extra Cold/Lightning/Fire Damage #% increased Mana Regeneration Rate |
|
 (Focus) Rare Sceptre - it is your main source of Spirit, further supplemented by Rabbit Idol. You can also get additional Attributes or Mana Regeneration here. Use a Sceptre that grants the Purity Skill. (Focus) Rare Sceptre - it is your main source of Spirit, further supplemented by Rabbit Idol. You can also get additional Attributes or Mana Regeneration here. Use a Sceptre that grants the Purity Skill. |
|
| Min. requirements: +200 to Spirit Grants Skill: Level (1-20) Purity of Element Optional affixes: +# to Attributes #% increased Mana Regeneration Rate |
|
 (Focus) Effigy of Cruelty - thanks to your second Weapon Set, you can use this Focus to apply Critical Weakness Debuff onto your Enemies, massively improving the Damage of your Arcs. (Focus) Effigy of Cruelty - thanks to your second Weapon Set, you can use this Focus to apply Critical Weakness Debuff onto your Enemies, massively improving the Damage of your Arcs. |
|
| +(20—30) to maximum Energy Shield (40—50)% increased Spell Damage +10 to Intelligence +(7—13)% to Chaos Resistance Critical Hits with Spells apply (1-3) Stacks of Critical Weakness |
|
 (Amulet) Rare Amulet - you will need a bonus for all Spells here, both for Arc and for the Spell Totem to reach your maximum limit. You should also Desecrate additional Quality here, ideally paired with Cast Speed. At a massive budget, you can look for extra Spirit or use Absent Amulet to gain free Spirit Skills. (Amulet) Rare Amulet - you will need a bonus for all Spells here, both for Arc and for the Spell Totem to reach your maximum limit. You should also Desecrate additional Quality here, ideally paired with Cast Speed. At a massive budget, you can look for extra Spirit or use Absent Amulet to gain free Spirit Skills. |
|
| Min. requirements: +3 to Level of all Spell Skills +5% to Quality of all Skills Allocates Paragon Optional affixes: % increased Spell Damage % increased Cast Speed % total Elemental Resistance |
|
 (Ring) Rare Ring - the Rings can provide tons of Damage through special Spell modifiers from Breach, but the Cast Speed remains the best option among them. You will also need to get plenty of Resistance and Rarity. (Ring) Rare Ring - the Rings can provide tons of Damage through special Spell modifiers from Breach, but the Cast Speed remains the best option among them. You will also need to get plenty of Resistance and Rarity. |
|
| Min. requirements: 20% increased Cast Speed +40% total Elemental Resistance Optional affixes: % increased Rarity of Items found % increased Spell/Lightning Damage +1 to Level of all Spell Skills % increased Critical Hit Chance for Spells |
|
 (Belt) Darkness Enthroned - a mandatory Belt that grants tons of Spirit and Quality for all your Skills. Aim for at least 90% increased Effect of Augments. (Belt) Darkness Enthroned - a mandatory Belt that grants tons of Spirit and Quality for all your Skills. Aim for at least 90% increased Effect of Augments. |
|
| Has (1—3) Charm Slots (50—100)% increased effect of Socketed Augment Items This item gains bonuses from Socketed Items as though it was Body Armour Has 2 Augment Sockets Recommended Augments: Fox Idol Rune of the Blossom |
|
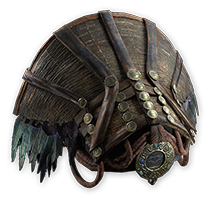 (Helmet) Rare Helmet - your Helmet provides a lot of basic defenses through Energy Shield and capping your Resistance. You can also get the Desecrated modifier to improve your Reservation Efficiency. (Helmet) Rare Helmet - your Helmet provides a lot of basic defenses through Energy Shield and capping your Resistance. You can also get the Desecrated modifier to improve your Reservation Efficiency. |
|
| Min. requirements: +300 to Energy Shield +40% total Elemental Resistance Optional affixes: #% increased Critical Hit Chance #% increased Energy Shield Recharge Rate % increased Spirit Reservation Efficiency |
|
 (Body Armour) Rare Armour - your Body Armour is your main source of Energy Shield. It competes with Spirit, so it is preferred to get Reservation Efficiency instead, but you can opt for them both at the same time if you don't need extra safety. (Body Armour) Rare Armour - your Body Armour is your main source of Energy Shield. It competes with Spirit, so it is preferred to get Reservation Efficiency instead, but you can opt for them both at the same time if you don't need extra safety. |
|
| Min. requirements: +600 to Energy Shield +40% total Elemental Resistance Optional affixes: % increased Spirit Reservation Efficiency +# to Spirit #% increased Energy Shield Recharge Rate |
|
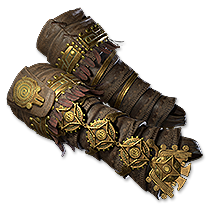
 (Gloves) Maligaro's Virtuosity - sets your Crit Damage Bonus to a set amount, allowing you to pick several choices that usually penalise your Damage. You can improve it with Corruption, but Extra Socket is also useful to have. (Gloves) Maligaro's Virtuosity - sets your Crit Damage Bonus to a set amount, allowing you to pick several choices that usually penalise your Damage. You can improve it with Corruption, but Extra Socket is also useful to have. |
|
| (60—80)% increased Evasion Rating (20—30)% increased Critical Hit Chance 5% increased Attack Speed +(10—20) to Dexterity Your Critical Hit Chance cannot be Rerolled Your Critical Damage Bonus is 250% |
|
|
|
|
| Min. requirements: +100 to Energy Shield +40% total Elemental Resistance Optional affixes: +2 to Level of all Projectile Skills #% increased Critical Hit Chance Projectiles have (20—32)% chance to Chain an additional time from terrain |
|
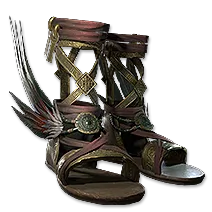 (Boots) Rare Boots - a very basic piece of equipment that simply grants basic defenses in the form of Energy Shield and Resistance, but also improves your Movement Speed. (Boots) Rare Boots - a very basic piece of equipment that simply grants basic defenses in the form of Energy Shield and Resistance, but also improves your Movement Speed. |
|
| Min. requirements: 30% increased Movement Speed +100 to Energy Shield +40% total Elemental Resistance Optional affixes: % increased Rarity of Items found % reduced Slowing Potency of Debuffs on You +# to Attributes |
|
 (Jewel) Rare Jewel - your Jewels can boost both your Damage and survivability. Seek Energy Shield and its Recharge, Critical Strike Chance for Spells, and optionally increases to your Damage. The Time-lost variant is slightly better, but usually more expensive. (Jewel) Rare Jewel - your Jewels can boost both your Damage and survivability. Seek Energy Shield and its Recharge, Critical Strike Chance for Spells, and optionally increases to your Damage. The Time-lost variant is slightly better, but usually more expensive. |
|
| Optional affixes: % increased Spell/Lightning Damage % increased Damage against Rare and Unique Enemies % increased maximum Energy Shield % increased Critical Hit Chance % increased Critical Hit Chance for Spells % faster start of Energy Shield Recharge |
|
 (Jewel) Split Personality - you will need this Jewel to efficiently progress with your Passive Tree. You will need to allocate traveling nodes all the way from Mercenary to the Sorceress and the Jewel Socket, and refund them later. (Jewel) Split Personality - you will need this Jewel to efficiently progress with your Passive Tree. You will need to allocate traveling nodes all the way from Mercenary to the Sorceress and the Jewel Socket, and refund them later. |
|
| Can Allocate Passive Skills from the Sorceress's starting point | |
 (Jewel) Heart of the Well - a universal Jewel that should grant you plenty of Extra Damage and improve your Energy Shield. (Jewel) Heart of the Well - a universal Jewel that should grant you plenty of Extra Damage and improve your Energy Shield. |
|
| Recommended modifiers: Gain #% of Damage as Extra Cold/Lightning/Fire Damage % increased Energy Shield from Equipped Body Armour Gain additional Stun Threshold equal to #% of maximum Energy Shield |
|
 (Jewel) Prism of Belief - a very straightforward Jewel that increases the Gem Levels of specific Skills. The Arc variant is quite expensive, so treat it as an aspirational upgrade. (Jewel) Prism of Belief - a very straightforward Jewel that increases the Gem Levels of specific Skills. The Arc variant is quite expensive, so treat it as an aspirational upgrade. |
|
| +(1—3) to Level of all Specific Skill Skills |
 (Gloves) Rare Gloves - at a much higher budget, you can opt for the special Marksman Modifiers that simply grant additional Skill Levels for your Arc, or allow it to Chain an additional time from terrain.
 |
|
If you have any other build requests please leave that in the comments below. We are always open to suggestions and constructive feedback.
Pictures used in this article are the intellectual property of Grinding Gear Games.