
Hollow Form Martial Artist POE 2 Build
The best Setup for the insanely powerful Hollow Form Skill granted by the Martial Artist that use the Whirling Assault to obliterate foes.Hollow Form Whirling Assault
Martial Artist
Updated for Path of Exile 2 Early Access
The Best Crafty Guides by Odealo
| Guide notes |
| June 03 2026 - Created for Early Access Patch 0.5.0 |
| Build Overview | |||
| Tags: [CHANNELLING] [CRIT] [HYBRID] [ATTACK] | |||
|
Budget: Defenses: |
|
Boss DPS: AoE: |
|
The new Martial Artist Ascendancy enables a unique and insanely powerful archetype with the Hollow Form. It is a Channeling Skill that summons clones of yourself that perform any other Melee Skill once. By spending Power Charges, you will summon 2 additional clones. There is no limit to the maximum number of summoned Mirages, so you can use even very slow Skills without worrying about overwriting existing ones and wasting your DPS. For this reason, the best Skill to use is the Whirling Assault. It is a spinning Attack that hits 8 times over its duration, but has +1 second to its total Attack time. You only need to Channel Hollow Form for a fraction of a second to create your Clones, making it an insanely powerful combination.
Usually, sustaining Power Charges at such a high rate is very challenging. Thankfully, the other Martial Artist's Ascendancy, the Way of the Stonefist, completely solves that problem. It changes or upgrades the Modifiers of your Gloves, even the Unique ones. In our case, the Lochtonial Caress turns from a fairly useless pair of Gloves into a true powerhouse of Charge generation. It grants up to a 10% Chance to grant each Charge to nearby Allies on Hit, which is inherited by your Clones, and grants you the Charges instead. To make further use of your Charges, you will be using the Charge Regulation Skill, which grants you 26% More Critical Hit Chance, 20% More Defenses, and 25% Increased Skill Speed. Sustaining Mana is not that easy. Your Clones cannot Leech for you, and the Gloves disable Mana Leech anyway. The Well of the Power Notable annointed on your Amulet restores 5% of your maximum Mana when you consume a Power Charge, but other than that, you will have to rely on Regeneration and Mana Cost Efficiency.
To further boost your Damage, you should use a Talisman in your second Weapon Set. By spending Power Charge on a single Rend, you will gain a global 50% Extra Lightning Damage for more than 20 seconds. The Devour grants Power Charges before the combat starts and enables the Thrill of the Kill and Blazing Critical Buffs for several seconds, granting you 40% Extra Elemental Damage. Thanks to the Hollow Focus, you will have an endless supply of Bells to refresh your Buffs. You should begin the combat with the Pounce to apply Freezing Mark, which helps Freezing Bosses and grants you another temporary Buff that provides 30% Extra Cold Damage.
Thanks to the new Breath of Aldur Rune, you can transform all Damage types on your Weapon into Cold. You will be scaling generic Attack and Elemental Damage bonuses, but by focusing on the Cold Damage, you will Freeze Enemies more reliably, which enables the Heavy Frost Notable, which causes you to ignore all Resistances of Frozen Enemies, which is an easy way to scale all your Damage types at the same time. Later on, you will equip the very expensive Rakiata's Flow to invert their Resistances instead. The final Ascendancy choice is optional - you can pick the Way of the Mountain to gain a significant boost to your Damage and survivability after Freezing an Enemy, or pick Runic Meridians to gain extra Rune Sockets.
You can also check our other Path of Exile 2 builds right over here Odealo's Crafty Guides - Full List
1. Gameplay
During Clearing Maps you only need to quickly Channel the Hollow Form for a brief moment to create Clones. Use Dodge Roll and Pounce to move away faster. Use Devour and Rend when needed to gain powerful Buffs for several seconds. Use the Pounce to apply Mark against Bosses.
|
|
|
|

2. Build's PROS & CONS
| PROS |
|
| CONS |
|
3. Leveling tips
You will have to level up as a regular Monk with Quarterstaves. You will need to complete 2 Ascendency Trials to switch to this setup. Check out our Hollow Palm Technique Invoker Guide for more tips for the early game progression.
4. Final Skill Tree, Ascendancy Points, and Pantheon
Final Skill Tree:
 |
|
Click on the image to open the Passive Tree preview in a new window, or use the Path of Building (PoB) tool, |
Ascendancy points:
Preferably in this order:
- Way of the Stonefist
- Hollow Form Technique
- Hollow Focus Technique
- Way of the Mountain/Runic Meridans
5. Final Gems links
| [DPS] Hollow Form setup | |
 |
Hollow Form - it is granted by your Ascendancy, so the extra Sockets will automatically unlock as you level up. |
 |
Whirling Assault - a slow spinning Attack that hits up to 8 times per use. It is easily the strongest Skill to combine with the Hollow Form. |
 |
Rakiata's Flow/Elemental Armament II |
 |
Heightened Charges |
 |
Vorana's Siege/Magnified Area II |
 |
Blindside/Mobility/Efficiency II |
| [Utility] Hollow Focus setup | |
 |
Hollow Focus - creates Bells that can be Attacked by you to release a Shockwave. Your Hits against this Bell are always Critical. |
 |
Cooldown Recovery II |
 |
Magnified Effect II |
 |
Blind II |
 |
Mana Leech |
|
Elemental Armament II |
| [Utility] Rend setup | |
 |
Rend - a Wyvern's default Attack that can consume Power Charges to grant you a global Buff that grants 50% Extra Lightning Damage for all your attacks. |
 |
Perpetual Charge |
 |
Rapid Attacks III |
 |
Rage III |
 |
Prolonged Duration II |
 |
Hit and Run |
| [Utility] Devour setup | |
 |
Devour - consumes Corpse or Bells to grant you Power Charges and enable other on-kill effects. |
 |
Thrill of the Kill II |
 |
Blazing Critical |
|
Rapid Attacks III |
|
Rage III |
|
Prolonged Duration II |
| [Utility] Pounce setup | |
 |
Pounce - a great mobility Skill that jumps to the target and applies any Mark. |
 |
Freezing Mark - speeds up Freeze Build up on your target and grants 30% Extra Cold Damage upon Freezing an Enemy. |
|
Blind II |
|
Cooldown Recovery II |
|
Rapid Attacks III |
|
Prolonged Duration II |
| [Utility] Charge Regulation setup | |
 |
Charge Regulation - grants massive bonuses depending on your active Charges, but consumes them every 12 seconds. |
 |
Warm Blooded |
| [UTILITY] Ghost Dance setup | |
 |
Ghost Dance - recovers your Energy Shield upon being hit based on your Evasion Rating. |
|
Cooldown Recovery II |
| [UTILITY] Wind Dancer setup | |
 |
Wind Dancer - improves your Evasion Rating and releases a Damaging shockwave upon being hit. |
|
Rage III |
|
Blind II |
|
Magnified Effect II |
 |
Life Leech III |
 |
Close Combat II |
| [UTILITY] Refutation setup | |
 |
Refutation - a Ward Skill that grants you Parrying for a few seconds, which saves you from Damage but also applies a Debuff on Enemies that significantly increases their Damage Taken. |
|
Cooldown Recovery II |
|
Prolonged Duration II |
 |
Rapid Casting II |
 |
Efficiency II |
|
|
6. Gear Setup
Your primary source of Damage comes from Elemental Damage, Critical Strikes, Attack Speed, and additional Skill Levels. You will want to prioritise Cold Damage to make Freezing easier, but any Damage type is good for pure DPS. Try to get all 3 Elemental types to enable all bonuses from the Yoke of Suffering. For defenses, we recommend a hybrid approach with maximum Life, Evasion, and Energy Shield, although pure Energy Shield with Chaos Innoculation can achieve higher survivability at a significantly higher budget. You won't need any additional Attributes, unless you plan to include pure Intelligence or Dexterity bases.
|
Stat priorities on items:
|
 (Weapon) Rare Quarterstaff - the Hollow Form allows you to use any Melee Weapon, but it is hard to find a more powerful and versatile combination than the default Quarterstaff with Whirling Assault. Look for high Critical Hit Chance, Elemental DPS, and Skill Levels. Use Breath of Aldur to convert all Elemental Damage on your Weapon into Cold Damage only. It does not convert Damage from other sources. (Weapon) Rare Quarterstaff - the Hollow Form allows you to use any Melee Weapon, but it is hard to find a more powerful and versatile combination than the default Quarterstaff with Whirling Assault. Look for high Critical Hit Chance, Elemental DPS, and Skill Levels. Use Breath of Aldur to convert all Elemental Damage on your Weapon into Cold Damage only. It does not convert Damage from other sources. |
|
| Min. requirements: 500+ DPS 14%+ Critical Hit Chance Optional affixes: +# to Level of all Attack Skills Gain #% of Damage as Extra Damage % increased Critical Damage Bonus |
|
 (Weapon) Amor Mandragora - in your second Weapon Set, you can use any Talisman. You can use Rare one with very high Attack Speed to make Pouncing faster, or opt for the Amor Mandragora for a valuable bonus for Skill Effect Duration, prolonging your Buffs. (Weapon) Amor Mandragora - in your second Weapon Set, you can use any Talisman. You can use Rare one with very high Attack Speed to make Pouncing faster, or opt for the Amor Mandragora for a valuable bonus for Skill Effect Duration, prolonging your Buffs. |
|
| Adds (16-20) to (23-27) Physical Damage +(8-15) to Intelligence (10-15)% increased Skill Effect Duration Enemies in your Presence are Hindered Gain 1 Druidic Prowess for every 20 total Rage spent |
|
 (Amulet) Yoke of Suffering - this Amulet grants an insane amount of Damage, and the negative Ailment Duration modifier doesn't include Freeze. Instill the Well of the Power to gain Mana upon spending Power Charges. (Amulet) Yoke of Suffering - this Amulet grants an insane amount of Damage, and the negative Ailment Duration modifier doesn't include Freeze. Instill the Well of the Power to gain Mana upon spending Power Charges. |
|
| +(30-40) to maximum Life +(10-15)% to all Elemental Resistances (15-30)% increased Elemental Damage Enemies take (15-20)% increased Damage for each Elemental Ailment type among your Ailments on them (40-30)% reduced Duration of Ignite, Shock and Chill on Enemies |
|
 (Ring) Rare Ring - your Rings should grant you a high amount of Elemental Damage to your Attacks; you can skip the Life modifier to gain more Damage. For an aspirational upgrade, you should Corrupt it to get another source of increased Damage, but don't forget to Catalyst it for higher Attack modifiers first. (Ring) Rare Ring - your Rings should grant you a high amount of Elemental Damage to your Attacks; you can skip the Life modifier to gain more Damage. For an aspirational upgrade, you should Corrupt it to get another source of increased Damage, but don't forget to Catalyst it for higher Attack modifiers first. |
|
| Min. requirements: Adds 50+ Lightning/Cold/Physical/Fire Damage to Attacks +40% total Elemental and Chaos Resistance Optional affixes: % increased Rarity of Items found +# to maximum Life (20-30)% increased Damage (Corrupt) |
|
 (Belt) Shavronne's Satchel - your Clones do not Leech Life for you, so you have to rely on Life Flask to Recover Life. You can apply this Regeneration to Energy Shield as well, but the Flask still stops once you fill your Life pool. (Belt) Shavronne's Satchel - your Clones do not Leech Life for you, so you have to rely on Life Flask to Recover Life. You can apply this Regeneration to Energy Shield as well, but the Flask still stops once you fill your Life pool. |
|
| Has (1-3) Charm Slots Flasks gain 0.17 charges per Second (30-20)% reduced Flask Life Recovery rate +(20-30) to Intelligence (20-30)% increased Flask Charges gained Life Recovery from Flasks also applies to Energy Shield |
|
 (Belt) Ingenuity - the default choice, it simply boosts the effect of your Rings. You can Corrupt it to gain extra Resistances, or boost the Effect of your Rings even more. (Belt) Ingenuity - the default choice, it simply boosts the effect of your Rings. You can Corrupt it to gain extra Resistances, or boost the Effect of your Rings even more. |
|
| Has (1-3) Charm Slots 20% of Flask Recovery applied Instantly (-20-20)% increased Charm Charges gained (-10-10)% increased Charm Charges used (20-30)% increased bonuses gained from left Equipped Ring (20-30)% increased bonuses gained from right Equipped Ring |
|
 (Belt) Rare Belt - at first, you will simply lack Resistances, which can be solved with a Rare Belt. Maximum Mana or Mana Flask Recovery Rate is also useful for your sustain. (Belt) Rare Belt - at first, you will simply lack Resistances, which can be solved with a Rare Belt. Maximum Mana or Mana Flask Recovery Rate is also useful for your sustain. |
|
| Min. requirements: +130 to maximum Life +40% total Elemental and Chaos Resistance Optional affixes: +100 to maximum Mana % increased Flask Mana/Life Recovery rate |
|
 (Helmet) Rare Helmet - the Helmet is mostly a defensive piece with a high amount of Energy Shield and Evasion, but it can also boost your Critical Strike Chance, which is very useful for your Damage output. Desecration can grant you Critical Damage Bonus and Mana Efficiency. Use Idol of Alira to improve your Power Charge generation. (Helmet) Rare Helmet - the Helmet is mostly a defensive piece with a high amount of Energy Shield and Evasion, but it can also boost your Critical Strike Chance, which is very useful for your Damage output. Desecration can grant you Critical Damage Bonus and Mana Efficiency. Use Idol of Alira to improve your Power Charge generation. |
|
| Min. requirements: +130 to maximum Life +100 to Energy Shield +300 to Evasion Rating +40% total Elemental and Chaos Resistance Optional affixes: % increased Rarity of Items found (10-34)% increased Critical Hit Chance (13-20)% increased Critical Damage Bonus (Desecrate) (6-10)% increased Mana Cost Efficiency (Desecrate) |
|
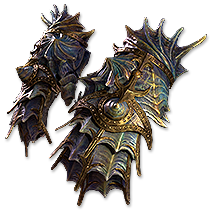
 (Body Armour) Rare Armour - your Body Armour is the major source of Energy Shield, Evasion Rating, and Life. Simple Resistances are useful too, but you can opt for more niche defensive bonuses such as Immunity to Ignite, Deflection Chance, or Reduced Effect of Curses on you. (Body Armour) Rare Armour - your Body Armour is the major source of Energy Shield, Evasion Rating, and Life. Simple Resistances are useful too, but you can opt for more niche defensive bonuses such as Immunity to Ignite, Deflection Chance, or Reduced Effect of Curses on you. |
|
| Min. requirements: +200 to maximum Life +200 to Energy Shield +500 to Evasion Rating +40% total Elemental and Chaos Resistance Optional affixes: #% reduced effect of Curses on you (Desecrate) Gain Deflection Rating equal to #% of Evasion Rating % reduced Ignite Duration on you |
|
|
|
|
| Has +4 to Evasion Rating per player level Has +2 to maximum Energy Shield per player level (7—9)% less damage taken while on Low Life (13—20)% increased Attack Speed Cannot Leech Mana (5—10)% chance to grant a Endurance Charge to Allies in your Presence on Hit (5—10)% chance to grant a Frenzy Charge to Allies in your Presence on Hit (5—10)% chance to grant a Power Charge to Allies in your Presence on Hit |
|
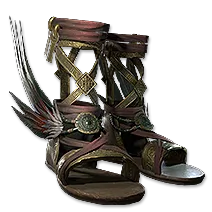 (Boots) Rare Boots - Your Boots are all about the Speed. You will want a high Movement Speed bonus, but later you can also include reducing Slow Potency or shortening the Chill on you. You will still need the usual defensive bonuses. (Boots) Rare Boots - Your Boots are all about the Speed. You will want a high Movement Speed bonus, but later you can also include reducing Slow Potency or shortening the Chill on you. You will still need the usual defensive bonuses. |
|
| Min. requirements: 30% increased Movement Speed +100 to maximum Life +100 to Energy Shield +300 to Evasion Rating +40% total Elemental and Chaos Resistance Optional affixes: % increased Rarity of Items found (20-30)% reduced Slowing Potency of Debuffs on You (Corrupt/Desecrate) (8-12)% increased Mana Cost Efficiency if you have Dodge Rolled Recently (Desecrate) % reduced Chill Duration on you |
|
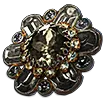
 (Jewel) Heart of the Well - this Jewel simply grants a lot of Damage. The Extra Damage bonuses are by far the best ones here, but you can also opt for regular Jewel modifiers such as Critical Strikes or increases to your Damage. (Jewel) Heart of the Well - this Jewel simply grants a lot of Damage. The Extra Damage bonuses are by far the best ones here, but you can also opt for regular Jewel modifiers such as Critical Strikes or increases to your Damage. |
|
| Recommended modifiers: Gain (9–15)% of Damage as Extra Cold/Fire/Lightning Damage |
|
 (Jewel) Against the Darkness - another mandatory Jewel for any high-end Build, it also grants you tons of Extra Damage. Socket it near the Heartstopping to affect 6 Notables. At first, you can use the Time-Lost Rare Jewel in its place. (Jewel) Against the Darkness - another mandatory Jewel for any high-end Build, it also grants you tons of Extra Damage. Socket it near the Heartstopping to affect 6 Notables. At first, you can use the Time-Lost Rare Jewel in its place. |
|
| <Recommended modifiers: Notable Passive Skills in Radius also grant Gain (2-4)% of Damage as Extra Fire/Cold/Lightning Damage |
|
 (Jewel) Rare Jewel - Jewels grant you an immense amount of Damage. Freeze Buildup is very noticeable against tougher foes and allows you to skip their Resistance quicker. (Jewel) Rare Jewel - Jewels grant you an immense amount of Damage. Freeze Buildup is very noticeable against tougher foes and allows you to skip their Resistance quicker. |
|
| Optional affixes: % increased Critical Hit Chance % increased Critical Damage Bonus % increased Freeze Buildup % increased Area of Effect % increased Elemental/Attack Damage with Quarterstaves % increased Damage with Hits against Rare and Unique Enemies |
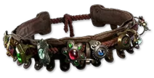
 (Gloves) Lochtonial Caress - the Way of the Stonefist converts this pair of Gloves into a more powerful version. Only the Power Charge generation is important, but you can't see it without equipping, so you will have to buy multiple copies to find the best ones.
|
|
If you have any other build requests please leave that in the comments below. We are always open to suggestions and constructive feedback.
Pictures used in this article are the intellectual property of Grinding Gear Games.