Buy/Sell
 Log in


Molten Shower Autobomber Acolyte of Chayula POE2 Build
An autobomber build that constantly triggers Molten Shower with the Archon of ChayulaMolten Shower Autobomber
Acolyte of Chayula Build
Updated for Path of Exile 2 Early Access
The Best Crafty Guides by Odealo
| Guide notes |
| August 16, 2026 - Created for Early Access. |
| Build Overview | |||
| Tags: [CHAOS] [POISON] | |||
|
Budget: Defenses: |
|
Boss DPS: AoE: |
|


The build utilizes Molten Shower from Brutus' Lead Sprinkler to its fullest potential. Molten Shower is an Attack that will Trigger on its own with each Attack, once you have at least 500 Strength. The Attack that will Trigger it is Archon of Chayula Tornado, but a simple Mace Strike will start the hopefully indefinitely-lasting chain reaction. Archon of Chayula requires Glory to use. Harbinger of Madness from Sadist's Mercy, Bodach from Vestige of Darkness, and Repulsion with Blasphemy are not Attacks, but will generate Glory nonetheless; you gain it by dealing any Chaos Damage, and to get it faster, we can implement the Redblade Banner on a weapon swap. The aforementioned Sadist's Mercy also hastens Glory generation via Gruelling Madness. The last thing needed is a Dominion Anoint to bypass the Cooldown the Tornado normally has. By increasing its Duration and spawning them often, they will generate Glory for themselves, so you can count on them being a permanent fixture, orbiting around. The Chaos Damage is sourced from Purple Flames; the Remnant you generate by allocating Into the Breach, Choice of Power. The Damage is boosted by the Rage, Despair, and Wither debuff, which is also a byproduct of Archon of Chayula; the skill has a second component: a Chaos-oriented buff for your character.
The infinite loop of Molten Shower that fuels itself makes it a strong autobomber; a type of build that requires almost no input from the player. Thus, we can focus on dodging and moving, which is one of the defensive layers. Armour and a huge Maximum Life pool (from Strength) will make the player quite durable against powerful Hits. We can even make a percentage of the Armour affect Elemental Damage taken with the right items and passives like Tempered Defences and Knight of Tarcus. The weak point of this build is its poor Life Recovery, so to mitigate that, allocate Mind Over Matter and shift damage to be taken from Mana first. This resource will not be needed at all for its inherent purposes. We can then invest in Mana Recovery.
You can also check our other Path of Exile 2 builds right over here Odealo's Crafty Guides - Full List
1. Gameplay
Start any map by picking up Flames and, with the Redblade Banner on, use a Mace Strike to generate Glory. If you don't want to approach any enemy, just wait for the Bodach to appear. This will trigger Repulsion, and by this point you will have enough Glory to spin the first Archon of Chayula, which you will continue doing. Such sustained Molten Shower is your main damaging ability. You can boost your boss damage with Despair Curse, given you can inflict two Curses (we do that with Atziri's Allure Support). Your passive kills are Mana Remnants, Into the Breach, Blasphemous Repulsion, and Scavenged Plating.
|
|


2. Build's PROS & CONS
| PROS |
|
| CONS |
|
3. Leveling tips
There is no one way to level up such a build - the ascendancy simply offers extra Chaos Damage on top (if you start by allocating the Purple Flames passive), so anything will do; what we recommend is to start with Poison right away. Poison is based on Physical and Chaos Damage combined (or any damage for that matter if you wear Plaguefinger Gloves), so you may start with any Physical or Chaos Attack or Spell. The Plague Bearer and Herald of Plague should be implemented as soon as possible since it's free damage in Poison builds. Poisonburst Arrow with Murkshaft or Gas Grenade are good candidates, and do consider Snakebite Gloves before you switch to the final version of the build, as the Maximum Poison stacks are important until you decide to wield the Unique Spear. Remember to allocate all the Poison-related nodes on the passive skill tree first, then go for defences. The process of evolving the build to its proper version is abrupt. Have your required unique items prepared and equip them once your character level is high enough. Also, be sure you have at least 500 Strength.
| [DPS] Poisonburst Arrow setup | |
 |
Poisonburst Arrow - One of the best Skills to inflict Poison with. Requires a Bow. |
 |
Escalating Poison |
 |
Deadly Poison |
 |
Bursting Plague |
| [UTILITY] other skills | |
 |
Plague Bearer |
 |
Herald of Plague |
 |
Herald of Blood |
 |
Toxic Growth - You can add Toxic Growth and Poison them; they'll explode for some additional damage. |
 |
Vine Arrow - Another Plant Skill that can be Poisoned to deal more damage, although its role is to Slow enemies down. |
4. Final Skill Tree, Ascendancy Points, and Pantheon
Final Skill Tree:
 |
|
Click on the image to open the Passive Tree preview in a new window Or import the build into PoB: |
Ascendancy points:
Preferably in this order:
- Waking Dream
- Lucid Dreaming; Choice of Power
- Chayula's Gift
- Archon of Chayula
5. Final Gems links
| [UTILITY] Archon of Chayula setup | |
 |
Archon of Chayula - After building up Glory, you can activate this Skill to gain a buff and create a Chaos Tornado. The Buff grants 20% More Physical and Chaos Damage with a 25% chance to Wither on Hit. |
 |
Profanity |
 |
Xoph's Pyre |
 |
Vorana's Siege |
 |
Prolonged Duration |
 |
Chaos Mastery |
| [DPS] Molten Shower setup | |
 |
Molten Shower - A Triggered-on-Hit Attack that comes with Brutus' Lead Sprinkler. It releases Projectiles that deal damage upon landing on the ground. |
 |
Cooldown Recovery |
 |
Projectile Acceleration |
 |
Concentrated Area |
 |
Elemental Armament |
 |
Fire Attunement |
| [UTILITY] Harbinger of Madness setup | |
 |
Harbinger of Madness - This Persistent Buff comes from Sadist's Mercy. It deals Physical Damage on Kill or on Hit against Unique and Rare enemies. |
|
Bursting Plague |
 |
Corrosion |
 |
Poison |
 |
Armour Break |
 |
Uruk's Smelting |
| [UTILITY] Despair setup | |
 |
Despair - A Curse that lowers Chaos Resistance, which is good considering Chaos Damage is your main damage type. |
 |
Atziri's Allure |
 |
Heightened Curse |
 |
Expanse |
 |
Cursed Ground |
| [UTILITY] Blasphemy setup | |
 |
Blasphemy - Turns Linked Curse into an Aura that constantly affects nearby enemies, but Reserves 60 Spirit. |
 |
Repulsion - Cursed enemies deal Physical Damage around them when you Hit them. When linked to Blasphemy, it'll be reapplied instantly. |
 |
Hex Bloom |
 |
Living Lightning |
 |
Magnified Area |
|
Poison |
| [UTILITY] Mace Strike setup | |
 |
Mace Strike - A default Mace Attack. In this setup, it is used to gain Rage. |
 |
Rage |
 |
Rapid Attacks |
| [UTILITY] Into the Breach setup | |
 |
Into the Breach - A Skill from your Ascendancy Skill Tree. It's the one that creates Flame Remnants to be picked up; purple ones after allocating Choice of Power -- they grant extra Chaos Damage. |
 |
Remnant Potency |
 |
Harmonic Remnants |
 |
Khatal's Rejuvenation |
| [UTILITY] Mana Remnants setup | |
 |
Mana Remnants - Mana Remnants are created on a Kill or on a Critical Hit against an enemy afflicted by an Elemental Ailment (Ignite or Chill in our case). They grant Mana, which can Overflow. |
|
Remnant Potency |
|
Harmonic Remnants |
| [UTILITY] Scavenged Plating setup | |
 |
Scavenged Plating - Breaking Armour grants a stackable buff for More Armour and flat Thorns. |
|
Prolonged Duration |
 |
Physical Mastery |
|
|
6. Gear Setup
There is not much of a legroom when assembling the build; most items are or should be unique. This includes two Weapons, a Helmet, a Body Armour, and hopefully the Amulet. The remaining slots should be allocated for Strength (aim for around 900, at least 500 of it), Maximum Life, Armour, and Added Damage to Attacks. Crit Chance and Attack Speed are uniquely irrelevant. So are Spirit and Life Regeneration; they're of no use for us. The output damage is mainly of the Chaos Attack type, so seeking Damage as Extra Chaos Damage, Rage generation with Maximum Rage, and Withered Magnitude is recommended. With Mind over Matter, you also want good Mana Recovery: Mana Regeneration or Mana Recoup. Don't forget to cap your Elemental Resistances and get some Chaos Resistance. Accuracy won't be needed with the Nimble Strength Notable allocated.
|
Stat priorities on items:
|
 (Helmet) Vestige of Darkness - You want your enemies Chilled so they're eligible to drop Mana Remnant, which this Helmet lets you do with Physical Damage. Bodach is a thing that attacks nearby enemies every 3 seconds and generates Glory. (Helmet) Vestige of Darkness - You want your enemies Chilled so they're eligible to drop Mana Remnant, which this Helmet lets you do with Physical Damage. Bodach is a thing that attacks nearby enemies every 3 seconds and generates Glory. |
|
| (150-200)% increased Armour and Energy Shield +(20-30) to Strength and Intelligence Physical damage from Hits Contributes to Chill Magnitude and Freeze Buildup Enemies in your Presence are Blinded The Bodach haunts your Presence |
|
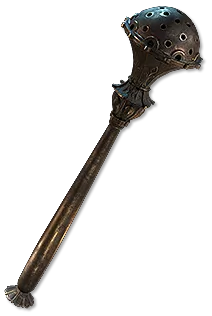 (Weapon) Brutus' Lead Sprinkler - With 500 Strength, it'll Trigger Molten Shower on each Attack. It also adds Fire Damage per Strength to Attacks. (Weapon) Brutus' Lead Sprinkler - With 500 Strength, it'll Trigger Molten Shower on each Attack. It also adds Fire Damage per Strength to Attacks. |
|
| Grants Skill: Molten Shower Hits with this Weapon have 5% chance to Trigger Molten Shower per 25 Strength (80-120)% increased Physical Damage (5-10)% increased Attack Speed +(15-25) to Strength 5 to 10 Added Attack Fire Damage per 25 Strength |
|
 (Weapon) Sadist's Mercy - Grueling Madness increases your Glory gain. Grants Harbinger of Madness Skill, which is another on-Hit Triggered ability that grants Glory. (Weapon) Sadist's Mercy - Grueling Madness increases your Glory gain. Grants Harbinger of Madness Skill, which is another on-Hit Triggered ability that grants Glory. |
|
| Grants Skill: Harbinger of Madness (240-300)% increased Physical Damage +(5-8)% to Critical Hit Chance (14-22)% increased Attack Speed Hits with this Weapon inflict (2-5) Gruelling Madness Enemies in your Presence have additional Power equal to their Gruelling Madness |
|
 (Off-hand) Redblade Banner - It's normally hidden behind weapon swap. Take it out only if you desperately need to generate a lot of Glory fast, meaning at the beginning of a boss fight. Use with Sadist's Mercy. (Off-hand) Redblade Banner - It's normally hidden behind weapon swap. Take it out only if you desperately need to generate a lot of Glory fast, meaning at the beginning of a boss fight. Use with Sadist's Mercy. |
|
| Grants Skill: Raise Shield (10-15)% increased Block chance (60-100)% increased Armour +(20-30) to Strength +(100-150) to Stun Threshold Enemies in your Presence count as having double Power |
|
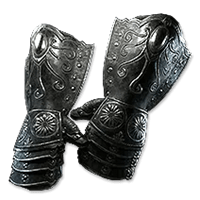 (Gloves) Rare Gloves - You can choose sturdy Gloves with high Maximum Life, Resistances, and Armour, or damage, with Added Damage. Preferably something in the middle. (Gloves) Rare Gloves - You can choose sturdy Gloves with high Maximum Life, Resistances, and Armour, or damage, with Added Damage. Preferably something in the middle. |
|
| Min. requirements: +80 to Maximum Life +80% total Resistance Optional affixes: Attributes Added Damage Armour increased Attack Speed |
|
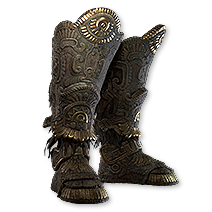 (Boots) Rare Boots - On Boots, you will need to search for Life, Resistances, Movement Speed, and Armour. (Boots) Rare Boots - On Boots, you will need to search for Life, Resistances, Movement Speed, and Armour. |
|
| Min. requirements: 30% increased Movement Speed +80% total Resistance +80 to Maximum Life Optional affixes: Attributes Armour |
|
 (Amulet) Astramentis - It's the best-in-slot item for Attribute-stackers. It grants a lot of Strength, Intelligence, and Dexterity. (Amulet) Astramentis - It's the best-in-slot item for Attribute-stackers. It grants a lot of Strength, Intelligence, and Dexterity. |
|
| +(5-7) to all Attributes +(50-100) to all Attributes -4 Physical Damage taken from Attack Hits |
|
 (Amulet) Rare Amulet - You can find some Strength here if needed; that's on top of Maximum Life, Resistances, Spirit, and other Attributes. (Amulet) Rare Amulet - You can find some Strength here if needed; that's on top of Maximum Life, Resistances, Spirit, and other Attributes. |
|
| Min. requirements: +30 to Strength +80 to Maximum Life Optional affixes: Resistances Spirit Anointment: Dominion |
|
 (Ring) Rare Ring - On Rings, we recommend Added Damage to Attacks and Maximum Life for Prefixes, and Attributes with Resistances for Suffixes. (Ring) Rare Ring - On Rings, we recommend Added Damage to Attacks and Maximum Life for Prefixes, and Attributes with Resistances for Suffixes. |
|
| Min. requirements: +40% total Resistance Added Damage to Attacks Strength Optional affixes: Maximum Life Attributes |
|
 (Belt) Rare Belt - On a Belt, focus only on Maximum Life, Resistances, and Strength. Not much else is needed besides these rather basic stats, so many players opt for a Mageblood with Armour effects once they can afford one. (Belt) Rare Belt - On a Belt, focus only on Maximum Life, Resistances, and Strength. Not much else is needed besides these rather basic stats, so many players opt for a Mageblood with Armour effects once they can afford one. |
|
| Min. requirements: +80% total Resistance +80 to Maximum Life Strength Optional affixes: Maximum Life Attributes |
|
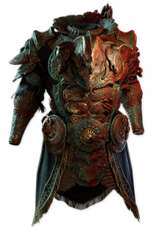 (Body Armour) Titanrot Cataphract - Big in Armour and Strength, which is great here. The downsides of reduced Dex and Int are not that debilitating, but the lack of Life Regen forces you to rely on a Flask or Recoup for Recovery. (Body Armour) Titanrot Cataphract - Big in Armour and Strength, which is great here. The downsides of reduced Dex and Int are not that debilitating, but the lack of Life Regen forces you to rely on a Flask or Recoup for Recovery. |
|
| (400-500)% increased Armour (15-30)% increased Strength 10% reduced Dexterity 10% reduced Intelligence You have no Life Regeneration |
|
 (Jewel) Rare Jewels - Rubies or Sapphires. Rubies can roll increased Armour, Rage, and generic Damage increases, but Sapphires seem overall better with their Withered Magnitude and Presence Area of Effect. (Jewel) Rare Jewels - Rubies or Sapphires. Rubies can roll increased Armour, Rage, and generic Damage increases, but Sapphires seem overall better with their Withered Magnitude and Presence Area of Effect. |
|
| Optional affixes: increased Armour (Rubby) Gain 1 Rage on Melee Hit (Ruby) increased Chaos Damage (Sapphire) increased Withered Magnitude (Sapphire) increased Presence Area of Effect (Sapphire) |
|
 (Jewel) Against the Darkness - You can socket it near Tempered Defences and Battle Trance to apply extra bonuses on Notables, notably the Extra Chaos Damage and increased Strength. (Jewel) Against the Darkness - You can socket it near Tempered Defences and Battle Trance to apply extra bonuses on Notables, notably the Extra Chaos Damage and increased Strength. |
|
| Notable Passive Skills in Radius also grant Gain (2-4)% of Damage as Extra Chaos Damage Notable Passive Skills in Radius also grant (2-3)% increased Strength |
|
 (Jewel) From Nothing - The Keystone you want on this Jewel is Primal Hunger to allocate Molten Being and Craving Slaughter. (Jewel) From Nothing - The Keystone you want on this Jewel is Primal Hunger to allocate Molten Being and Craving Slaughter. |
|
| Passives in Radius of <Keystone> can be Allocated without being connected to your tree | |
 (Jewel) Controlled Metamorphosis - With Massive Ring, it lets you allocate Reaving, Sudden Infuriation, Punctured Lung, Made to Last, and Heavy Armour Notables. (Jewel) Controlled Metamorphosis - With Massive Ring, it lets you allocate Reaving, Sudden Infuriation, Punctured Lung, Made to Last, and Heavy Armour Notables. |
|
| Only affects Passives in (Very Small-Massive) Ring Passives in Radius can be Allocated without being connected to your tree -(20-5)% to all Elemental Resistances |
|
|
If you have any other build requests please leave that in the comments below. We are always open to suggestions and constructive feedback.
Pictures used in this article are the intellectual property of Grinding Gear Games.