Raging Spirits Lich POE 2 Build
A very potent Setup for the Lich Ascendancy that summons powerful temporary Raging Spirits to deliver massive amounts of damage!Raging Spirits
Lich
Updated for Path of Exile 2 Early Access
The Best Crafty Guides by Odealo
| Guide notes |
| June 17 2026 - Created for Early Access Patch 0.5.0 |
| Build Overview | |||
| Tags: [CASTER] [MINION] [HYBRID] | |||
|
Budget: Defenses: |
|
Boss DPS: AoE: |
|
The Raging Spirits is a Spirit Skill that creates Temporary Minions upon casting any other Fire Spell, up to 2 Spirits per single Cast. The best Spell to use is Volcano due to its shortest Cast Time. The Raging Spirits quickly rush to attack nearby opponents, but do not draw their attention and ignore collisions. It is a Minion Skill, so it scales exceptionally well with the Gem Levels. It is also a Fire Skill, so you can utilise Fireflower Amulet and Sunsplinter Buckler to gain lots of extra Gem Levels at a very low cost. They deal primarily Fire Damage, with plenty of Physical and Chaos Damage on top of that. To improve their DPS output, you will use Elemental Weakness and Frost Bomb in your second Weapon Set to massively reduce enemies' Resistance, although later on, you can simply use Rakiata's Flow Gem to invert their Resistance instead, and use your Curse to boost the Chaos portion with Despair. To improve the Clear Speed, you will need to incorporate Minion Splash. It can be acquired quite simply via the new Minion Splash Support Gem or as a special modifier on Breach-crafted Belts. The Lich Ascendancy also helps with that, as Enemies killed by you or your Allies will often explode on death, obliterating entire packs of monsters at once.
The base limit of your Minions is 10. You can raise it with Quality, Expendable Army Notable, and Rare Boots augmented by the new Expansive Alloy. You can also opt for the Archon of Undeath to gain 25% More Minion Damage and double their limit for a short duration, but its activation is often troublesome and unreliable. You will also need a lot of Duration investments to make your army last long enough, as the base Duration is barely 5 seconds. It can be done via Passive Tree choices and Rare Jewels.
The new Reverie Armour enables a new defensive method for hybrid Builds. It lowers the recovery of your Life Flask, but applies its effect constantly. You can combine it with Shavronne's Satchel to apply its Recovery to your Energy Shield too. In this Setup, 15% of the incoming Damage bypasses your Energy Shield, making full use of your potent regeneration. It is a great option for Mapping, as normally your Energy Shield would be constantly interrupted by random Hits and ground Degens, but it does not provide as much protection against singular Hits as regular Rare Armour.
The Lich Ascendancy provides simple bonuses in the form of an extra Jewel Socket, excellent Mana Regeneration, and Unholy Might Buff for your Allies, but it is not the only choice. At a higher budget, you can utilise the new Gemling Legionnaire Ascendancy to massively boost your Minions via extra Quality, which grants them a lot of extra Damage and raises the summon Limits even more. However, the Mercenary Class has no Minion bonuses in its proximity, so you would need a quite expensive Split Personality Jewel to save tons of Passive Skills on traveling nodes.
You can also check our other Path of Exile 2 builds right over here Odealo's Crafty Guides - Full List
1. Gameplay
Use Volcanos to create Raging Spirits. Use the Pain Offering to boost nearby Allies when necessary. Against tougher foes, cast Elemental Weakness and Frost Bomb to remove their Resistance. When in danger, place down Rite of Restoration to boost your Energy Shield and raise your Buckler to Parry incoming attacks.
|
|
|
|

2. Build's PROS & CONS
| PROS |
|
| CONS |
|
3. Leveling tips
The leveling process is very easy. The Raging Spirits is the first Spirit Skill you can unlock in Act 1 of the campaign, and will easily carry you all the way to the Endgame. Make sure to equip your core Unique Amulet and Buckler at level 55 for a massive boost. Prioritise unlocking Passives that grant you Skill Effect Duration first.
4. Final Skill Tree, Ascendancy Points, and Pantheon
Final Skill Tree:
 |
|
Click on the image to open the Passive Tree preview in a new window, or use the Path of Building (PoB) tool, |
Ascendancy points:
Preferably in this order:
- Necromantic Conduit
- Soulless Form
- Crystaline Phylactery
- Rupture the Soul
5. Final Gems links
| [DPS] Raging Spirits setup Weapon Set 1 |
|
 |
Raging Spirits - your main Minions. You will create 2 Spirits every time you Cast a Fire Spell, up to a limit. In this Setup, they deal Fire, Physical, and Chaos Damage. |
 |
Minion Splash II/Elemental Armament II/Rakiata's Flow |
 |
Muster |
 |
Feeding Frenzy II |
 |
Rage III |
 |
Fire Attunement |
| [Utility] Volcano setup Weapon Set 1 |
|
 |
Volcano - simply the fastest Fire Spell you can use to summon your Raging Spirits. |
 |
Rapid Casting II |
 |
Mobility |
 |
Elemental Focus |
 |
Efficiency II |
| [Utility] Elemental Weakness setup Weapon Set 2 |
|
 |
Elemental Weakness - an offensive Curse that lowers all Elemental Resistances of the affected enemy. |
 |
Heightened Curse |
 |
Focused Curse |
|
Efficiency II |
 |
Magnified Area II |
| [Utility] Temporal Chain setup | |
 |
Blasphemy - a Spirit Skill that applies a linked Curse to all nearby Enemies. |
 |
Temporal Chain - a defensive Curse that heavily slows down affected foes. |
|
Heightened Curse |
|
Magnified Area II |
 |
Slow Potency |
| [Utility] Frost Bomb setup Weapon Set 2 |
|
 |
Frost Bomb - applies Elemental Exposure to all Enemies in its radius. |
 |
Potent Exposure |
 |
Cooldown Recovery II |
|
Magnified Area II |
 |
Prolonged Duration II |
| [Utility] Pain Offering setup | |
 |
Pain Offering - sacrifices your Skeletal Minions, greatly boosting your other nearby Minions. |
 |
Brutus' Brain |
 |
Danse Macabre |
 |
Sacrificial Offering |
|
Magnified Area II |
|
Prolonged Duration II |
| [UTILITY] Skeletal Cleric setup | |
 |
Skeletal Cleric - you will need Skeletal Minions to use Pain Offering and benefit from the Muster Gem. Clerics are also somewhat useful as they heal your Allies. |
 |
Last Gasp |
 |
Meat Shield II |
|
Rapid Casting II |
| [UTILITY] Skeletal Minions setup | |
 |
Skeletal Reaver/Sniper/Warrior - your other Skeletal Minions are meant only to boost the Muster Gem. |
 |
Amanamu's Tithe |
| [UTILITY] Parry setup | |
 |
Parry - you will use a Buckler, so you can use its innate Parry Skill to block incoming Damage and inflict powerful Debuff on your Enemies. |
 |
Steadfast II |
 |
Blind II |
|
|
6. Gear Setup
At its core, it is a fairly usual Minion Build, so you will need the usual Minion-related modifiers, such as Minion Gem Levels and increases to their Damage and Attack Speed. What is special about this Setup is that you can utilise bonuses for Fire Skills found on the Fireflower and Sunsplinter, which is a massive boost for a low price. For defense, we recommend a hybrid Setup with maximum Life and Energy Shield. To make the Reverie Armour truly effective, you will need a proper Life Flask and Vision Runes to boost your recovery further. Alternatively, you can opt for the usual Energy Shield and Recharge setup and utilise the new Breach-crafted Rare Belt and Rings for a massive amount of Damage. You will need a bit of extra Attributes, which makes capping Resistance slightly harder.
|
Stat priorities on items:
|
 (Weapon) Rare Sceptre - the Sceptre is your main source of Damage. Minion Gem Levels are by far the most important here, but you should also seek increases to Damage or Attack Speed of your Allies. It is also worth improving your Presence Area to make sure those expensive modifiers actually apply to your Minions at all times. (Weapon) Rare Sceptre - the Sceptre is your main source of Damage. Minion Gem Levels are by far the most important here, but you should also seek increases to Damage or Attack Speed of your Allies. It is also worth improving your Presence Area to make sure those expensive modifiers actually apply to your Minions at all times. |
|
| Min. requirements: +4 to Level of all Minion Skills Optional affixes: Allies in your Presence deal #% increased Damage Allies in your Presence have #% increased Attack Speed % increased Presence Area of Effect |
|
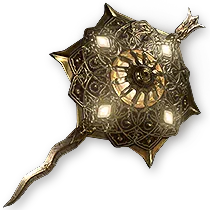 (Shield) Sunsplinter - the Sunsplinter has multiple variants; look for one that improves the Fire Skills by 3 levels. You can also Corrupt it to improve it by 1, but it is quite rare. Additional Sockets are also good. (Shield) Sunsplinter - the Sunsplinter has multiple variants; look for one that improves the Fire Skills by 3 levels. You can also Corrupt it to improve it by 1, but it is quite rare. Additional Sockets are also good. |
|
| Grants Skill: Parry (100—300)% increased Evasion Rating +3 to Level of all Fire Skills +2 to Level of all Cold Skills +1 to Level of all Lightning Skills +1% to Maximum Fire Resistance +2% to Maximum Cold Resistance +3% to Maximum Lightning Resistance |
|
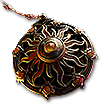 (Amulet) Fireflower - another extremely potent source of Gem Levels. You can Corrupt it to gain one additional Skill Level, but if you apply 20% Quality first, it might increase up to 6 levels. (Amulet) Fireflower - another extremely potent source of Gem Levels. You can Corrupt it to gain one additional Skill Level, but if you apply 20% Quality first, it might increase up to 6 levels. |
|
| +(10—15) to Spirit (10—15)% increased Rarity of Items found +(1—4) to Level of all Fire Skills (30—40)% increased Mana Regeneration Rate Take 100 Fire Damage when you Ignite an Enemy |
|
 (Ring) Rare Ring - the special Breach-crafted Rings can increase the Damage and Attack Speed of your Minions, but the primary role of your Rings is to cap your Resistances and improve your Life. (Ring) Rare Ring - the special Breach-crafted Rings can increase the Damage and Attack Speed of your Minions, but the primary role of your Rings is to cap your Resistances and improve your Life. |
|
| Min. requirements: +80 to maximum Life +40% total Elemental and Chaos Resistance Optional affixes: % increased Rarity of Items found +# to Attributes Temporary Minion Skills have +1 to Limit of Minions summoned Minions have #% increased Attack and Cast Speed Minions deal #% increased Damage |
|
 (Belt) Rare Belt - the Breach-crafted Rare Belt can provide a massive boost to your Damage via additional Gem Levels, or save you a Support Gem for Minion Splash. Such Belts are usually very expensive, and you would need to rely on Energy Shield Recharge for your personal defense. (Belt) Rare Belt - the Breach-crafted Rare Belt can provide a massive boost to your Damage via additional Gem Levels, or save you a Support Gem for Minion Splash. Such Belts are usually very expensive, and you would need to rely on Energy Shield Recharge for your personal defense. |
|
| Optional affixes: +(1-2) to Level of all Minion Skills (35—50)% to gain Archon of Undeath when you create an Offering Minions' Strikes have Melee Splash (35—49)% increased Minion Duration Minions have (14—16)% increased Movement Speed |
|
 (Helmet) Rare Helmet - the Minion Skill Levels are mandatory here. It is a hybrid Setup, but the Helmet is your biggest source of Energy Shield, so you can skip Life modifiers. (Helmet) Rare Helmet - the Minion Skill Levels are mandatory here. It is a hybrid Setup, but the Helmet is your biggest source of Energy Shield, so you can skip Life modifiers. |
|
| Min. requirements: +300 to Energy Shield +2 to Level of all Minion Skills +40% total Elemental and Chaos Resistance Optional affixes: % increased Rarity of Items found +# to Attributes +# to maximum Life |
|
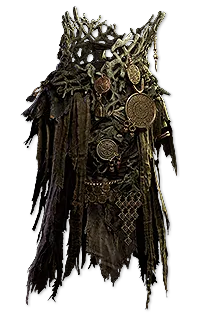 (Body Armour) Reverie - with this Armour, your Life Flask will always be active, but its Recovery Rate will be significantly lower. You can expect 500 Life per second recovered that way, but reaching up to 800 is also possible at higher investments. Try to Corrupt it for an extra Rune Socket. (Body Armour) Reverie - with this Armour, your Life Flask will always be active, but its Recovery Rate will be significantly lower. You can expect 500 Life per second recovered that way, but reaching up to 800 is also possible at higher investments. Try to Corrupt it for an extra Rune Socket. |
|
| Grants Skill: Level 18 Rite of Restoration (100—150)% increased Armour and Energy Shield -10% to Fire Resistance +(17—23)% to Chaos Resistance Cannot use Life Flasks Non-Unique Life Flasks apply their Effects constantly Recovery from Life Flasks cannot be Instant Recovery from your Life Flasks cannot be applied to anything other than you (40—60)% less Life Flask Recovery |
|
 (Belt) Shavronne's Satchel - with this Belt, your Life Flask will also apply to Energy Shield. It is not that great on its own, as the Life Flask usually deactivates upon filling your Life, but thanks to the Reverie Armour, it is always active. You can get more useful modifiers via Corruption. (Belt) Shavronne's Satchel - with this Belt, your Life Flask will also apply to Energy Shield. It is not that great on its own, as the Life Flask usually deactivates upon filling your Life, but thanks to the Reverie Armour, it is always active. You can get more useful modifiers via Corruption. |
|
| Has (1—3) Charm Slots Flasks gain 0.17 charges per Second (20—30)% reduced Flask Life Recovery rate +(20—30) to Intelligence (20—30)% increased Flask Charges gained Life Recovery from Flasks also applies to Energy Shield |
|
 (Flask) Life Flask - to make proper use of Reverie Armour, you will need a Life Flask with very high Recovery. The best value comes from the modifier that removes your Mana, but since you are not actually using it, it won't impact your Mana. You should use Vision Rune in every empty Rune Socket in your Armour pieces to boost its Recovery further. (Flask) Life Flask - to make proper use of Reverie Armour, you will need a Life Flask with very high Recovery. The best value comes from the modifier that removes your Mana, but since you are not actually using it, it won't impact your Mana. You should use Vision Rune in every empty Rune Socket in your Armour pieces to boost its Recovery further. |
|
| Min. requirements: (61—100)% increased Life Recovered Removes 15% of Life Recovered from Mana when used |
|
 (Body Armour) Rare Armour - a usual Rare Armour with lots of Energy Shield will provide better protection against big hits. You will need additional investments in Energy Shield Recharge Rate and Faster Start to make it comfortable. (Body Armour) Rare Armour - a usual Rare Armour with lots of Energy Shield will provide better protection against big hits. You will need additional investments in Energy Shield Recharge Rate and Faster Start to make it comfortable. |
|
| Min. requirements: +200 to maximum Life +500 to Energy Shield +40% total Elemental and Chaos Resistance Optional affixes: #% reduced effect of Curses on you (Desecrate) #% increased Energy Shield Recharge Rate +# to Attributes % reduced Ignite Duration on you |
|
|
|
|
| Min. requirements: +100 to maximum Life +100 to Energy Shield +80% total Elemental and Chaos Resistance Optional affixes: % increased Rarity of Items found +# to Attributes |
|
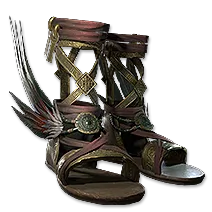 (Boots) Rare Boots - the Boots should grant you the Movement Speed, but can also increase the limit of your Temporary Minions when combined with the Expansive Alloy. (Boots) Rare Boots - the Boots should grant you the Movement Speed, but can also increase the limit of your Temporary Minions when combined with the Expansive Alloy. |
|
| Min. requirements: 30% increased Movement Speed Temporary Minion Skills have +(1—2) to Limit of Minions summoned +100 to maximum Life +40% total Elemental and Chaos Resistance Optional affixes: % increased Rarity of Items found +# to Attributes |
|
 (Jewel) Rare Jewel - seek Jewels that prolong your Skill Effect Duration and improve your Minions. Use Liquid Ire to add an Energy Shield modifier for a low price. (Jewel) Rare Jewel - seek Jewels that prolong your Skill Effect Duration and improve your Minions. Use Liquid Ire to add an Energy Shield modifier for a low price. |
|
| Optional affixes: #% increased maximum Energy Shield Minions have #% increased Attack and Cast Speed Minions deal #% increased Damage % increased Skill Effect Duration Minions have +#% to all Elemental Resistances |
|
 (Jewel) Prism of Belief - the Raging Spirits is a rather unpopular Skill, so getting a perfect Prism of Belief Jewel for this Skill shouldn't be too expensive. (Jewel) Prism of Belief - the Raging Spirits is a rather unpopular Skill, so getting a perfect Prism of Belief Jewel for this Skill shouldn't be too expensive. |
|
| +(1—3) to Level of all Specific Skills | |
 (Jewel) Split Personality - if you want to experiment with different Ascendencies, you will need this Jewel to save tons of Passive Skills on traveling nodes. The Templar's starting point is significantly cheaper, but only slightly less efficient. (Jewel) Split Personality - if you want to experiment with different Ascendencies, you will need this Jewel to save tons of Passive Skills on traveling nodes. The Templar's starting point is significantly cheaper, but only slightly less efficient. |
|
| Can Allocate Passive Skills from the Sorceress's starting point Can Allocate Passive Skills from the Templar's starting point |
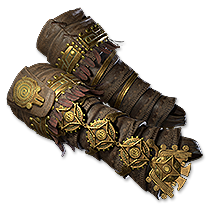 (Gloves) Rare Gloves - the Gloves should provide the basic defensive modifiers, such as Life, Energy Shield, and Resistance. Using multiple Unique Items puts a heavy strain on your Resistances, so you will need a lot of them here.
 |
|
If you have any other build requests please leave that in the comments below. We are always open to suggestions and constructive feedback.
Pictures used in this article are the intellectual property of Grinding Gear Games.