 Buy/Sell
 Log in

Torchlight Infinite Void Charts Guide
Blacksail or Hunting? Cube or Creation? Our Void Charts Guide explains where to spend points and which rewards to target.Torchlight: Infinite Void Charts Guide
Last Update: October 22, 2026
Introduction
Your build gets you through a Netherrealm map. Your Void Chart determines what makes the trip worthwhile. One constellation keeps crafting materials flowing, another brings valuable encounters into more maps, and a third turns quick boss kills into a farming routine. Spread your points too thinly, though, and those rewards become decidedly scattershot.
In Torchlight: Infinite Season 14: Tartarus, a useful chart evolves alongside your character. Embers, Flame Sand and Netherrealm Resonance matter most during the first stretch of Netherrealm progression. Blacksail and Cube unlock at Timemark 4; more ambitious Cube, Hunting and Creation setups become appealing as your damage, map supply and trading budget improve.
We will start with dependable resource nodes, move through accessible encounter farming and finish with specialist routes that demand more investment. Along the way, you will see which enticing upgrades deserve a closer look before you spend the points.
1. How the Void Chart Works
The Void Chart shapes the rewards you earn across Netherrealm stages. Each Talent Constellation caters to a different resource or encounter, with connected nodes gradually opening more specialized bonuses. Ordinary Star Talents build these routes; Prime Star Talents are reserved for the more consequential Profound choices.
Up to 92 ordinary points in the current SS14 chart. Defeat Plane Watchers and complete Path of Progression objectives to unlock them.
Four points earned by defeating Travelers. Spend these separately on the Profound constellation and read every drawback first.
Commodities focuses on supplies; Blacksail, Cube, Hunting and other branches specialize in encounters and their associated rewards.
Use Winding Keys to refund points. Alternate Void Chart plans let you keep different farming setups ready without dismantling the one you currently use.
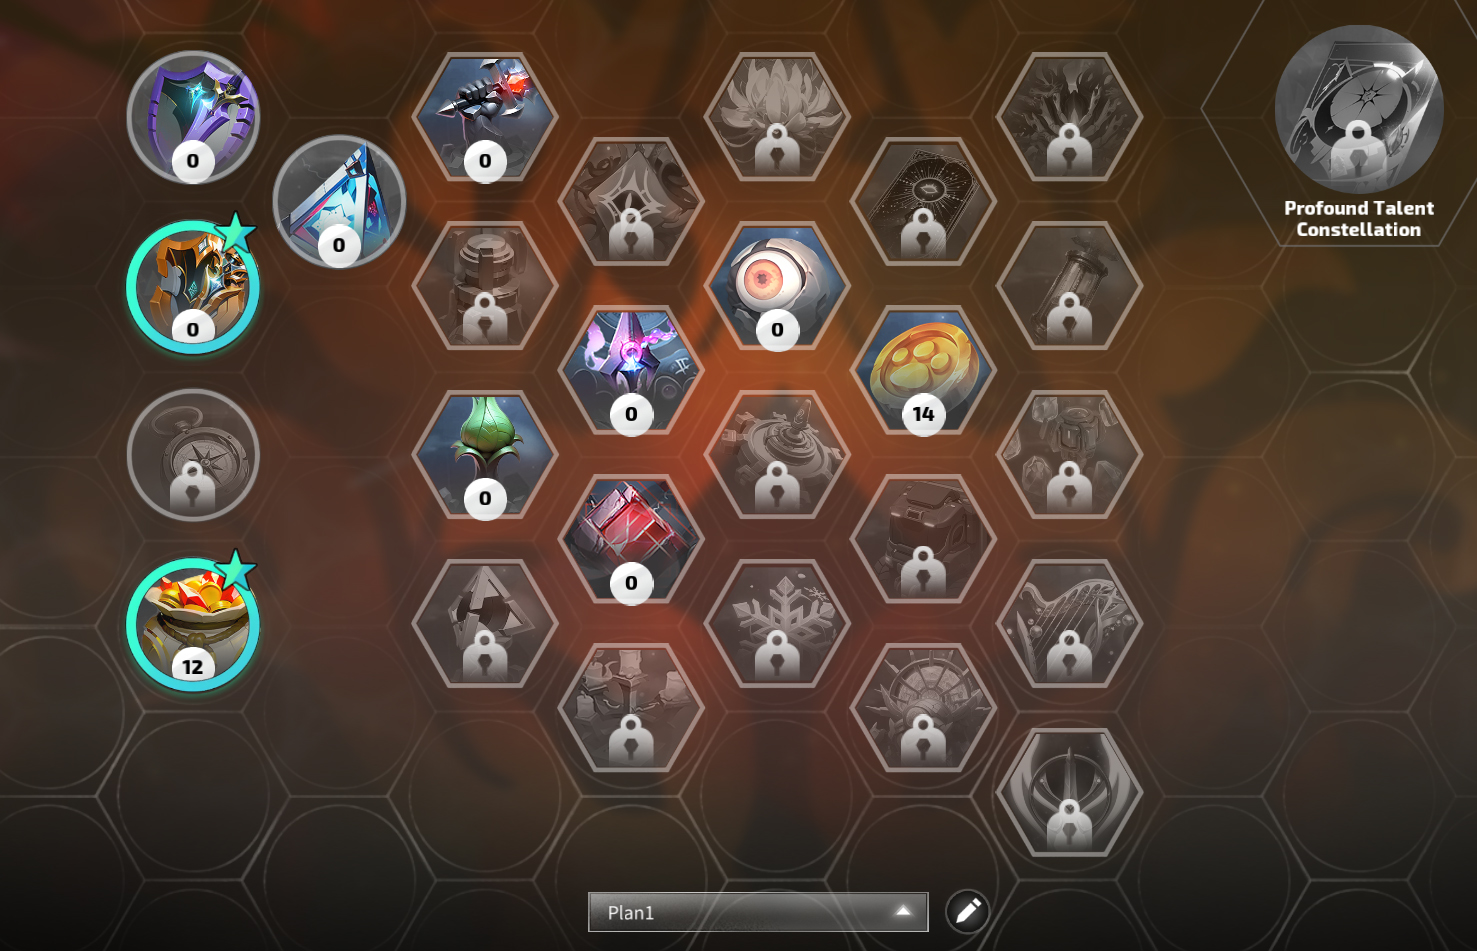
The Void Chart's constellations offer distinct paths for crafting materials, encounters and boss rewards.
Progression also governs which branches you can reach. Blacksail and Cube open at Timemark 4, followed by War and Hunting at Timemark 5 and Creation at Timemark 8. Profound becomes available after Timemark 7; its more formidable bonuses are better suited to characters already clearing demanding stages comfortably.
2. Which Void Chart Should You Use?
| Progression | Recommended Focus | Best For | Investment |
|---|---|---|---|
| Campaign to early Netherrealm | Commodities | Embers, Flame Sand, Netherrealm Resonance and basic supplies | Very low |
| Timemark 5-7 | Commodities + War, then Blacksail | Fast progression, crafting materials and Hero Memory upgrades | Low |
| Timemark 7-8 | Blacksail or Hunting + War | Repeatable material farming or short boss-focused runs | Low to medium |
| Comfortable T8 and Profound | Specialized Cube or Creation + supporting nodes | Desire Crystal conversion, Divinity rewards or Fluorescent Creation drops | Varies; optimized Creation is high |
The choice becomes clearer once you consider what your character does well. Blacksail offers an accessible stream of Hero Memory materials, while Hunting + War rewards brisk movement and strong single-target damage. Cube has a modest entry point through Malice and Desire Crystals, with more intricate conversions sometimes relying on specific Pactspirits. A premium Creation setup carries a steeper outlay, particularly when Fluorescent rewards and costly Compasses are involved.
3. Recommended Early Void Chart Progression
At the start of Netherrealm, every reliable crafting drop helps. Build a foundation in Commodities to sustain your maps and equipment upgrades, then divert points toward a dedicated encounter mechanic as your character grows stronger. Follow the destinations below, taking the connecting nodes shown in your current in-game chart.
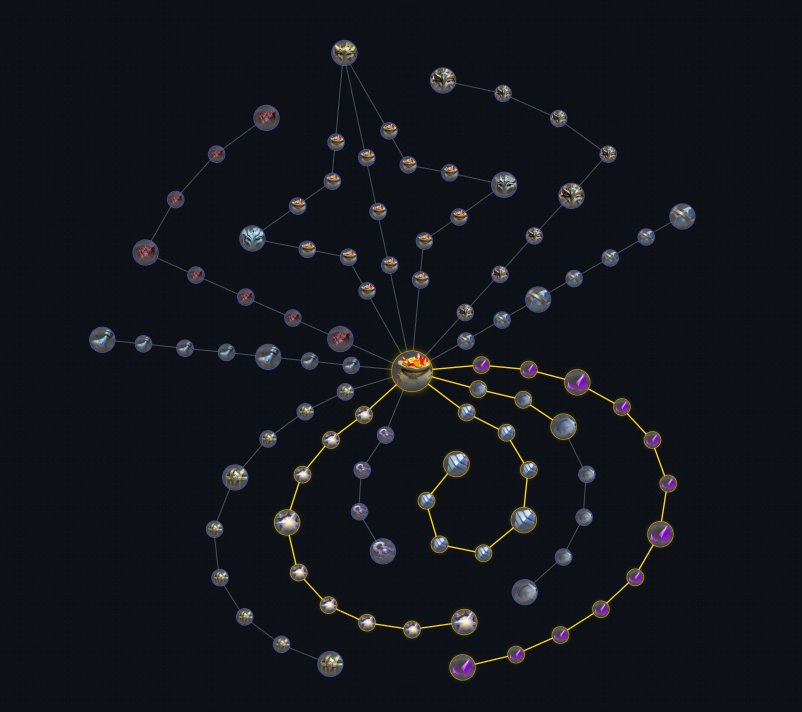
Commodities: Ember and Flame Sand routes provide an early foundation, with Resonance and Starshards becoming useful as progression advances.
Take the Ember and Flame Sand Routes
Work through the small 2% replication nodes to reach the medium 8% Ember replication and 8% Flame Sand replication nodes. Let your next crafting upgrade dictate which route comes first. Another 8% Flame Sand node is available if that material remains scarce.
Secure Resonance from Bosses
Next, pursue the boss-drop Resonance branch. Its medium nodes include a 2.5% chance for 20 additional Resonance and a separate chance for 40. Each reward is occasional, but frequent boss kills give those chances more opportunities to pay out.
Use War as a Speed Supplement
Timemark 5 opens access to the +10%, +15% and +23% Trial: God of War appearance nodes. They are worthwhile when the trial noticeably accelerates your runs, and duration nodes can extend that benefit. Already racing between bosses? Direct the spare points into your main reward constellation.
Specialize in Blacksail
Once Timemark 4 is behind you, invest in Plane Anchor appearance and work toward Whisper of Wealth. Blacksail gives the chart a tangible focus: Memory Scrap farming. Retain the Commodities nodes that continue to support your map supply.
Shift Toward T7 Starshards When Needed
At Timemark 7, compare your need for crafting supplies with the value of Starshards. The 5% and 8% Starshard replication nodes can be a timely pivot. Frequent respecs also make the optional 10% chance for bosses to drop an extra Winding Key more attractive.
4. Blacksail - Our Preferred Low-Investment Farming Route
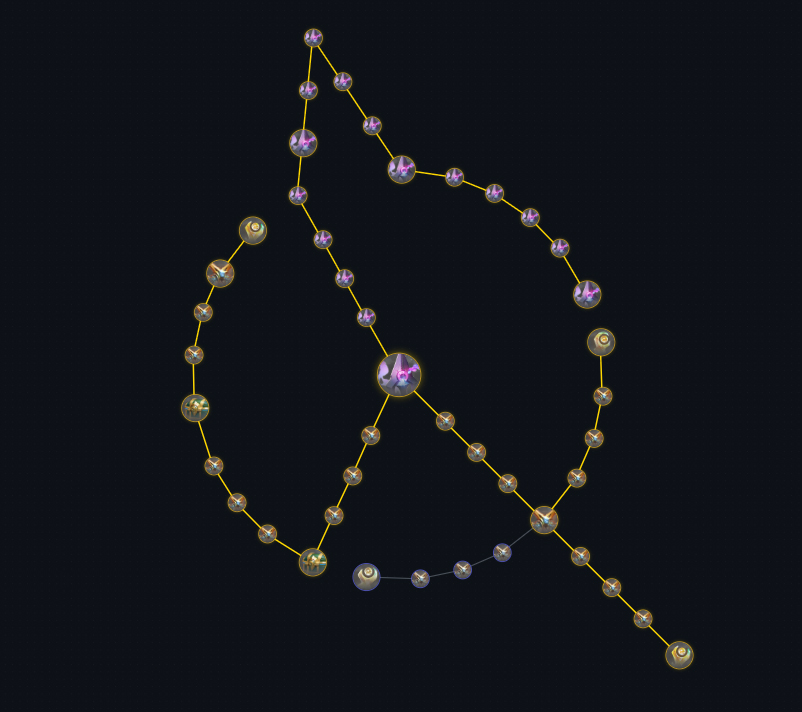
Blacksail: build encounter frequency before investing in the Whisper rewards.
Blacksail turns ordinary Netherrealm maps into a dependable source of Memory Scraps and related Hero Memory materials. You can use them for upgrades or sell them when Trade House prices are favorable. Its compact encounters fit neatly into short farming runs, making the constellation an appealing first specialization.
Recommended Node Priorities
- Establish Plane Anchor frequency. Take the connected small appearance nodes leading toward the +10%, +15% and +23% medium nodes. A developed appearance branch supplies encounters consistently and reduces your reliance on purchased Compasses.
- Unlock Whisper of Wealth. The medium node guarantees an encounter monster carrying Whisper of Wealth Void Sea Flame. Favor Memory Scrap and Memory Thread outcomes when their quantities or selling prices justify the choice.
- Expand into Whisper of Wonder. This medium node likewise guarantees a monster bearing Whisper of Wonder Void Sea Flame. Compare its possible rewards with Wealth before choosing which encounter outcome to pursue.
- Round out the route. Domineering - Blacksail provides a 50% chance for a Boss Whisper Void Sea Flame carrier, opening further Void Invitation opportunities. Alternatively, nodes that skip Plane Anchor combat can streamline slow runs.
Choose encounter rewards with an eye on Memory Scraps, Memory Threads and valuable invitations. Whisper of Wealth provides the core returns; Wonder and Boss Whisper broaden the options once appearances are reliable.
5. The Best Specialized Void Chart Strategies
As Timemark 7 and 8 become routine, your character's strengths should guide the next investment. A swift mapper can exploit frequent encounters; a hard-hitting boss killer may earn more by moving from one stage boss to the next.
Hunting + War - Fast Boss Rush
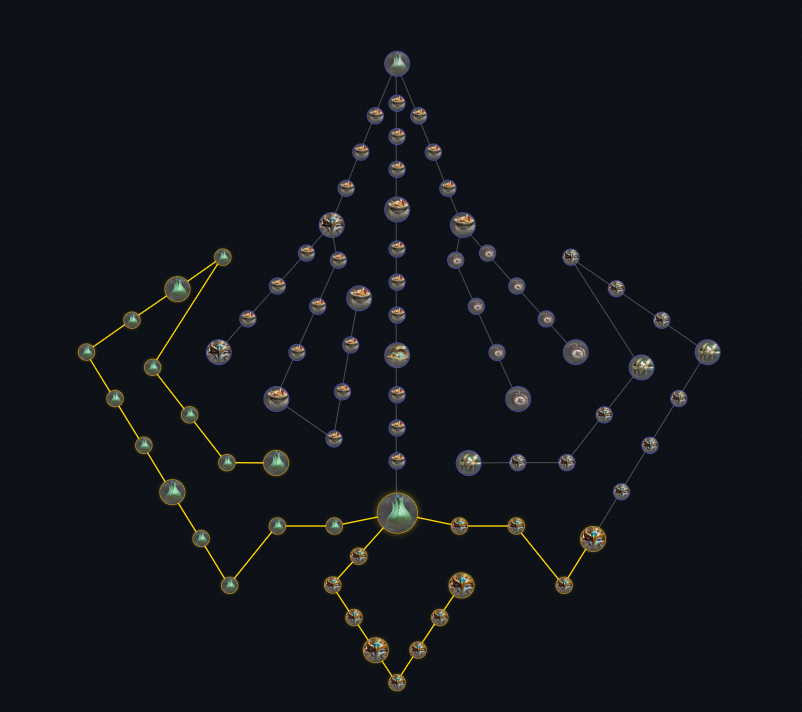
Hunting: Trial appearance and boss-related rewards support a dedicated boss rush.
A boss rush is built around one objective: reach the stage boss quickly and collect the rewards. Hunting improves the encounter's potential, while War can quicken the journey through the map. Add selected Commodities nodes for Resonance or Starshards, and favor layouts that keep travel to a minimum.
Hunting priorities: open with Trial: Goddess of Hunting appearance, including the +10%, +15% and +23% medium nodes. The 14% chance to replicate the Stage Final Boss nodes are the next targets for a conventional boss loop. For a tougher variation, Mistrustful - Hunting converts the trial into Safari, improving final boss Hunting rewards while substantially empowering the boss. Insidious - Hunting disables boss replication, so it belongs to a different setup.
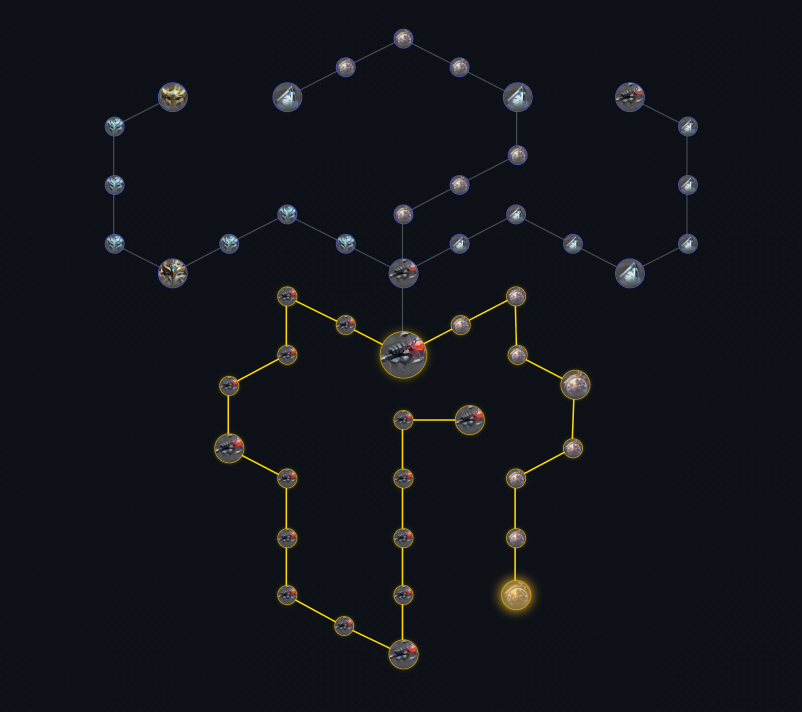
War: Trial appearance is the main priority, with duration nodes available when its buff improves your farming pace.
War priorities: begin with the small Trial: God of War appearance nodes and work toward the +10%, +15% and +23% medium bonuses. Characters that benefit from the trial can then pick up +12% / +20% duration. The Berserk branch pursues a more specialized Beacon-and-stack strategy and can be saved for another chart.
Farming loop: choose a short map, activate useful trials along the way, defeat the stage boss and repeat. The pace hinges on efficient boss kills; a drawn-out fight can swallow the time saved while mapping. Gauge extra Hunting bosses and Safari difficulty by clear times and survival, not theoretical rewards.
Cube - Reward Conversion and Divinity Materials
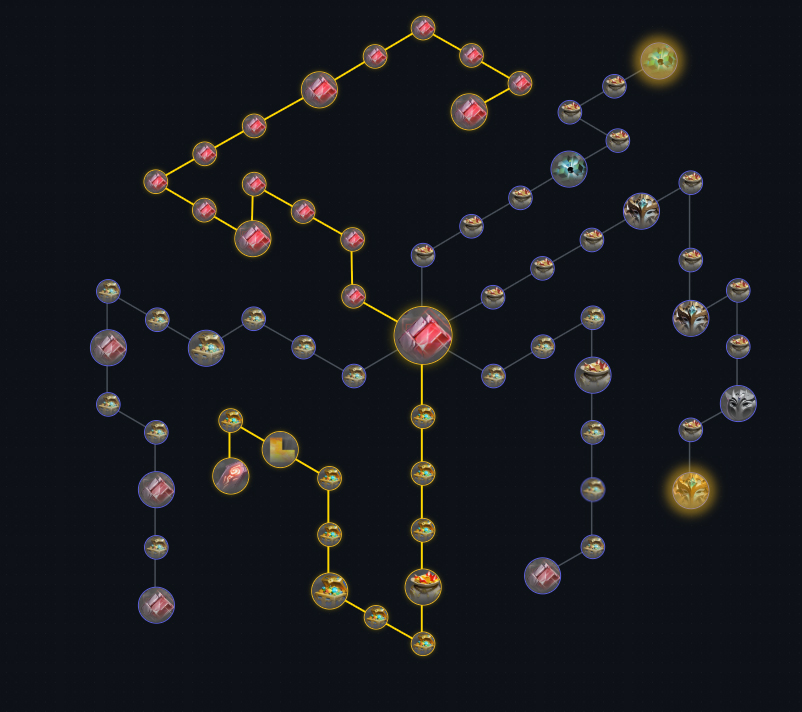
Cube: start with Malice encounters and Desire Crystals before selecting a conversion path.
Cube is a more intricate economy of Malice encounters, Desire Crystals and Coveting rewards. Early investments increase encounter frequency and crystal drops. Later branches shape what your crystals can produce, including materials relevant to Divinity Slate progression.
First allocation: follow the Malice appearance path through the +10%, +15% and +23% medium nodes. Add +6% additional Drop Quantity for Malice Incarnations and the 8% chance for an extra set of Desire Crystals. Together, these form a useful foundation for crystal farming.
Next, choose a conversion target: Fallacious - Cube and a related medium node each add 13% to the chance of obtaining Cube of Craving through Coveting. A separate node offers a 6% chance to preserve Desire Crystals during the process. Farther along the branch, Cube of Craving may grant an extra Legendary Divinity Slate (1%) or Transcendence Wedge (Legendary) (5%). There is also a 20% chance for an additional Desire Core node, with a 30% reduction to Desire Crystal drops; its reward profile favors a different farming plan.
Basic Cube farming has a manageable entry point. Optimized conversion loops, however, may rely on particular Pactspirits and Compass combinations. Calculate the outlay per stage before copying one; a striking FE-per-hour result from another player tells only part of the story.
Creation - High-End Specialized Farming
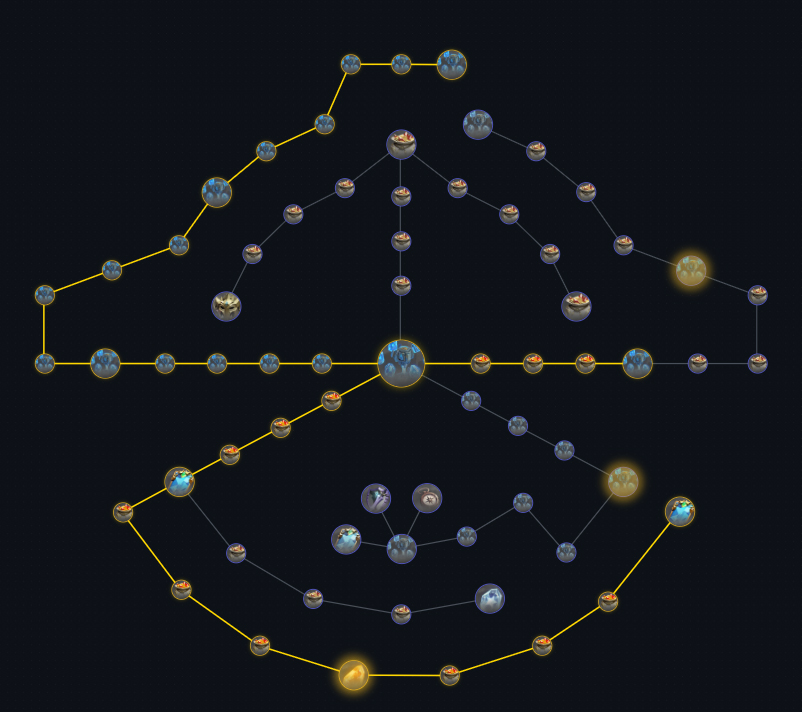
Creation: engine frequency leads into specialized Fluorescent Crystal rewards.
The appeal of Creation lies in shaping what Creation Engines produce and how their crystals pay out. At Timemark 8, you can experiment with the base mechanic before committing to a premium strategy. High-end Season 14 loops may combine Record Creation and Fluorescent Compasses with a Pactspirit such as Kong, turning each stage into a substantial investment.
Allocation order: begin with Creation Engine appearance (+10%, +15% and +23% medium nodes), followed by bonuses such as the +30% chance for an additional Creation Engine. From there, a Fluorescent-focused route progresses through Fluorescent Creation Crystals, their potential upgrade to Gold Fluorescent Creation Crystals and the later node that guarantees an exclusive Fluorescent Memory upon activating a Gold Fluorescent Crystal. Raw engine Drop Quantity offers another specialization.
Creation also contains some severe trade-offs. The +50% chance for an extra Catalyst Creation Engine comes with -100% additional Creation Engine Drop Quantity, while another extra-engine option toughens Creation Sentries. Consider the full effect on your chosen crystal and Compass loop, then compare results across several runs. A single windfall can easily disguise an expensive strategy.
Other Worthwhile Branches
Several other constellations deserve a look once your main route is established. Dark Surge favors eruptions and Edict rewards, although escalating encounters can come with damage penalties. Arcana leans into Tarot Trials, extra settlement chances and Notes of Arcana. Afterlight, with its own Tartarus constellation, provides another specialist detour. Their appeal ultimately depends on market demand and how quickly you can complete each encounter.
6. Confusion Cards, Compasses and Profound Talents
Season 14 reshaped how Confusion Cards interact with the Void Chart. The relevant chart nodes now unlock gameplay-related cards, which take effect at every level until exhausted. This gives card selection a sharper purpose: a dangerous modifier makes sense when its rewards support the encounters you already farm.
Check both sides of every card. Higher quantity can come with tougher bosses, longer encounters or reduced survivability.
Compasses can guarantee or strengthen an encounter. Their price belongs in the calculation alongside expected drops and map time.
Four separately earned Prime Star Talents open potent late-stage modifiers, including +25% Drop Quantity at the cost of four stage attempts or extra bosses in Compass-free runs.
Tartarus prison content adds another layer to Netherrealm farming. The interaction between ordinary map Drop Quantity and prison rewards remains unverified; base your strategy on the rewards you can observe.
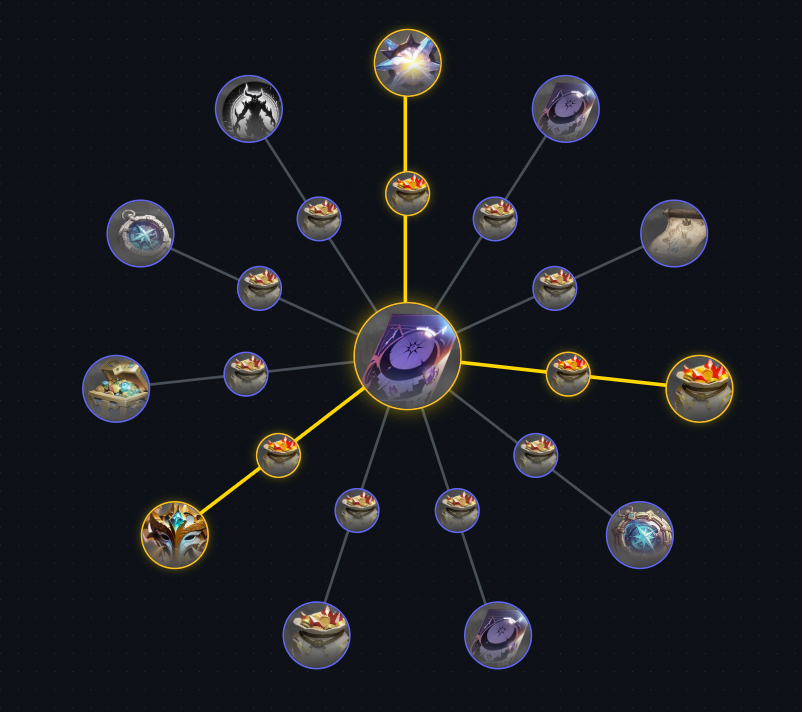
Profound offers powerful bonuses with substantial trade-offs. Select its Prime Star Talents to complement your primary farming strategy.
Profound selection: Compass-free routes can test the 25% chance to spawn four additional random bosses. With expensive Compasses, the 10% chance to preserve them may be more valuable, although monsters then take 20% less additional damage. The general +25% Drop Quantity option sacrifices four stage attempts. Let your established farming loop determine the choice.
Final Thoughts
A worthwhile Void Chart changes as your character develops. Commodities keeps early resources moving, War can hasten map clears, and Blacksail provides an accessible route into Hero Memory materials. As your build matures, Hunting opens a boss-focused option, while Cube and Creation reward more deliberate investment.
Choose a repeatable map, measure the returns after costs and adjust when your next upgrade or a market shift makes another constellation more promising. A well-directed chart pays for the decisions behind it.