Twister Spirit Walker POE2 Build
Release a multitude of rapidly twirling twisters with screen-wide coverage with this Spirit Walker build.Twister
Spirit Walker Build
Updated for Path of Exile 2 Early Access Patch 0.5
The Best Crafty Guides by Odealo
| Guide notes |
| June 10, 2026 - Created for Patch 0.5 of Early Access. |
| Build Overview | |||
| Tags: [RANGED] [ELEMENTAL] [HYBRID] | |||
|
Budget: Defenses: |
|
Boss DPS: AoE: |
|
Twister is a Projectile Spear Attack that releases an erratically moving tornado. They can be empowered with Whirlwinds and Elemental Ground Effects, which are obligatory components to make them deal competitive damage. Whirlwinds, in this build, are created by Whirling Slash. Elemental Ground Effects are sourced from the Spirit Walker's Vivid Stampede, and it's fully automated. With The Taming Ring, your Twisters can be and will be boosted by all three Elements just from these Stags, so we heavily recommend it. It makes for a two-button playstyle during mapping, and it will require two different weapons - one Spear whose sole purpose is attacking rapidly with Whirling Slash, and the second set of Spear and Sceptre with which you will release powerful Twisters. The build also includes Projectile-empowering Skills such as Ice-Tipped Arrows, Barrage, Freezing Mark, Primal Bounty upgraded with Mhatcha's Gift, and Sacred Unity. Such Twisters are exceptionally strong.
Spirit Walker, as mentioned, has the powerful Blue, Purple, and Yellow branches, which unlock the Sacred Unity passive that upgrades all of them. The purple bear Maims and intimidates enemies while taking some of your damage, and its role is rather minor, since we didn't invest much into their survivability. The last point will be spent to further improve the Primal Bounty to fire up more Twisters, increase their speed, and charge up the passive ability faster. It's an Attack build, so getting a Spear with high Damage on it is essential. Defensively, the build relies on Maximum Life with Evasion and Deflection Rating if it's a budget version, but should switch to a hybrid one with high Energy Shield later on.
You can also check our other Path of Exile 2 builds right over here Odealo's Crafty Guides - Full List
1. Gameplay
Empower yourself with Barrage and Ice-Tipped Arrows. These buffs will only apply to Twister, which is your main damaging ability. Whirling Slash does not expend them, so use it whenever there are Twisters near you that need to be upgraded by it. It can empower your Twister three times. Don't forget to Dodge Roll every 6 or 7 seconds for the Primal Bounty enhancement. Everything else is automatic - Herald of Ice, Wind Dancer, Ghost Dance, Combat Frenzy, Trinity, Vivid Stampede, and Wild Protector.
|
|

2. Build's PROS & CONS
| PROS |
|
| CONS |
|
3. Leveling tips
This setup is not distinctly late-game oriented. Start with Twisters and Whirling Slash; to create Elemental Grounds, Fangs of Frost, Explosive Spear, Cold-infused Ice Nova, Frost Nexus Support, or Gathering Storm. Pick Vivid Stampede as your First ascendancy if you don't want to be troubled by the Ground Surfaces requirement, but Primal Bounty is better damage-wise. You can continue to upgrade the build from this point on by slowly shaping it to resemble this one. Critical Strikes and Trinity should matter only at the very end of your progression.
4. Final Skill Tree, Ascendancy Points, and Pantheon
Final Skill Tree:
 |
|
Click on the image to open the Passive Tree preview in a new window Or import the build into PoB: |
Ascendancy points:
Preferably in this order:
- Primal Bounty
- Vivid Stampede
- Wild Protector
- Sacred Unity
- The Mhacha's Gift
5. Final Gems links
| [DPS] Twister setup | |
 |
Twister - A Spear Projectile Attack that creates damaging Twisters. You can upgrade them with a Whirling Slash and Elemental Ground Effects. |
 |
Elemental Armament |
 |
Projectile Acceleration |
 |
Deliberation |
 |
Prolonged Duration |
 |
Pinpoint Critical |
| [UTILITY] Barrage setup | |
 |
Barrage - A Buff that upgrades Twister and causes it to repeat two additional times, plus one time per Frenzy Charge consumed. Be sure to use it only with Charges ready since it has a Cooldown. |
 |
Heightened Charges |
 |
Rapid Casting |
 |
Perpetual Charge |
 |
Cooldown Recovery |
|
Prolonged Duration |
| [DPS] Ice-Tipped Arrows setup | |
 |
Ice-Tipped Arrows - A Buff that upgrades your next 4 Twisters and Converts all of their Physical Damage to Cold. Empowered Attacks will deal additional damage via Ice Fragments. |
|
Elemental Armament |
 |
Elemental Focus |
|
Cooldown Recovery |
 |
Retreat |
|
Deliberation |
| [DPS] Herald of Ice setup | |
 |
Herald of Ice - Allows you to Shatter Frozen enemies on Kill so that they deal Cold Damage all around. |
|
Elemental Armament |
 |
Cold Penetration |
|
Elemental Focus |
 |
Magnified Area |
 |
Longshot |
| [UTILITY] Whirling Slash setup | |
 |
Whirling Slash - A Whirlwind ability whose only role is to Hit Twisters. In this setup, it will also generate Rage, knock enemies back, and add Fire Damage with Blazing Critical. It should be performed fast and cost little to no mana, so keep it at level 1. |
 |
Rage |
 |
Rapid Attacks |
 |
Knockback |
 |
Blazing Critical |
|
Magnified Area |
| [UTILITY] Primal Bounty setup | |
 |
Primal Bounty - You can dodge roll every 6-or-so seconds to Empower your Twisters by adding Projectiles and increasing their Projectile Speed. This skill is sourced from the Spirit Walker's Tree and is upgraded with the Mhacha's Gift further down the branch. |
 |
Olroth's Conviction |
| [UTILITY] Wild Protector setup | |
 |
Wild Protector - A purple bear Companion that soaks up some of your damage (by virtue of Romira's Requital), Intimidates, and Maims enemies. This skill is sourced from the Spirit Walker's Tree. |
 |
Hulking Minions |
 |
Elemental Army |
 |
Meat Shield |
 |
Romira's Requital |
 |
Minion Mastery |
| [UTILITY] Vivid Stampede setup | |
 |
Vivid Stampede - Automatically releases Stags that Shock enemies and leave Shocked Ground. You gain them by moving and trigger them by Attacking. This skill is sourced from the Spirit Walker's Tree. |
 |
Shock |
|
Magnified Area |
 |
Lightning Exposure |
 |
Lightning Attunement |
|
Elemental Armament |
| [UTILITY] Freezing Mark setup | |
 |
Freezing Mark - Freezing Mark causes a marked enemy to build up Freeze faster and grant extra Cold Damage upon Freezing. You can replace it with Sniper's Mark if you struggle with generating Frenzy Charges during boss fights. |
 |
Charged Mark |
 |
Mark of Siphoning |
 |
Eternal Mark |
| [UTILITY] Combat Frenzy setup | |
 |
Combat Frenzy - Grants Frenzy Charge on Freeze. These will be needed for Barrage and possibly Charge Regulation. |
 |
Charge Profusion |
| [UTILITY] Trinity setup | |
 |
Trinity - If you use Attacks that don't all deal the same type of Elemental Damage all the time (which you don't thanks to Skills and Items), you can accumulate Affinity, which grants more Elemental Damage and increases Skill Speed. It reserves 100 Spirit. |
 |
Fire Mastery |
| [UTILITY] Wind Dancer setup | |
 |
Wind Dancer - Grants more Evasion until you get Hit. You can regain lost stages over time. It can be replaced or supplemented with Ghost Dance to have an ES-recovery tool. |
|
|
6. Gear Setup
You can search for added Physical or Elemental Damage, so everything but Chaos. Gem Levels for Projectile Attacks will help. Then, look for Attack Speed with Critical Hit Chance and Critical Damage. Defensively, you have to prioritise Maximum Life with Evasion first. Deflection Rating is a bit harder to find, but relevant. To include Energy Shield, you need a sizeable budget, as the hybrid ES/Evasion gear pieces are much more expensive. The requirements for Accuracy and Attributes are very easy to meet. Spirit is also not an issue, as you can wield a Sceptre in off-hand (Sacred Flame is the best option). Although that would disable your 25% more Skill Speed bonus from the Dance with Death keystone, you can have it as a second set, where Trinity is disabled. We have two weapon and skill tree sets; one (with off-hand for Spirit) for Twisters and the other one (with empty off-hand) to cast Buff-Spells, where Trinity is disabled.
|
Stat priorities on items:
|
 (Helmet) Rare Helmet - Helmet can roll Accuracy or Crit Chance, but focus more on defences, especially Resistances and Energy Shield. Evasion is not as important here if you plan to allocate Subterfuge Mask notable. (Helmet) Rare Helmet - Helmet can roll Accuracy or Crit Chance, but focus more on defences, especially Resistances and Energy Shield. Evasion is not as important here if you plan to allocate Subterfuge Mask notable. |
|
| Min. requirements: 300 Energy Shield +80% total Resistance Optional affixes: Maximum Life Accuracy Rating increased Critical Hit Chance Evasion with Maximum Energy Shield |
|
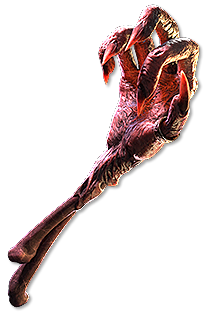
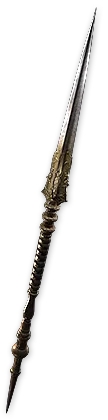 (Weapon) Rare Spear - If you want to use a Rare Spear for Twisters, be sure its damage is higher than that of The Ordained. The Rare Spear for Barrage and Whirling Slash can afford to have very low damage; Attack Speed, Leech, and sockets for Soul Cores of Quipolatl are more important there. (Weapon) Rare Spear - If you want to use a Rare Spear for Twisters, be sure its damage is higher than that of The Ordained. The Rare Spear for Barrage and Whirling Slash can afford to have very low damage; Attack Speed, Leech, and sockets for Soul Cores of Quipolatl are more important there. |
|
| Min. requirements: +3 to Level of all Projectile Skills high Physical/Elemental Damage Optional affixes: increased Attack Speed Accuracy Rating Critical Hit Chance |
|
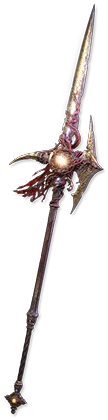 (Weapon) The Ordained - This weapon has an incredibly high Crit Chance, Life Leech from Lightning Damage, and good DPS, although not as good as the best Rares. It is undoubtedly very fitting. (Weapon) The Ordained - This weapon has an incredibly high Crit Chance, Life Leech from Lightning Damage, and good DPS, although not as good as the best Rares. It is undoubtedly very fitting. |
|
| Grants Skill: Level (18-20) RighteousDescent 25% increased Melee Strike Range with this weapon (150-250)% increased Physical Damage Adds 1 to (200-300) Lightning Damage +(5-8)% to Critical Hit Chance Life Leech recovers based on your Lightning damage as well as Physical damage Create a Fragment of Divinity in your Presence every 4 seconds |
|
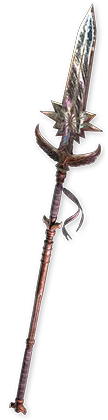 (Weapon) Skysliver - This weapon can be used for the Barrage and Whirling Slash because it has very high Attack Speed. (Weapon) Skysliver - This weapon can be used for the Barrage and Whirling Slash because it has very high Attack Speed. |
|
| No Physical Damage Adds 1 to (80-120) Lightning Damage (15-30)% increased Attack Speed (50-100)% increased chance to Shock Rolls only the minimum or maximum Damage value for each Damage Type |
|
 (Off-hand) Sacred Flame - Sacred Flame grants 100 Spirit, a lot of extra Fire Damage, and some Fire Resistance with Purity of Fire. You can wield it in your off-hand for Twisters. (Off-hand) Sacred Flame - Sacred Flame grants 100 Spirit, a lot of extra Fire Damage, and some Fire Resistance with Purity of Fire. You can wield it in your off-hand for Twisters. |
|
| Spirit: 100 Grants Skill: Level (18-20) Purity of Fire Gain (40-60)% of Damage as Extra Fire Damage Allies in your Presence Gain (20-30)% of Damage as Extra Fire Damage Allies in your Presence Regenerate (2-3)% of their Maximum Life per second Enemies in your Presence Resist Elemental Damage based on their Lowest Resistance |
|
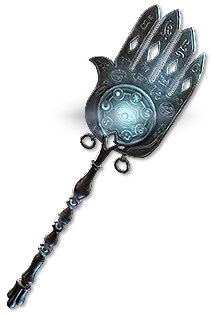 (Off-hand) Guiding Palm of the Eye - Cold-themed Guiding Palm grants 100 Spirit, extra Cold Damage, Intelligence, Guided Freezing Shrine (that's the orbiting Ice Shards), and some Cold Resistance with Purity of Ice. (Off-hand) Guiding Palm of the Eye - Cold-themed Guiding Palm grants 100 Spirit, extra Cold Damage, Intelligence, Guided Freezing Shrine (that's the orbiting Ice Shards), and some Cold Resistance with Purity of Ice. |
|
| Spirit: 100 Grants Skill: Level (15-20) Purity of Ice Gain 25% of Damage as Extra Cold Damage Allies in your Presence deal (15-23) to (28-35) added Attack Cold Damage 50% of your Base Life Regeneration is granted to Allies in your Presence +(20-30) to Intelligence 25% increased Light Radius Grants effect of Guided Freezing Shrine |
|
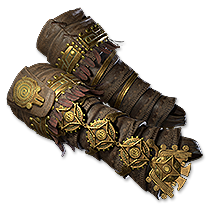 (Gloves) Rare Gloves - Gloves are great for Attack builds. Search for Added Damage, Attack Speed, Skill Gem Level (this one has to be crafted), and Life gain on Kill or on Hit with Attacks. (Gloves) Rare Gloves - Gloves are great for Attack builds. Search for Added Damage, Attack Speed, Skill Gem Level (this one has to be crafted), and Life gain on Kill or on Hit with Attacks. |
|
| Min. requirements: +80 to Maximum Life +2 to Level of all Projectile Skills (Kolr's Hunt Suffix) Added Elemental Damage Optional affixes: Added Physical Damage Life gain on Hit Resistance increased Attack Speed |
|
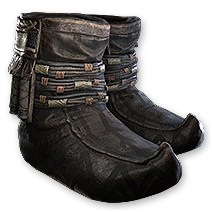 (Boots) Rare Boots - On Boots, go for Maximum Life, Resistances, Movement Speed, with maybe Evasion, or Maximum ES. (Boots) Rare Boots - On Boots, go for Maximum Life, Resistances, Movement Speed, with maybe Evasion, or Maximum ES. |
|
| Min. requirements: +80 to Maximum Life +80% total Resistance 30% increased Movement Speed Optional affixes: Attributes Evasion Rating Maximum Energy Shield |
|
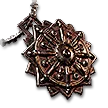
 (Amulet) Yoke of Suffering - Yoke of Suffering grants tons of damage per Elemental Ailment on the enemy, which they are probably afflicted with due to the multiple sources of Cold, Fire, and Lightning Damage in this build. It pairs up nicely with The Taming. (Amulet) Yoke of Suffering - Yoke of Suffering grants tons of damage per Elemental Ailment on the enemy, which they are probably afflicted with due to the multiple sources of Cold, Fire, and Lightning Damage in this build. It pairs up nicely with The Taming. |
|
| +(30-40) to maximum Life +(10-15)% to all Elemental Resistances (15-30)% increased Elemental Damage Enemies take (15-20)% increased Damage for each Elemental Ailment type among your Ailments on them (40-30)% reduced Duration of Ignite, Shock and Chill on Enemies |
|
| +(10-15) to Spirit +(60-100) to maximum Mana +30 to Spirit 30% increased Light Radius Critical Hits ignore Enemy Monster Elemental Resistances |
|
 (Amulet) Rare Amulet - Amulet can add and increase Maximum ES, Critical Hit Chance, grant Maximum Life and Spirit, and, most importantly, add Gem Levels for Projectile Skills. (Amulet) Rare Amulet - Amulet can add and increase Maximum ES, Critical Hit Chance, grant Maximum Life and Spirit, and, most importantly, add Gem Levels for Projectile Skills. |
|
| Min. requirements: +80 to Maximum Life +3 to Level of all Projectile Skills Optional affixes: Spirit increased Critical Hit Chance Resistance increased Maximum Energy Shield Anointment: Blessing of the Moon Preservation Vulgar Methods |
|
 (Ring) Rare Ring - On Rare Rings you can find Maximum Life, Attributes, Resistances, and Added Damage to Attacks of various kinds. Try to get them in huge quantities. (Ring) Rare Ring - On Rare Rings you can find Maximum Life, Attributes, Resistances, and Added Damage to Attacks of various kinds. Try to get them in huge quantities. |
|
| Min. requirements: +80% total Elemental Resistance Added Elemental or Physical Damage to Attacks Optional affixes: Maximum Life Accuracy Rating Attributes |
|
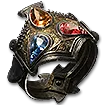 (Ring) The Taming - It's pretty much mandatory to wear The Taming, so that your Twisters count as being boosted by all Elemental Ground Effects. It also has some damage and Resistances. (Ring) The Taming - It's pretty much mandatory to wear The Taming, so that your Twisters count as being boosted by all Elemental Ground Effects. It also has some damage and Resistances. |
|
| +(7-10)% to all Elemental Resistances +(10-20)% to all Elemental Resistances (10-20)% increased Damage for each type of Elemental Ailment on Enemy Wind Skills which can be boosted by Elemental Ground Surfaces count as being boosted by Ignited, Shocked, and Chilled Ground Wind Skills which can be boosted by Elemental Ground Surfaces can be boosted by multiple Elemental Ground Surfaces |
|
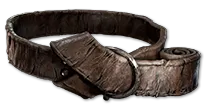 (Belt) Rare Belt - Belts are for Maximum Life, Resistances, and Strength. There is not much else to look for, so most players end up with a Headhunter or Shavronne's Satchel. (Belt) Rare Belt - Belts are for Maximum Life, Resistances, and Strength. There is not much else to look for, so most players end up with a Headhunter or Shavronne's Satchel. |
|
| Min. requirements: +80% total Resistance +80 to Maximum Life Strength Optional affixes: Charm slots |
|
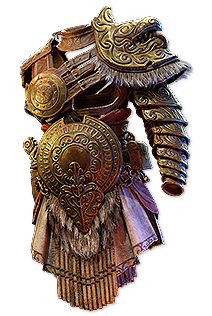 (Body Armour) Hyrri's Ire - It's a good Body Armour if you go for a full-evasion setup, since a Rare chest is a fundamental source of Energy Shield. (Body Armour) Hyrri's Ire - It's a good Body Armour if you go for a full-evasion setup, since a Rare chest is a fundamental source of Energy Shield. |
|
| (30-40)% increased Elemental Ailment Threshold (200-250)% increased Evasion Rating Gain (15-25)% of Damage as Extra Cold Damage +(30-40) to Dexterity 25% increased Freeze Duration on Enemies Evasion Rating is doubled if you have not been Hit Recently |
|
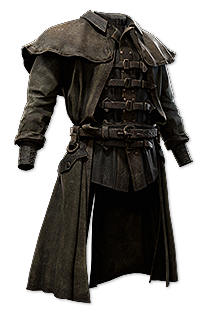 (Body Armour) Rare Body Armour - A Rare Body Armour is the best place to get defences like Armour and Evasion in huge quantities. Resistances and Maximum Life will probably be needed. Spirit is optional. (Body Armour) Rare Body Armour - A Rare Body Armour is the best place to get defences like Armour and Evasion in huge quantities. Resistances and Maximum Life will probably be needed. Spirit is optional. |
|
| Min. requirements: +40% total Resistance 1700 Evasion 500 Energy Shield Optional affixes: Maximum Life Spirit |
|
 (Jewel) Rare Jewels - Emeralds or Sapphires have the best mod pools. Check for increased Elemental Damage, Damage with Spears, Critical Hit mods, Attack Speed, Projectile Speed, Cold Penetration, and such. (Jewel) Rare Jewels - Emeralds or Sapphires have the best mod pools. Check for increased Elemental Damage, Damage with Spears, Critical Hit mods, Attack Speed, Projectile Speed, Cold Penetration, and such. |
|
| Optional affixes: increased Critical Hit Chance increased Critical Damage Bonus Increased Elemental Damage increased Damage with Spears increased Projectile Speed Cold Penetration increased Maximum Energy Shield |
|
|
If you have any other build requests please leave that in the comments below. We are always open to suggestions and constructive feedback.
Pictures used in this article are the intellectual property of Grinding Gear Games.